How to Migrate Data from NFS to Cloud
A lot of companies around the world have migrated to cloud from the traditional or legacy file systems in the past few years. Cloud has not only provided them a way to store their files securely, but it also improved their productivity and communication. Despite the host of benefits the cloud provides, a decent number of companies and small businesses are still using traditional storage systems like Network File Shares (NFS).
Why Migrate to Cloud?
- Cloud enables building a smooth and robust work from home/remote work environment
- Increased data security
- Better communication and collaboration between team members
- Access to documents and files on the go
- Secure file sharing
Challenges Migrating to Cloud
- Transferring large amount of data (often in TBs) can be a time-taking bandwidth-draining task
- Maintaining folder structure
- Retaining sharing permissions
- Handling special characters, long file names, and other technical difficulties that arise during migration
CloudFuze Can Help Companies Migrate Content from NFS to Cloud
CloudFuze is a data migration engine that transfer data from on-premise file systems to cloud. It also migrates data between popular clouds.
CloudFuze automates data migration and creates an exact replica of your content in NFS in a cloud account like OneDrive for Business (Office 365). The migration platform not only transfers files but also retains sharing permissions and folder structure.
Following is an NFS to Cloud migration tutorial using CloudFuze.
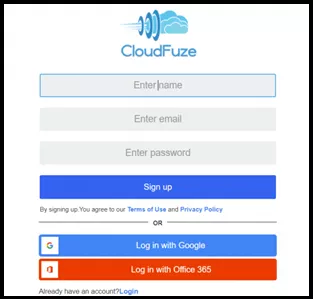
Step 1: Create a CloudFuze account and Login
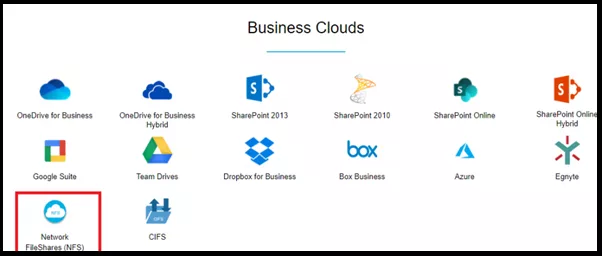
Step 2: Add NFS to CloudFuze
Locate Network File Shares (NFS) icon under the business clouds and click on it.
Step 3: Authorize Your Network File System for Migration
Enter a display name to recognize your source drive throughout the migration. Enter hostname. Enter a folder path. Here you can choose root or a specific folder for migration. Go with the root option if you wish to migrate entire content.

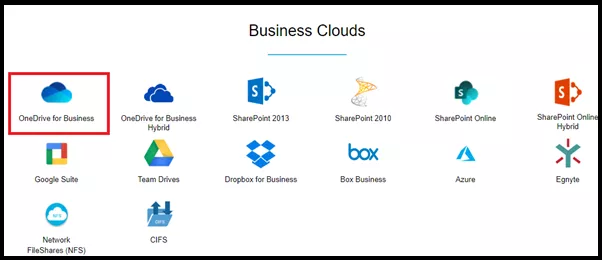
Step 4: Add and Authorize Your OneDrive for Business Account
Like how you added NFS, you now need to authorize your new OneDrive account. Just click on the OneDrive for the Business logo listed under business clouds and enter your ODFB admin login credentials. Remember that you need to be the admin of an ODFB account to initiate migration. An OneDrive account with user access will not be able to migrate any data. CloudFuze neither stores your passwords nor the data. The app uses the OAuth protocol to authorize the account and make it ready for the migration. Read more about CloudFuze Security here.
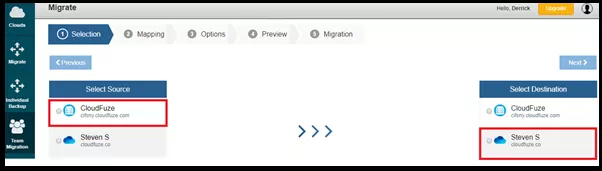
Step 5: Select Source and Destination Clouds for Migration
In this case, you need to select NFS as a source and OneDrive for Business as a destination. This is a critical step and you need to be cautious as selecting the wrong source and destination clouds will break the migration.
Step 6: Select the Users You Wish to Migrate from NFS to OneDrive
CloudFuze has a feature called Auto-Map that automatically pairs users in source and destination based on the email aliases. This feature saves a lot of time and makes the entire migration process smooth. In case, if you need to transfer data between different users, it can be done using the CSV feature.

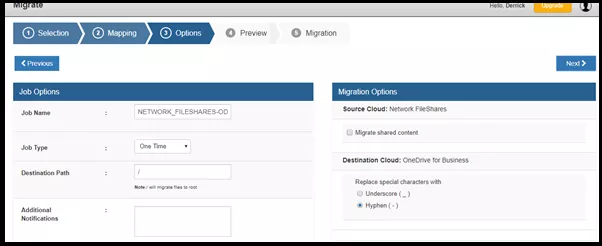
Step 7: Choose Your Preferred Migration Settings
In this page, you can give your migration a name. This is particularly useful when you have multiple migration jobs. In the job type, select it as One Time. Leave the Destination Path as / to migrate the data to OneDrive for Business root. If you want the data to go a specific folder in OneDrive, enter/followed by the folder name. Keep in mind that you need to enter the folder name correctly. By default, you will get the migration reports in your email. If you want the notification to go to additional emails, enter those emails under Additional Notifications text box. OneDrive for Business doesn’t support some special characters to be in the folder or file names. Since you are migrating from NFS, you need not worry about this option. This special character’s function comes in handy while migrating from other cloud service providers like Dropbox or Box.
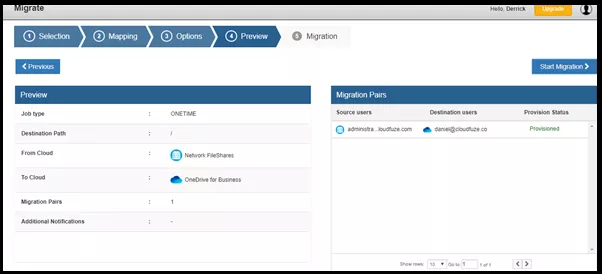
Step 8: Preview and Initiate the Migration
Preview your migration job and when everything looks alright just hit the Start Migration button. Your migration will be initiated instantly.
Step 9: Migration Is in Progress
Now, the status shows as In-Progress as the file migration between Network File Shares and cloud (OneDrive) is in process.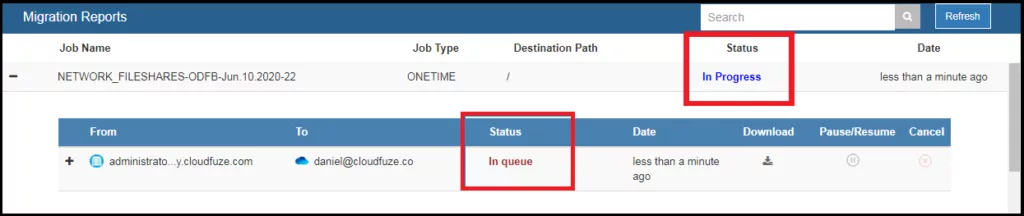
Step 10: Migration Is Completed
After sometime, the migration will be completed and the same will be shown as a status. Note that the duration of migration depends upon the size of your data.


