Introduction
Performing a SharePoint to SharePoint migration between Microsoft 365 tenants involves many technical parameters that your company must focus on. From replicating the SharePoint Online sites to transferring all users and data with permissions, only a complete migration can help your team ensure that the target Microsoft 365 tenant reflects the source tenant’s structure.
To get started, you can also watch this video for a quick walkthrough of all the migration steps.
Why do Businesses Perform SharePoint to SharePoint Migration?
Most businesses migrate from SharePoint to SharePoint as part of migrating between Microsoft 365 tenants. The use case of migrating between Microsoft 365 tenants varies from one business to another, with some of the common ones being:
- Mergers
- Acquisitions
- Other organizational restructuring
Advantages of SharePoint Online to SharePoint Online Migration
Businesses undertaking a SharePoint to SharePoint Online migration benefit from consolidations in the target Microsoft 365 tenant post-migration. A proper plan and the right SharePoint to SharePoint migration tool can help your team gain many advantages, such as:
- Migration of all user accounts without any data loss
- Accurate replication of sharing permissions and other metadata
- Mirroring of the source SharePoint Online’s Sites in target SharePoint Online
Potential Challenges and Solutions
Downtime is one of the potential challenges many businesses face. The risk of downtime can be high when planning to migrate a high volume of user accounts and large TBs or even PBs of data from one SharePoint Online to another. Other potential challenges include:
- Preservation of permissions, access levels, and metadata
- Migrating users and data to specific SharePoint Online sites
- Migrating incremental changes that build up during the one-time migration
The solution to overcome all the challenges is to use an advanced SharePoint Online to SharePoint Online migration tool that can enable your team to migrate a high volume of users and data without downtime while ensuring accurate replication of the source SharePoint’s environment in the target SharePoint.
Planning SharePoint to SharePoint Migration
A lot goes into planning the process to make the entire migration journey smooth and secure. It starts with assessing the user accounts and data in the source SharePoint Online and understanding the structure and preparing the scope of migration accordingly.
1) Pre-Migration Analysis
Pre-migration assessment is perhaps the most critical stage of the entire migration. It is when your team must decide the number of user accounts and the size of files and folders to migrate and finalize the types of metadata to preserve in the target SharePoint Online. Here are some of the essential parameters to consider:
- The total number of user accounts to migrate
- The total size of files and folders to migrate
- Metadata to preserve, such as
- Permissions
- Timestamps
- External shares
- File versions
- Shared links
2) Developing a Communication Plan with Stakeholders
Do not let communication become an oversight when focusing on various aspects of migration, especially when coordinating with stakeholders. Involve all the stakeholders in the communication channels you plan to use with the migration vendor, such as migration reports, email communication, conference meetings, etc.
Preparing for the Migration
The better the preparedness, the smoother the SharePoint tenant-to-tenant migration. Here are some of the important steps to take during the preparation phase:
1) Choosing a SharePoint to SharePoint Migration Tool
The success of your company’s SharePoint Online to SharePoint Online migration significantly depends on the migration tool. Therefore, if there’s one area your team must get absolutely right, it is choosing a proper tool.
Check these areas when exploring SharePoint tenant migration tools:
- Performance – support for large data sizes and fast migrations
- Scalability – scalable to match your company’s migration needs
- Security – optimum protection of data during the migration
- Compliance – adherence to data regulation and localization standards
- On-prem deployment – deployable in your company’s local infrastructure
As an industry leader in Microsoft 365 tenant to tenant migrations, we at CloudFuze offer the most advanced functionalities and enterprise-grade security in our SharePoint to SharePoint migration tool. Apart from supporting migrations of TBs and PBs of data and a large volume of users, we also preserve metadata extensively, to ensure complete mirroring of the source SharePoint in the target SharePoint.
2) User Mapping
The accuracy of the SharePoint to SharePoint Online migration largely depends on the way users are mapped. We recommend using CSV mapping, an industry standard method.
Although this method demands a bit of work, it offers the best flexibility. Your team can either create mappings between the same user accounts from the source to the target SharePoint or create swaps for data transfer customizations.
3) Admin Login Details
When working with a tenant migration solution provider like us, your team must be ready with Global admin login credentials of both the source and target SharePoint tenants. Why? The first step is to add the clouds to our tool. The cloud adding process happens through the secure OAuth 2.0 protocol and we ensure not to store any passwords.
Performing the Migration
After the initial stages progress and materialize to the execution stage, your team must select a strategy or approach to migrate the users and data.
1) Migration Strategy (Big Bang vs Phased Migration)
Would it be best for your company to adopt the big bang migration approach and migrate all users and data in a single operation? Or would your team rather migrate in phases to keep the transition lightweight and better manageable?
We recommend the latter. With a phased approach, your team can divide the total number of users into several batches and migrate them one after another. Not only does this approach simplify the migration and validation process, but it also keeps the risk of API rate limiting at bay.
2) SharePoint to SharePoint Migration Steps
Check out all the steps below to migrate from source SharePoint to the target SharePoint using our content migration tool X-Change.
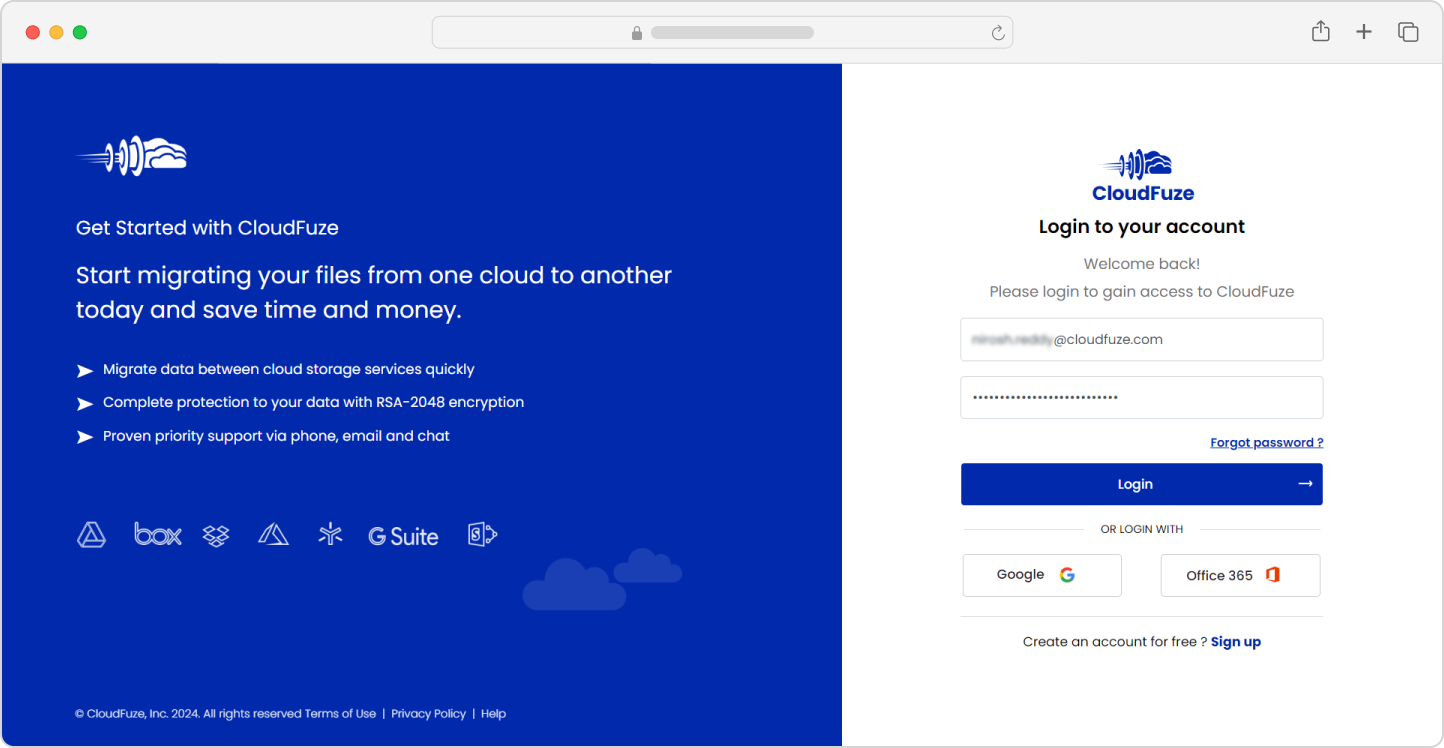
Step 1: Sign into CloudFuze
Get started by creating an account for our webapp and log into it.
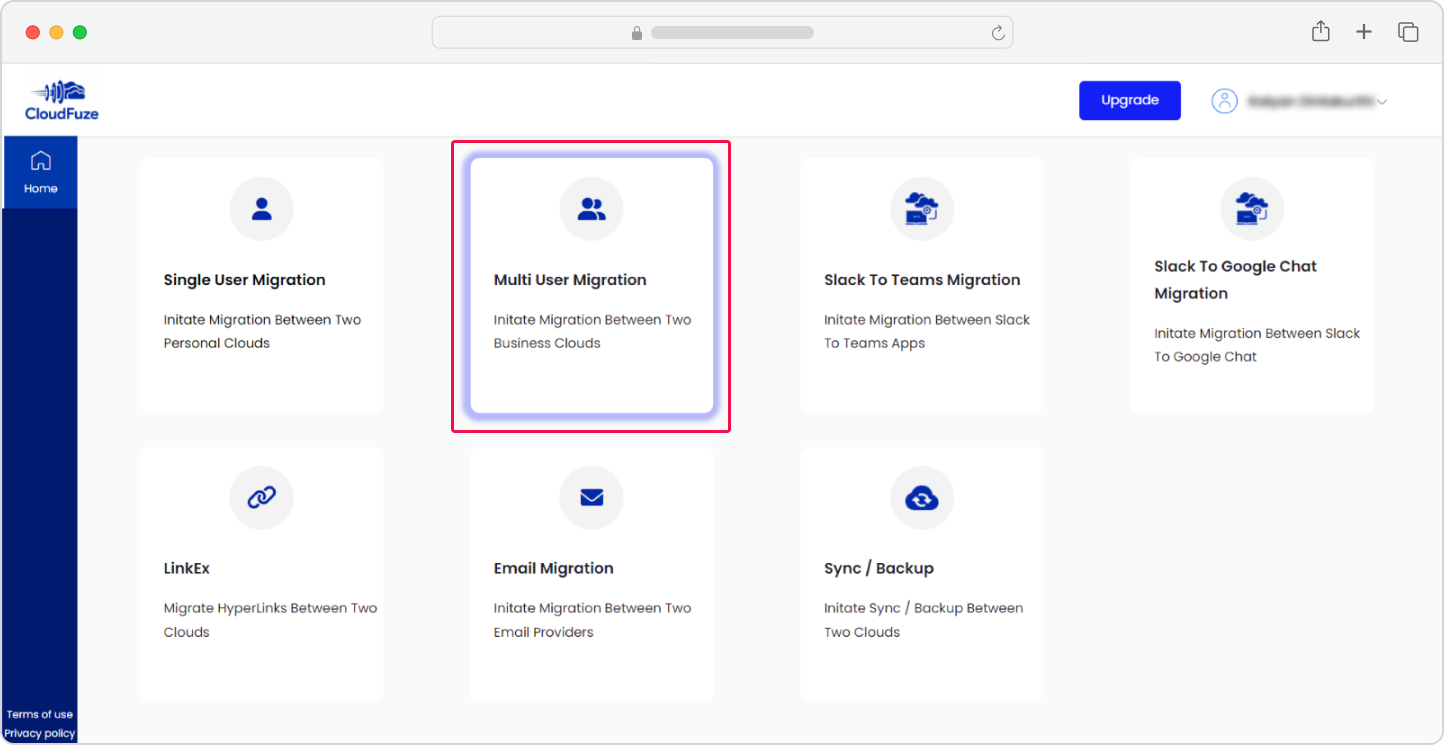
Step 2: Select Multi-User Migration
From the several options, select the Multi User Migration option as it allows for business migrations.
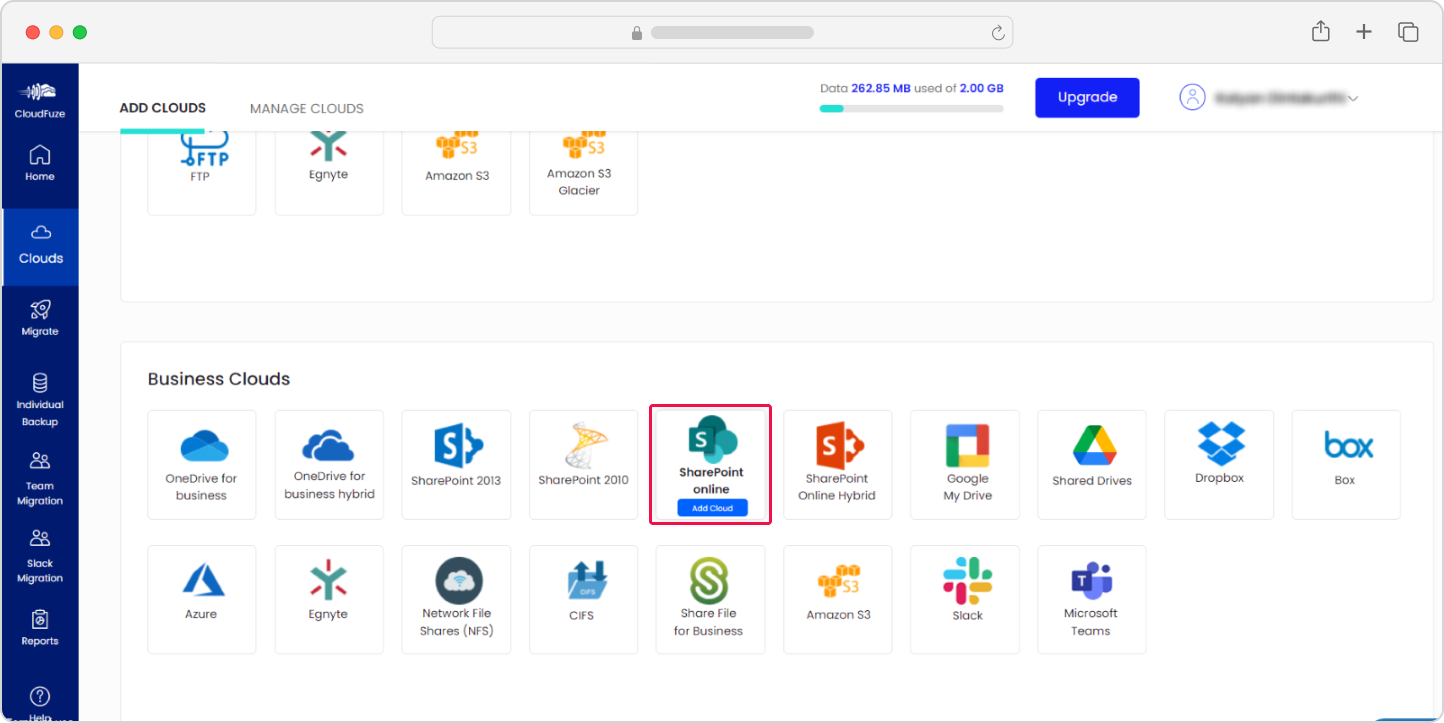
Step 3: Add the Source SharePoint Online Cloud
Navigate to the Business Clouds section of the dashboard and select the SharePoint Online cloud. Click on “Add Cloud.”
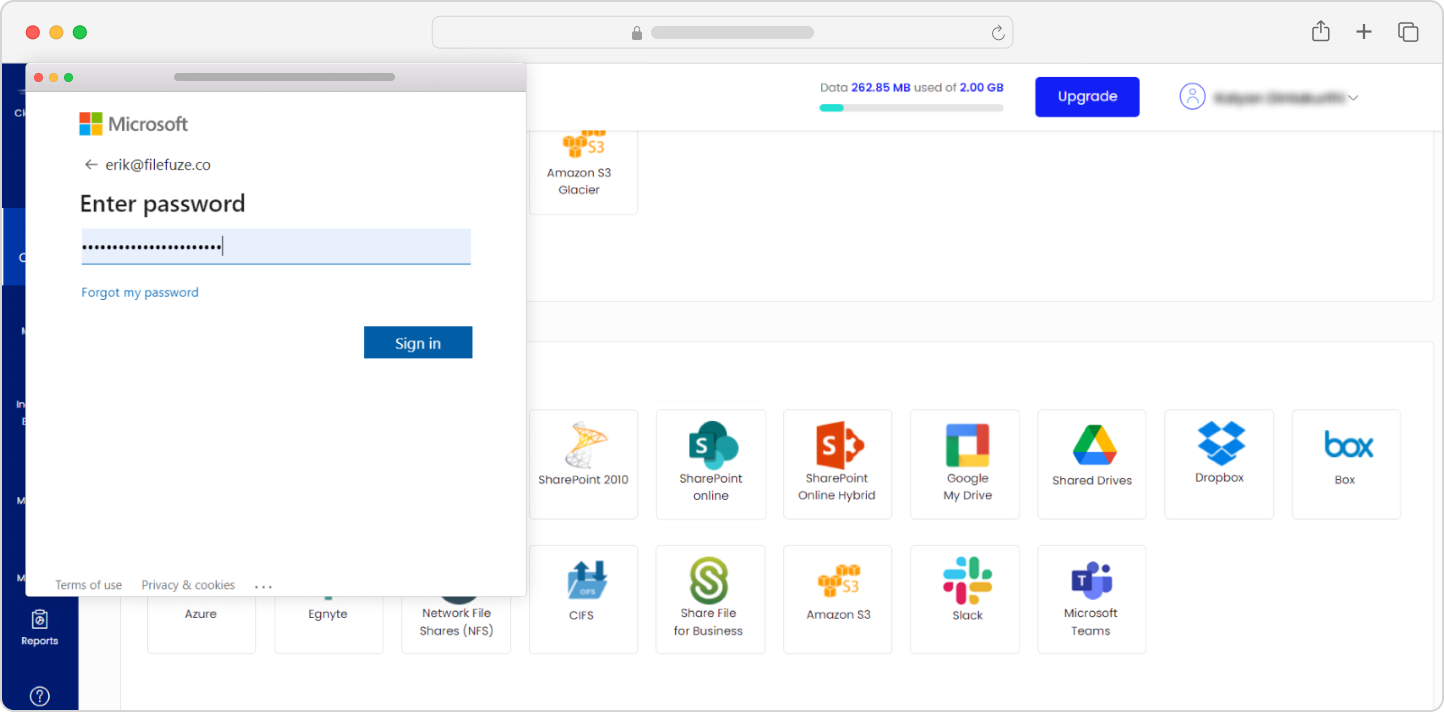
Step 4: Enter SharePoint Online Admin Login Details
Add the Global admin login details.
Step 5: Click on Accept
Click on “Accept” to authenticate the SharePoint Online cloud on our migration webapp.
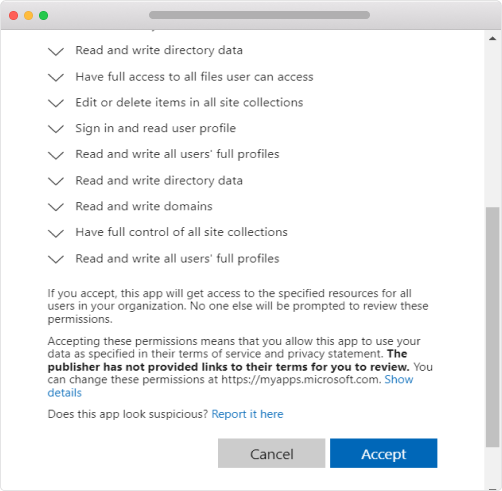
Step 6: Add the Target SharePoint Online Cloud
Repeat the process to add the target SharePoint Online cloud and authorize it to our migration tool.

Step 7: Verify Cloud Addition
Toggle to the Manage Clouds section and ensure both SharePoint Online clouds are added successfully.
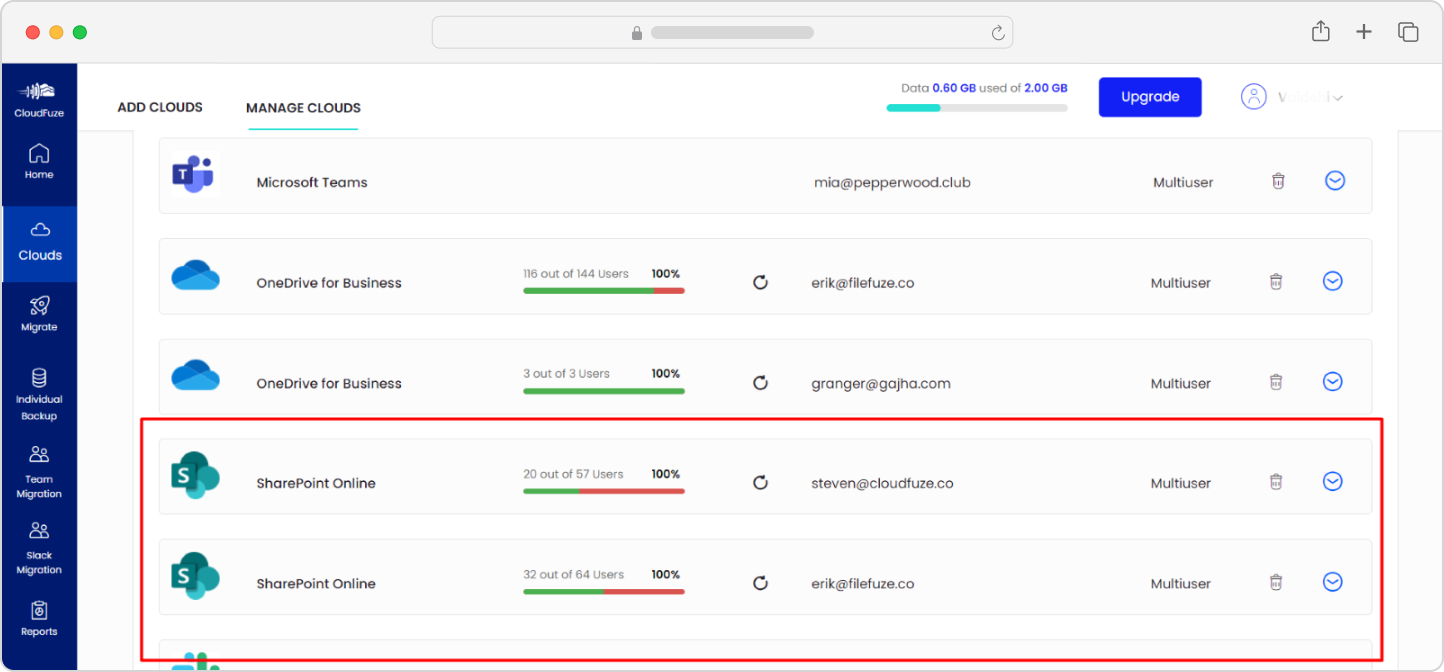
Step 8: Configure the Source and Target Clouds
Visit the Team Migration panel of our webapp and select the source SharePoint Online cloud in the “Select Source” section and choose the target SharePoint Online cloud in the “Select Destination” section.
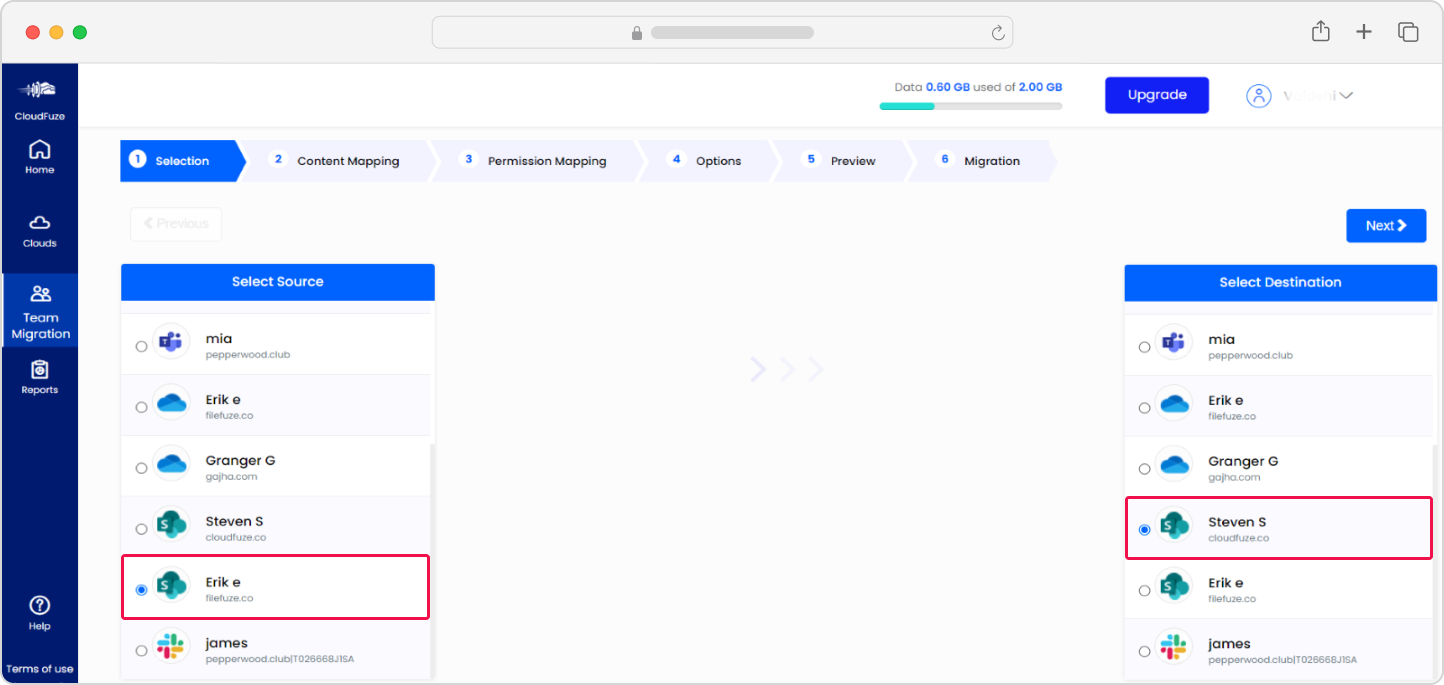
Step 9: Map the Users
When it comes to mapping the users, you have two options: auto-mapping, and CSV mapping. The auto-mapping option automatically maps source and destination SharePoint Online users based on their email IDs.
To test this feature, click on the “Auto-Map” button as shown below:
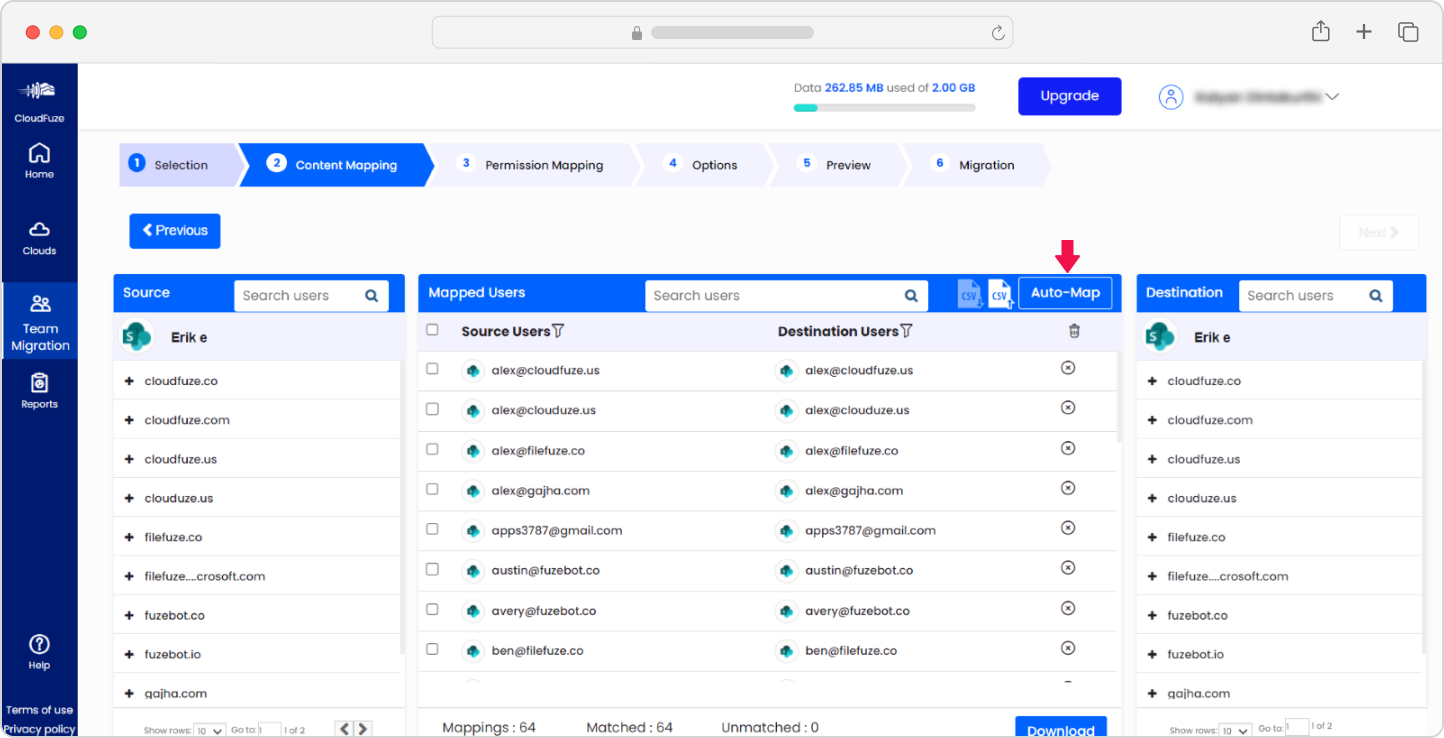
For flexibility in user mapping, including custom mappings, use the CSV mapping method. Follow these syntaxes to create the mappings between source and target SharePoint Online users:

After creating the user mappings, save it in the CSV format and upload it to our webapp by clicking on the CSV button as shown below:
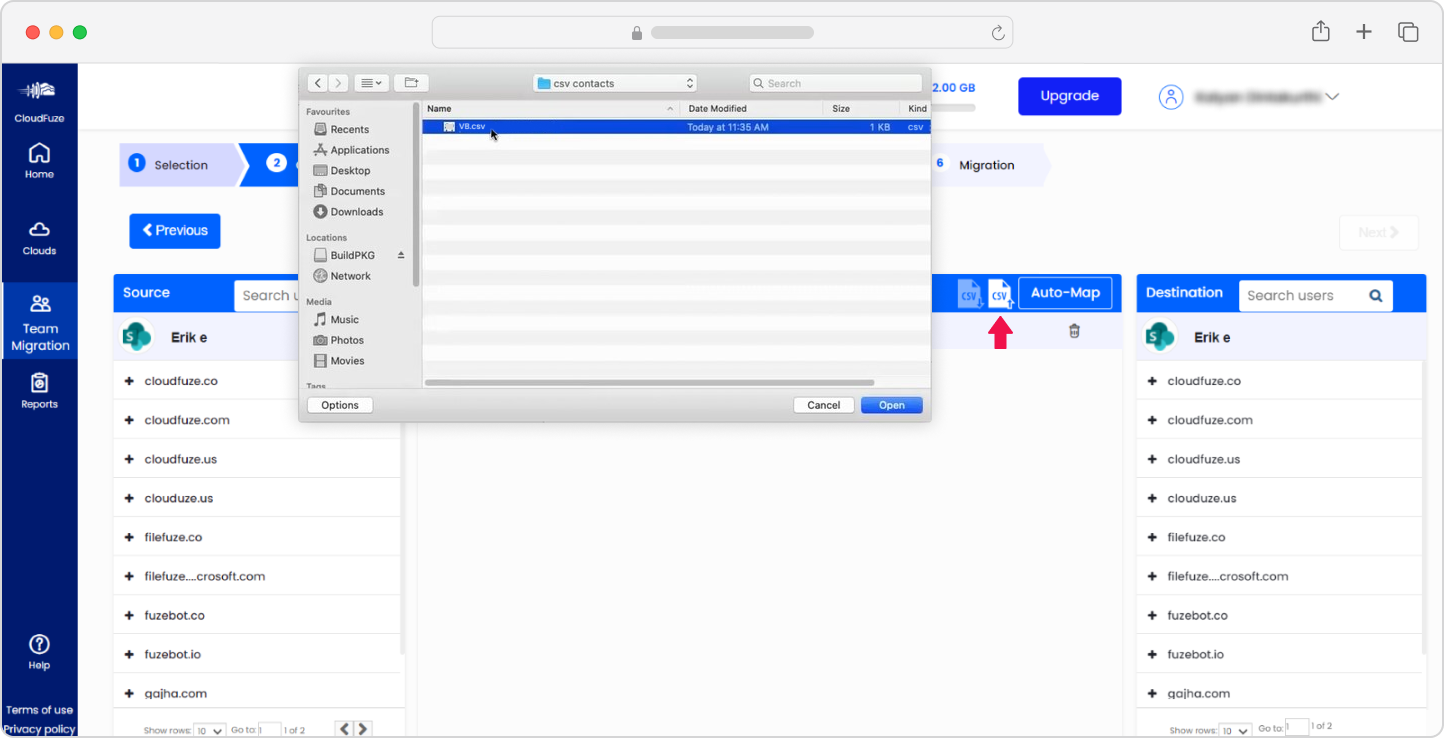
To validate the accuracy of the mapping, download the processed CSV file from our webapp and check for the “PASS” status as shown below:

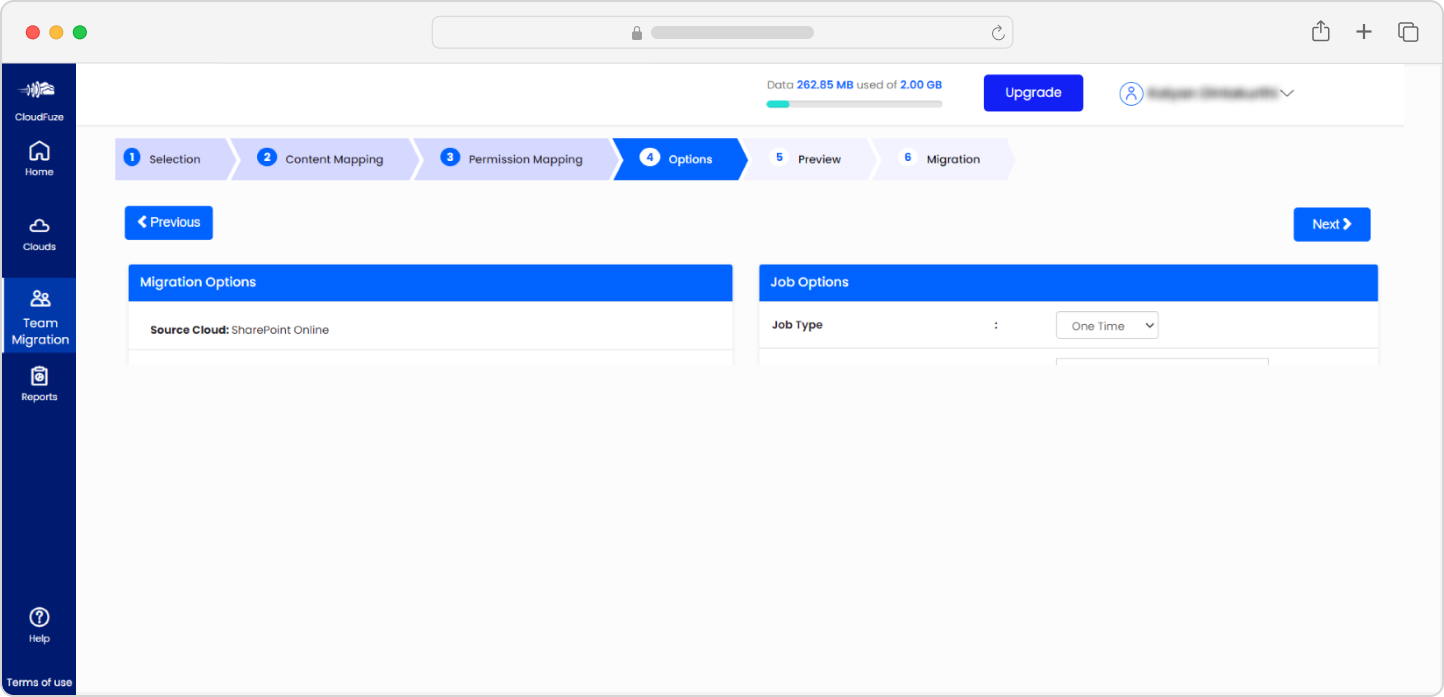
Step 10: Select the Migration Options
Our tool provides you with several options, choose them as per your migration needs. For example, when performing the migration for a particular batch, select the Job Type as “One-Time.” After the completion of the one-time migration, you can initiate a delta migration.
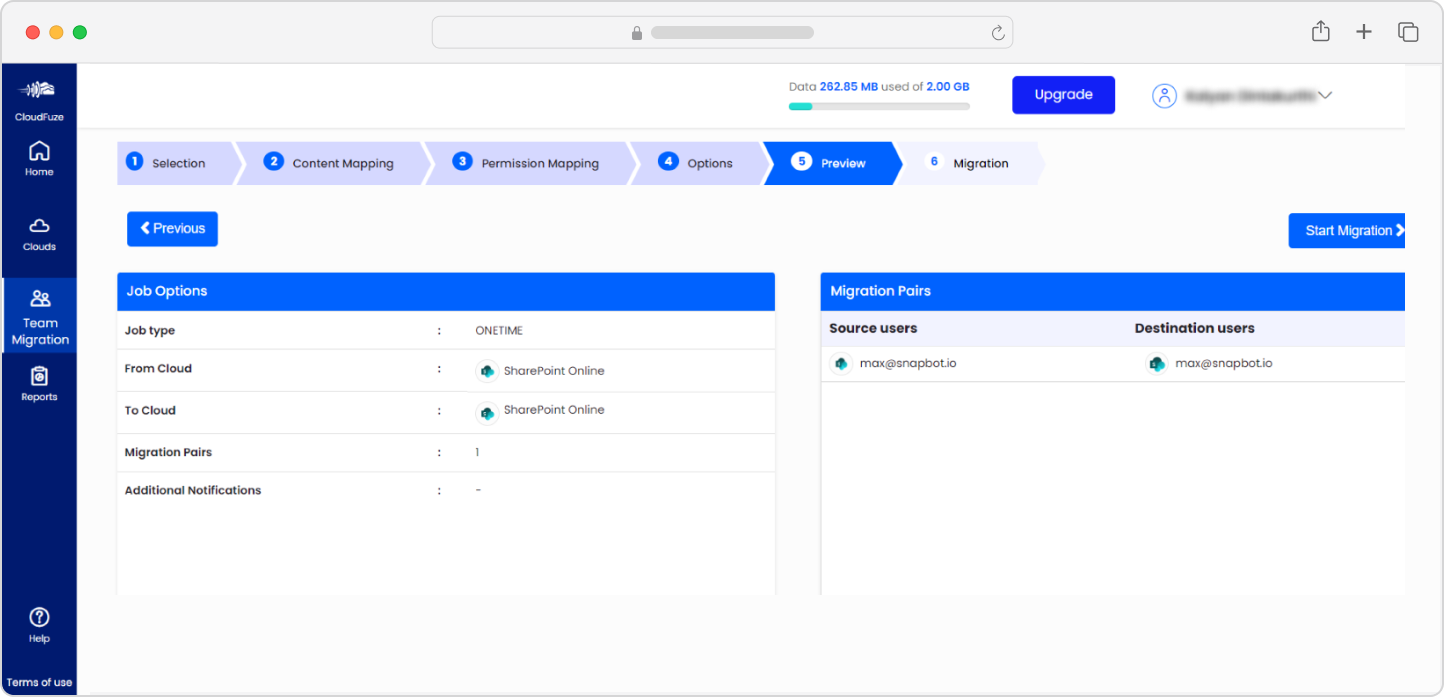
Step 11: Preview the Migration Parameters
Before starting the migration process, preview all the parameters you have selected and ensure everything is set properly.
Step 12: Start the SharePoint to SharePoint Migration
Click on “Start Migration” to start the user and data transfer process.
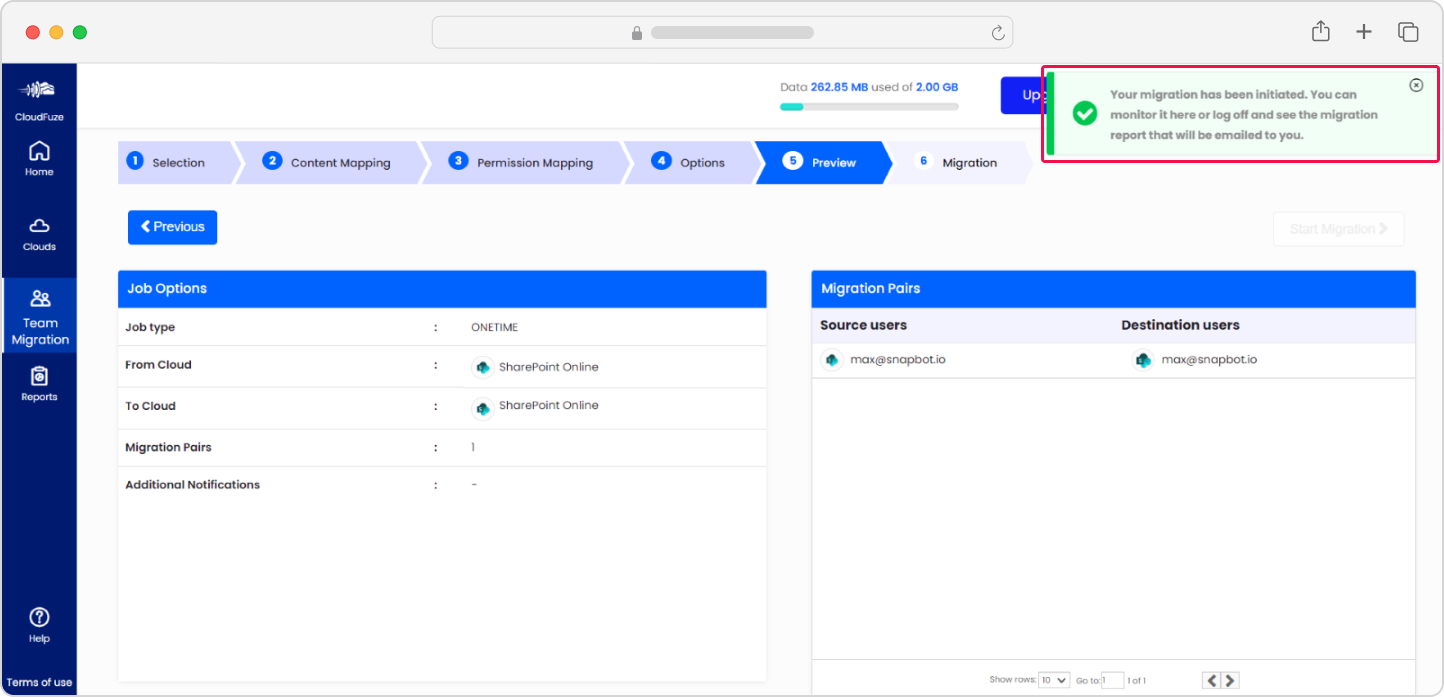
Step 13: Monitor the Migration
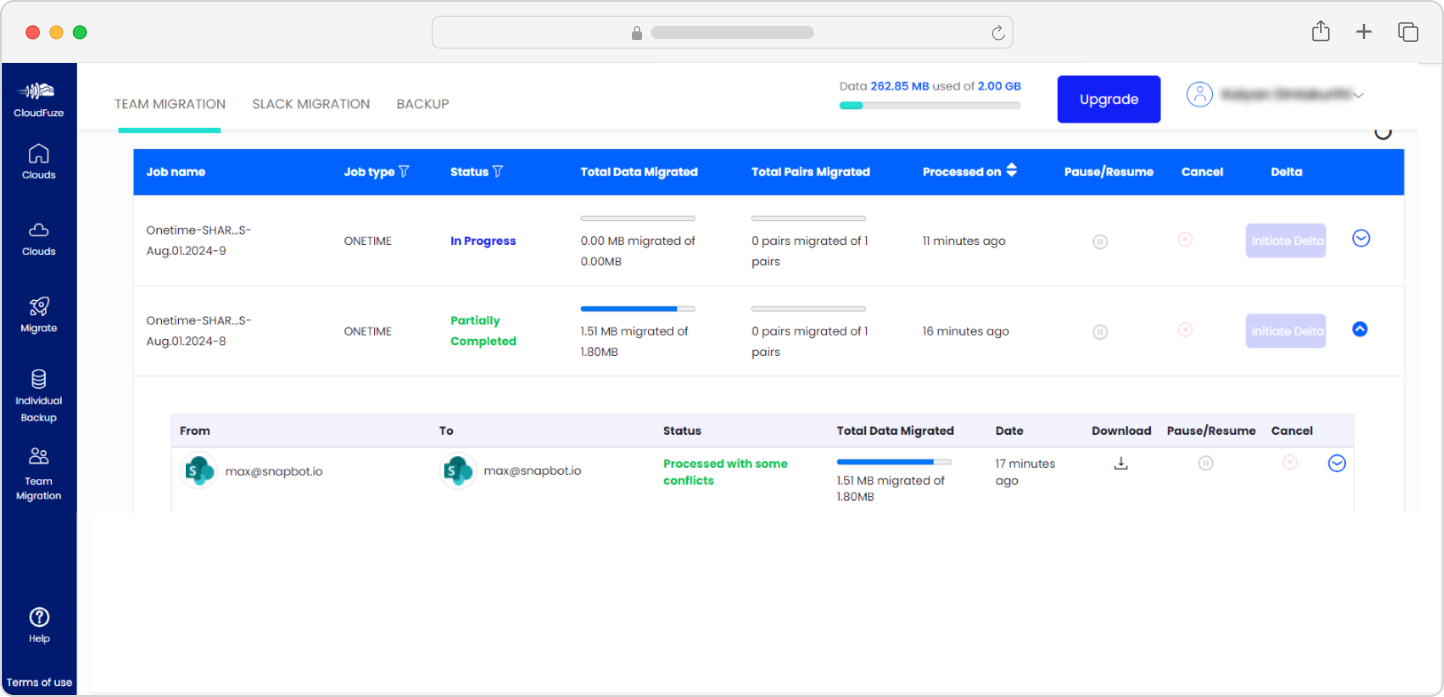
Upon starting the migration, you will be automatically redirected to the Reports dashboard. There, check the progress of the ongoing migration.
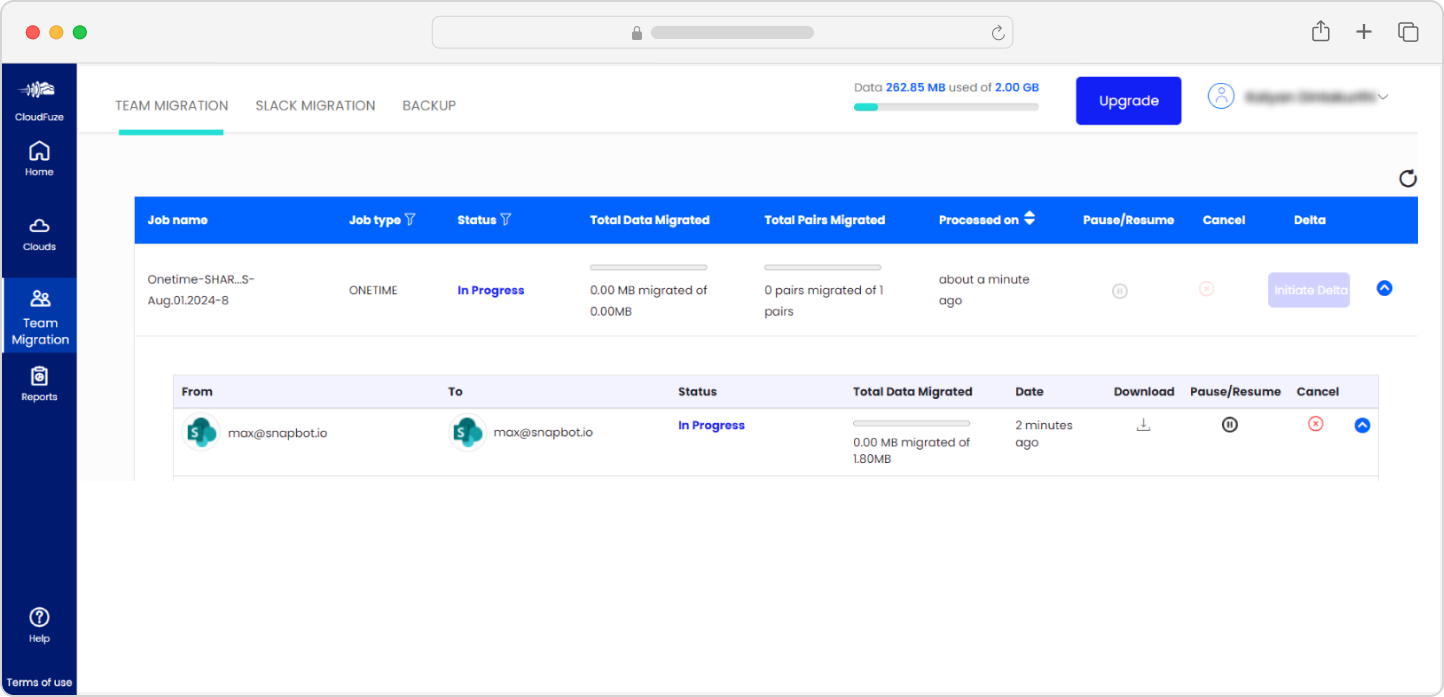
The dashboard will display the “In Progress” status for ongoing migrations and a “Completed” status for completed migration jobs.
Post-Migration Activities
After the SharePoint Online to SharePoint Online migration is completed, the final stage is to validate and ensure proper integration of the migrated data into the target SharePoint Online.
1) Delta Migration
Incremental changes build up during the one-time migration as users continue working in the source SharePoint Online. Make sure to transfer all the incremental changes through a single or multiple delta migration.
Since it is important to avoid adding a new layer of incremental changes during the delta migration, it is best to schedule this job during weekends when the users are not active.
We recommend performing delta migration of each batch as and when their one-time migration gets completed. This way, your team can avoid build-up of significant incremental changes by the time the last batch’s one-time migration gets completed.
2) Migration Validation
It is only through proper validation that your team can be assured that the users and data have been migrated properly. Rather than validating all the users and data in a single operation, we recommend validating each batch as and when they are migrated to the target SharePoint Online.
Perform the validation by checking the migration reports our tool generates. And while you are at it, check all the critical parameters, including:
- Total number of user accounts migrated
- Total number of files and folders migrated
- Total size of the data migrated
- Any conflicts or warnings
- Migration initiation and completion dates
- Overall migration summary
3) Post-Migration Integration
After validating all the migrated batches, your team must ensure proper post-migration integration. Check the apps and tools in which the source SharePoint’s shared data is integrated into and install the same apps in the target SharePoint and re-sync the shared data.
4) User Onboarding and Go Live
As a final step, onboard the users to the target SharePoint Online. Unlike other migration projects that involve migrating between different clouds, SharePoint to SharePoint migrations may not require user training due to familiarity with the target SharePoint Online.
Conclusion
If you gained insights from this guide, we recommend discussing with your team and implementing them in your company’s SharePoint tenant to tenant migration strategy.
At CloudFuze, we can streamline your company’s SharePoint to SharePoint migration entirely. Right from the pre-migration analysis to migration initiation and validation, we take care of all the important stages to help your team avoid the heavy lifting.
Our 10+ years of expertise in Microsoft 365 migrations can help your team navigate the complexities and ensure a secure and error-free migration between the SharePoint Online tenants.
Connect with our team to discuss further or request for a free price quote tailored to your company’s SharePoint to SharePoint migration needs.
Frequently Asked Questions
How to Move SharePoint to Another SharePoint?
- Finalize the users and their files and folders to migrate
- Map the users from the source SharePoint to the target SharePoint in a CSV file
- Populate the mapping to our tool by uploading the CSV mapping file
- Configure the permissions mapping
- Select the metadata to preserve
- Select the migration job type
- Start the migration
- Monitor the migration
- Validate with the tool-generated migration reports
How to Copy an Entire SharePoint Site to Another Site?
Create a mapping of the users and their data of the source SharePoint Site using te CSV mapping method. Create a replica of the source SharePoint’s Site in the target SharePoint and point the CSV mapping path to it. You can then use the mapping with a SharePoint migration tool like ours to transfer the users and data.
How to Migrate SharePoint to SharePoint Securely?
Ensure that the migration tool/solution you plan to use follows industry-standard migration protocols, such as the use of REST APIs, OAuth for cloud authentication, etc. Also, it is important that the tool complies with GDPR, SOC 2 Type 2, ISO 27001, and other such regulations. It is best to use dedicated servers to protect the data in transit from external threats.
