
How to Transfer Files from Amazon S3 to Google Shared Drives (Non-Business)
Do you have a lot of data in your Amazon S3 account that you want to migrate to Google Shared Drives? The major challenge here will be migrating GBs of data on your personal internet infrastructure which in most cases is not equipped to handle a large migration. CloudFuze, on the other hand, migrates all your data through its backend, ensuring that you save a lot of time and money. Here are the steps involved in transferring files from Amazon S3 to Google Shared Drives.
Step 1: Create a CloudFuze Account
Go to webapp.cloudfuze.com and create a CloudFuze account. CloudFuze offers a limited free trial for users who wish to test the service.

Step 2: Add Your Amazon S3 Account
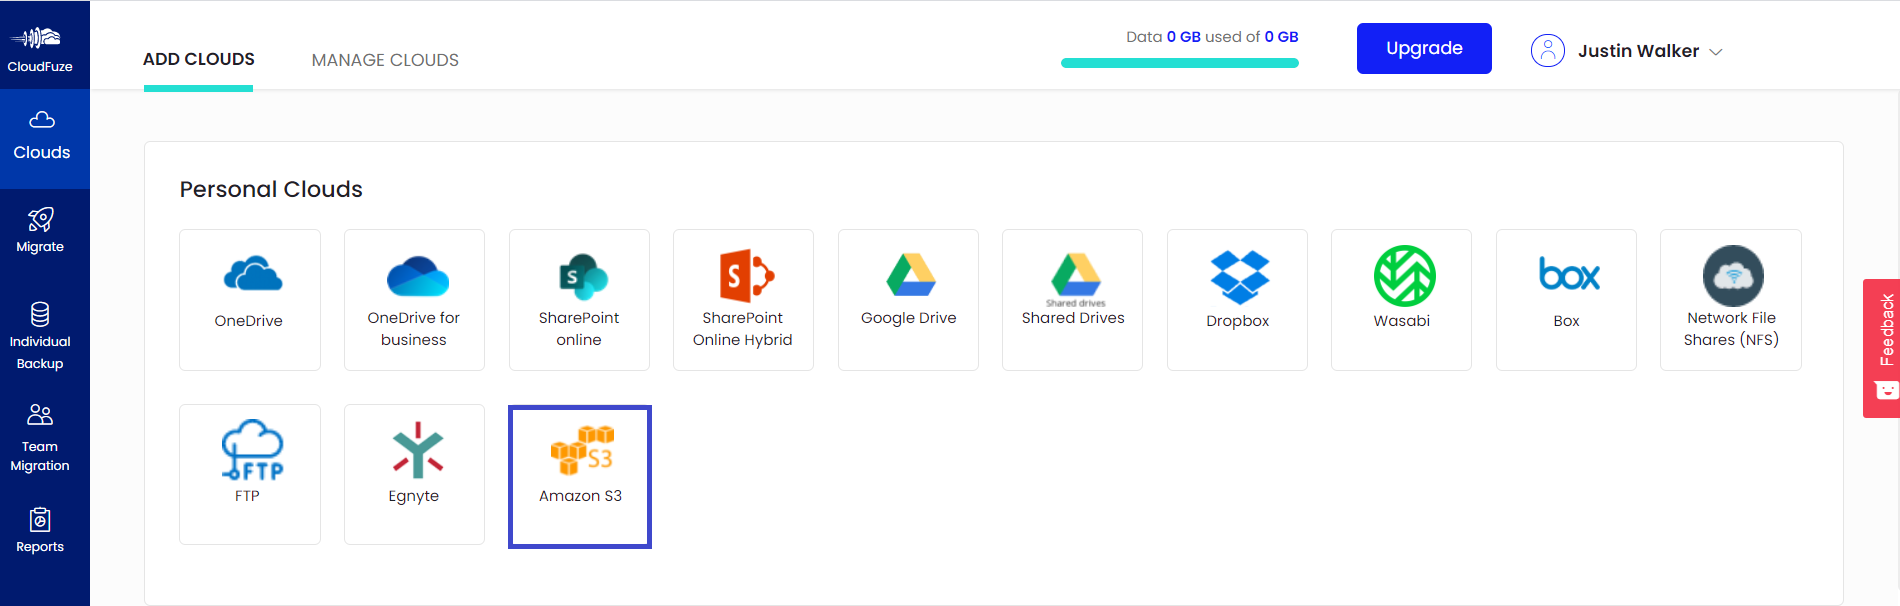
Locate the Amazon S3 logo from the list of personal clouds. This will open a popup where you need to enter your Amazon S3 login details.
Step 3: Enter Amazon S3 Credentials
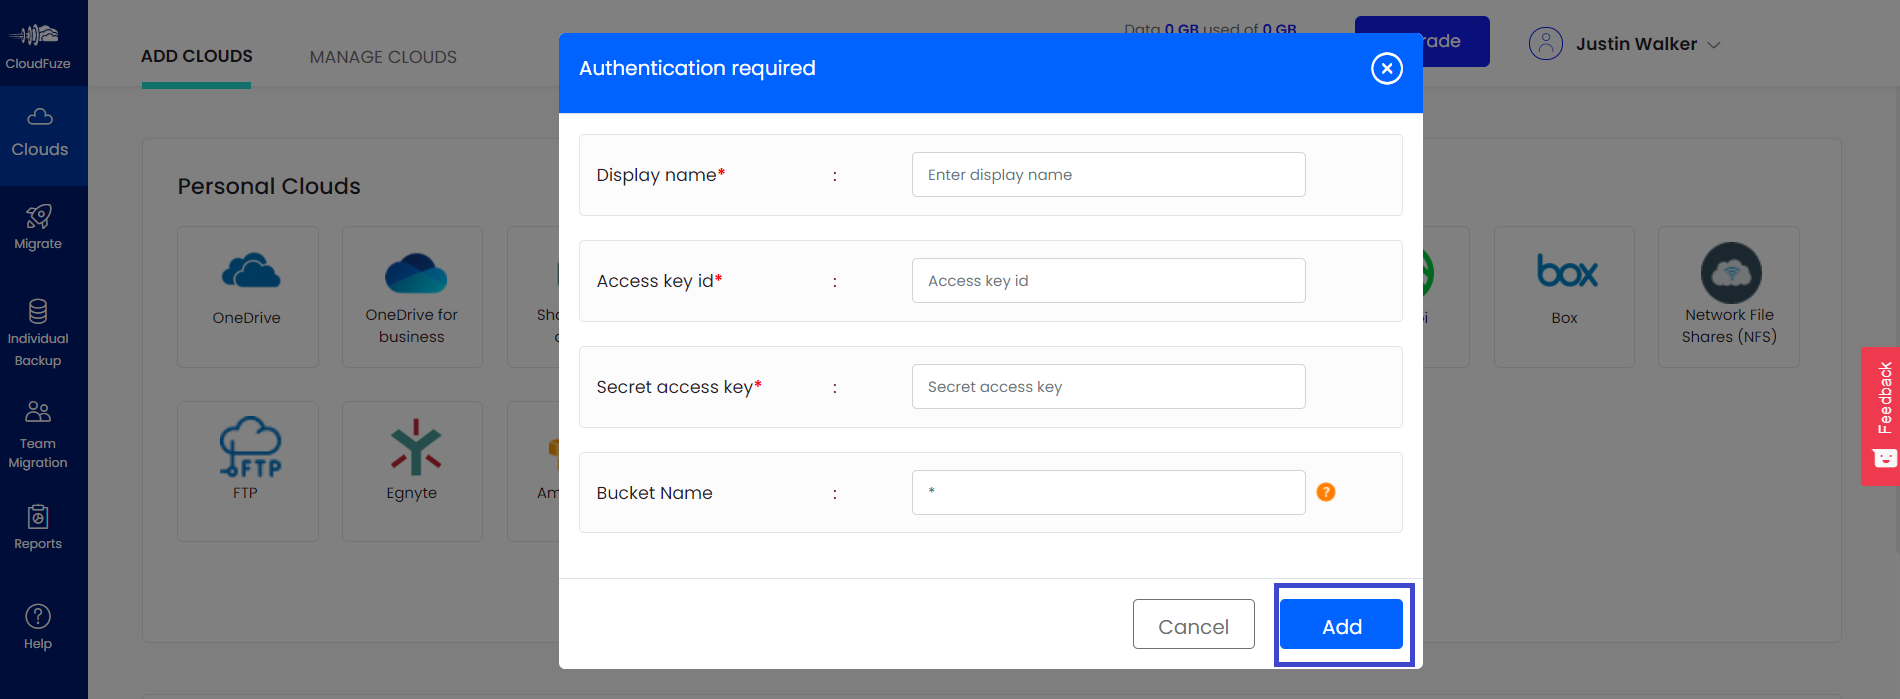
Enter your Amazon S3 login credentials and click on the Next button.
Step 4: Add Google Shared Drives
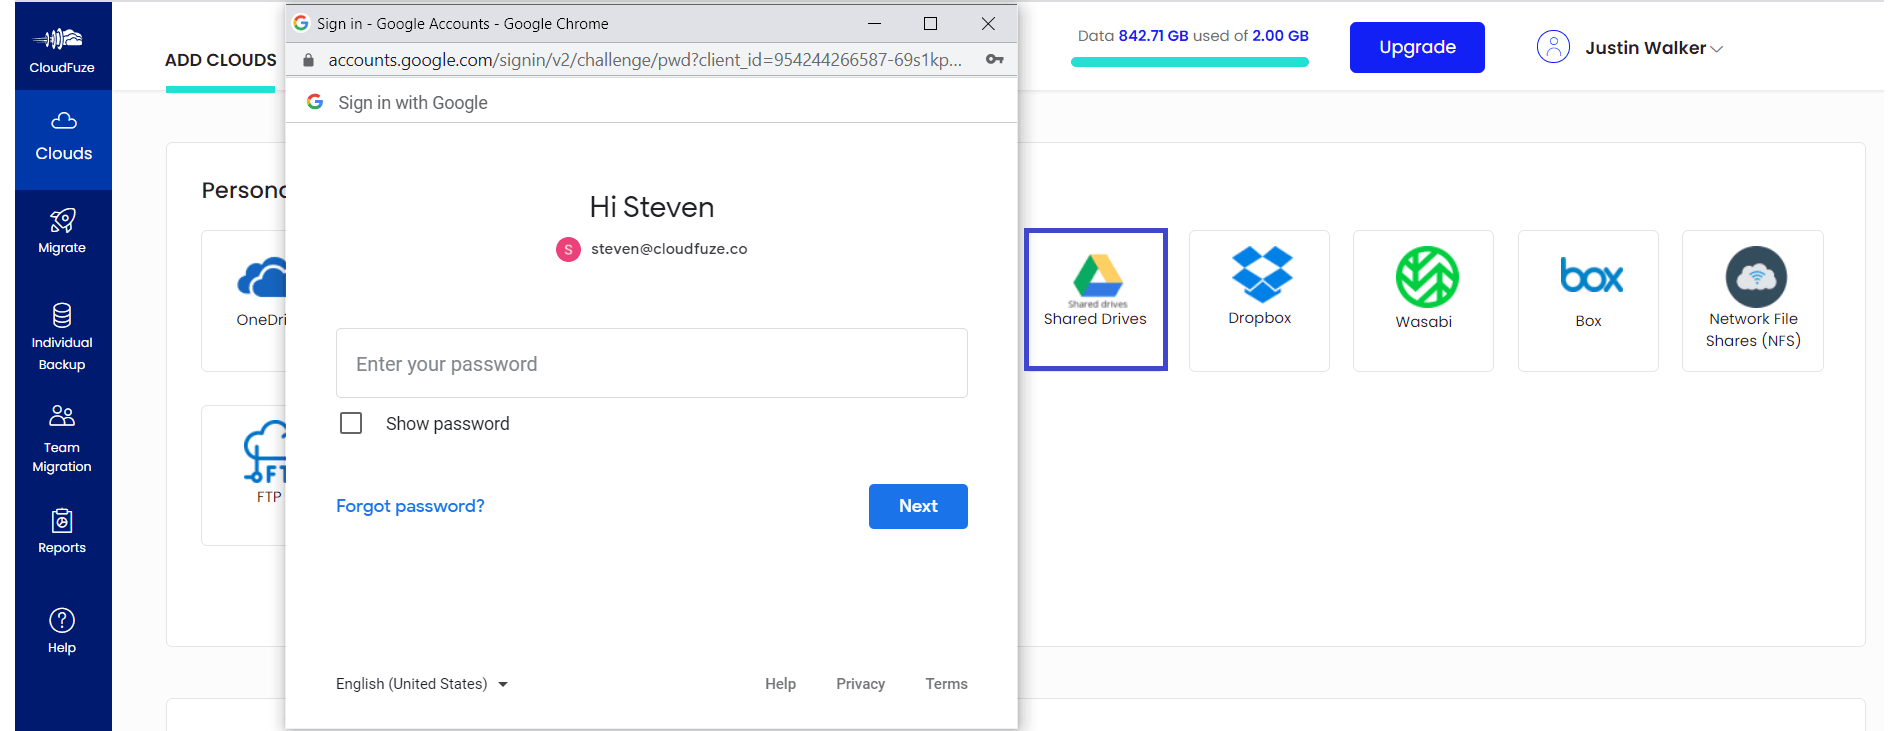
Click on the Google Shared Drive logo and enter admin details to authorize the Shared Drive account.
Step 5: Authorize Google Account
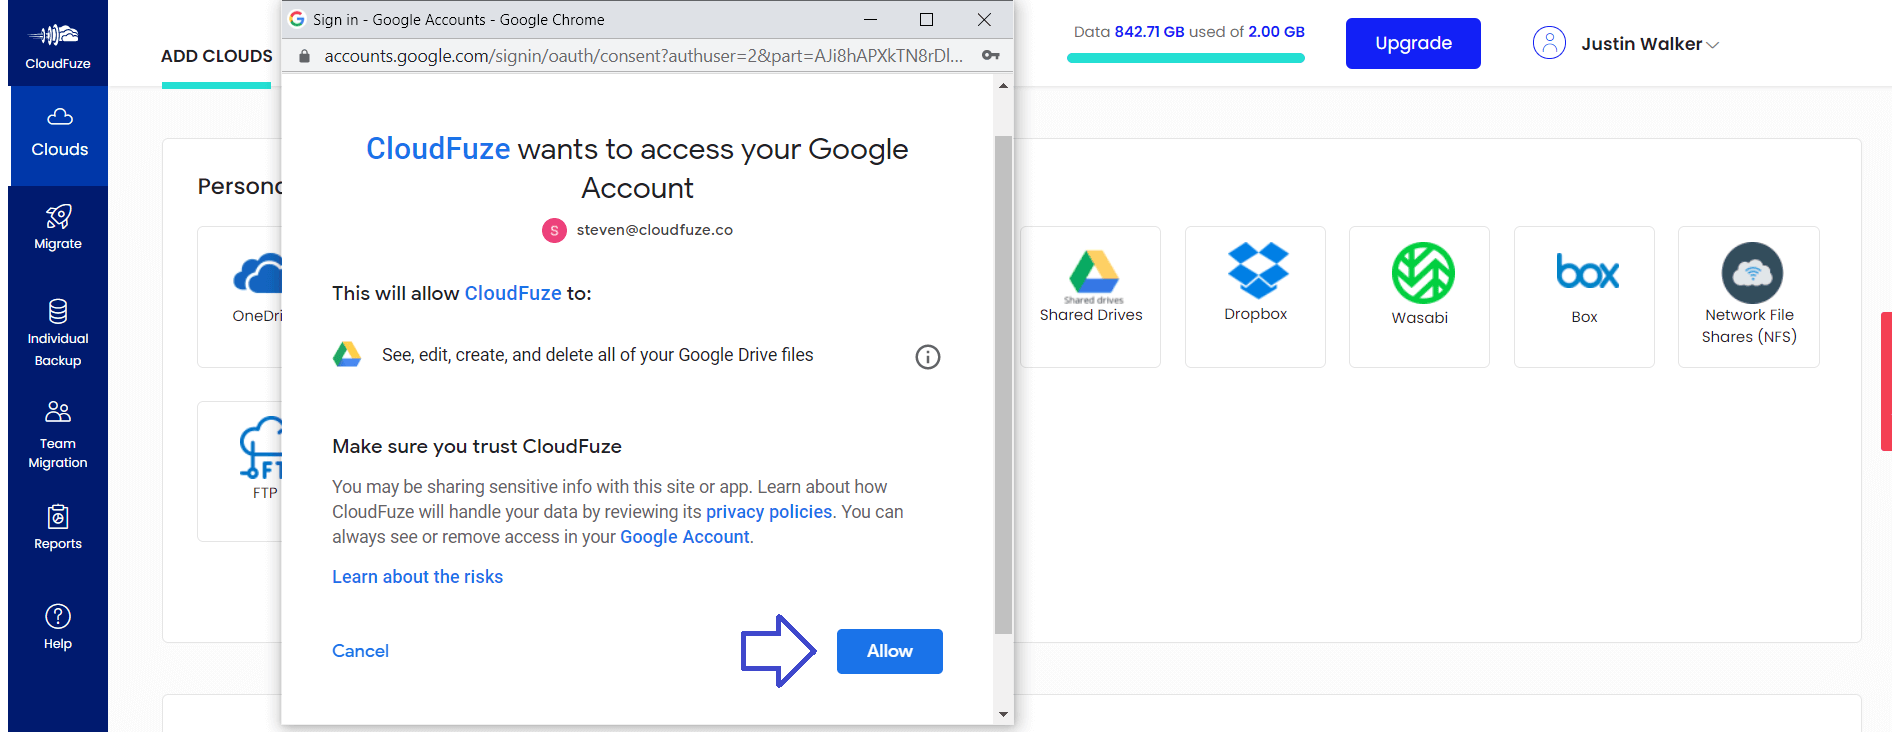
Just click on the Allow button to authorize the Google account and make it ready for the migration.
Step 6: Verify Cloud Addition Process
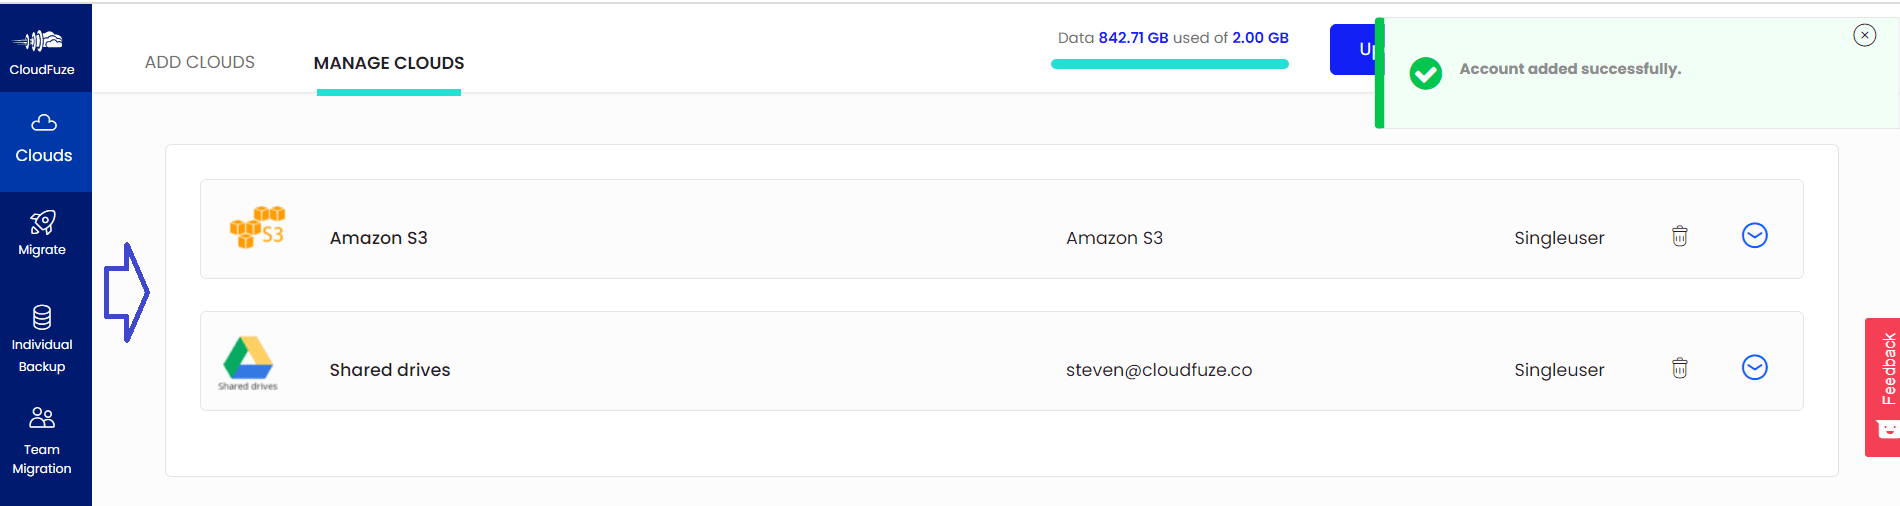
Click on the Clouds logo and go to the Manage Clouds tab. You should be able to see both Amazon S3 and Google Shared Drive accounts being added there.
Step 7: Start the Migration
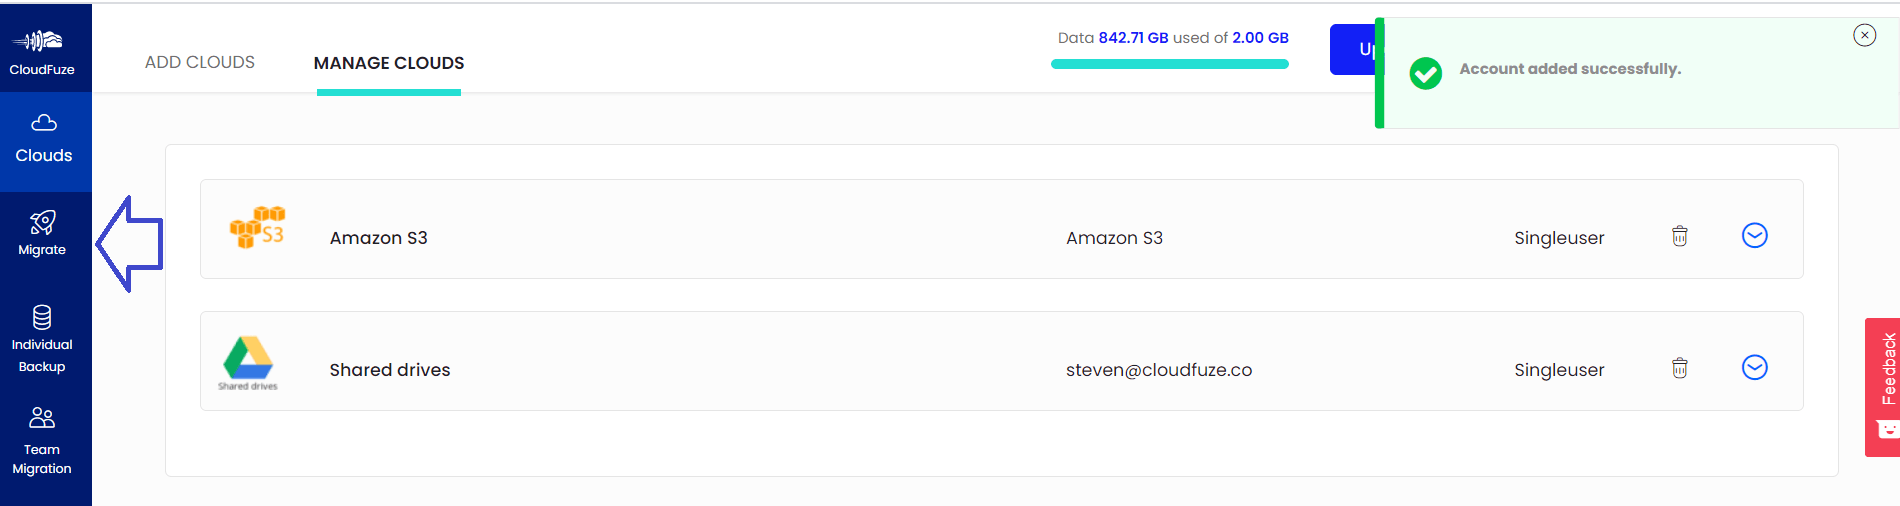
Click on the Migrate button located in the menu on the left.
Step 8: Select Source and Destination Cloud Accounts
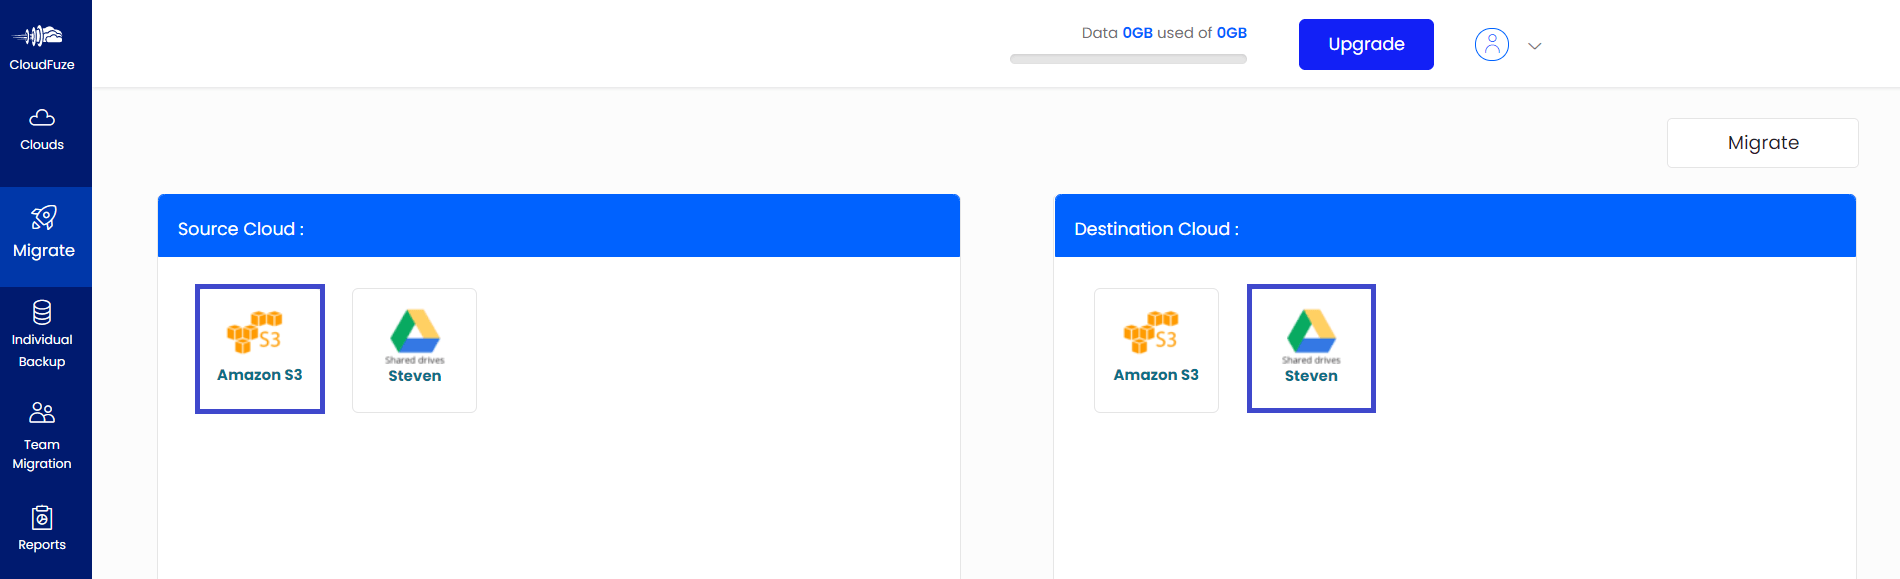
Select Amazon S3 as a source cloud and Google Shared Drive as the destination.
Step 9: Select Files That You Want to Migration
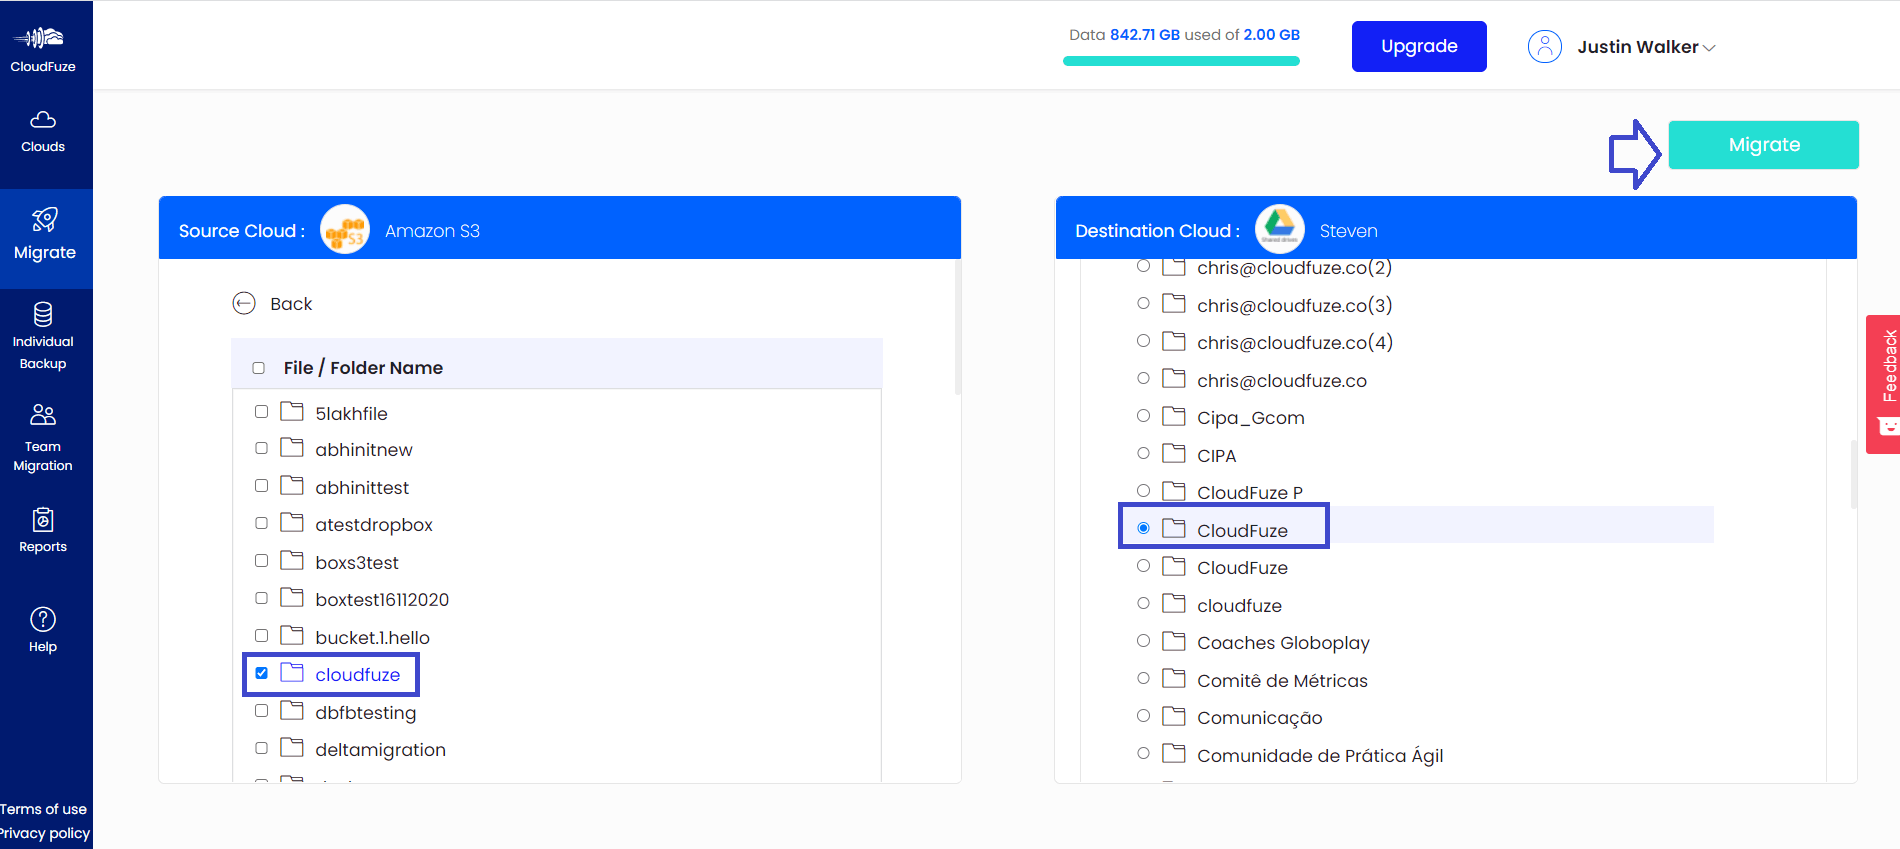
Select all the files that you are planning to migrate. Besides, CloudFuze also allows you transfer all your files and folders in the Amazon S3 root.
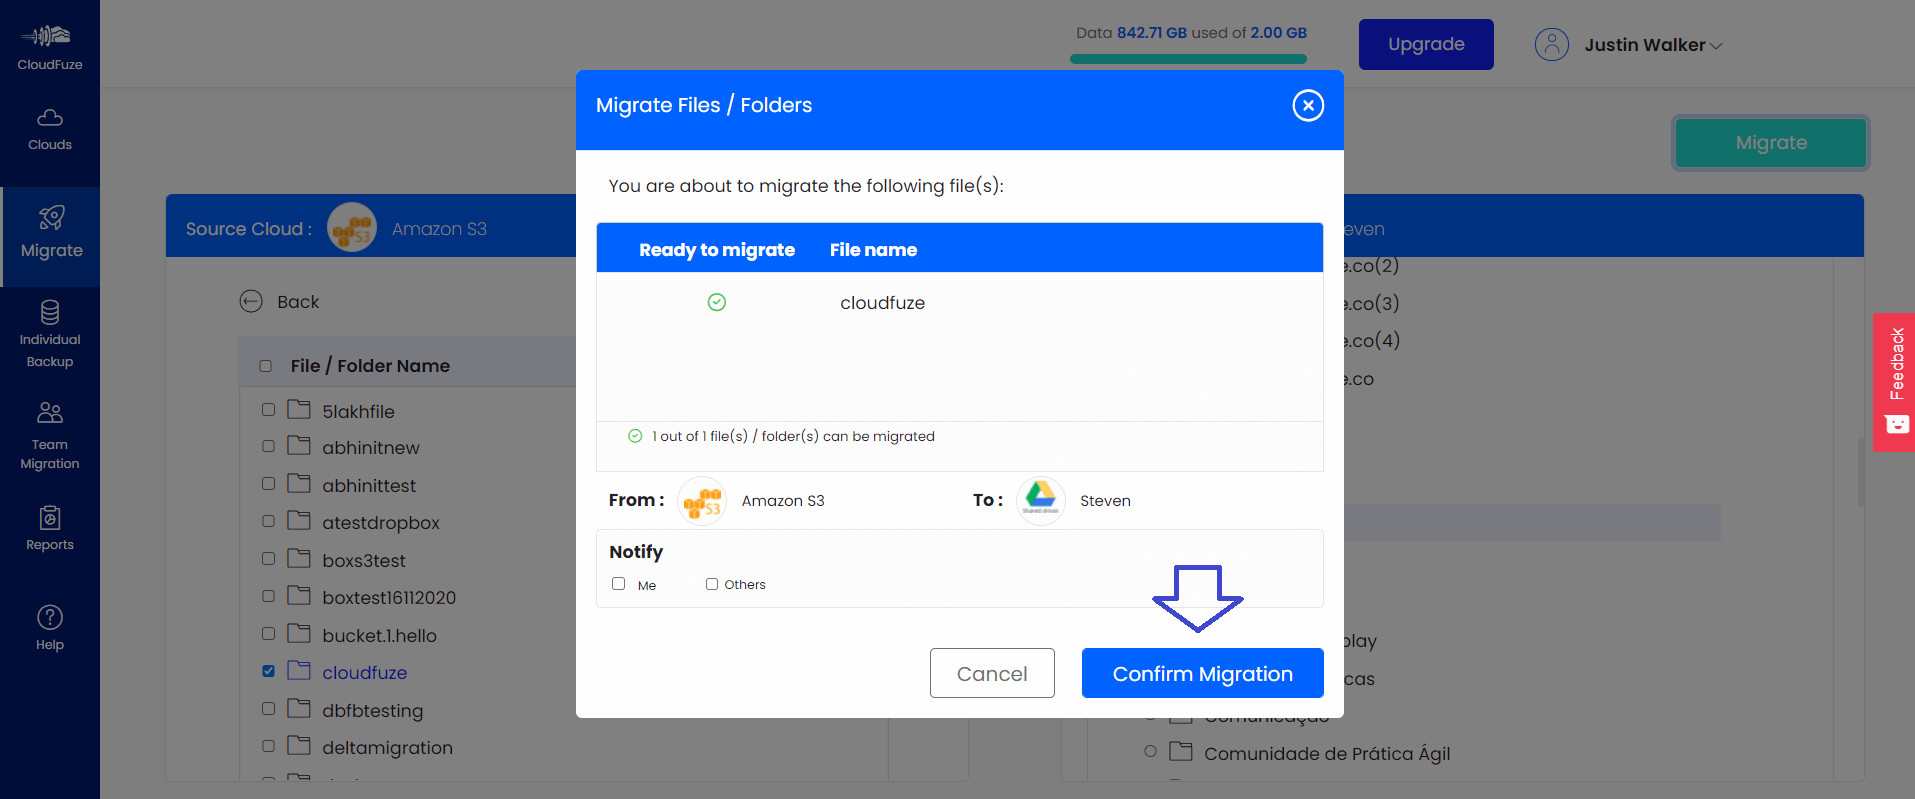
Step 10: Preview and Confirm Migration
Preview all your migration preferences and then click on the Confirm Migration button.
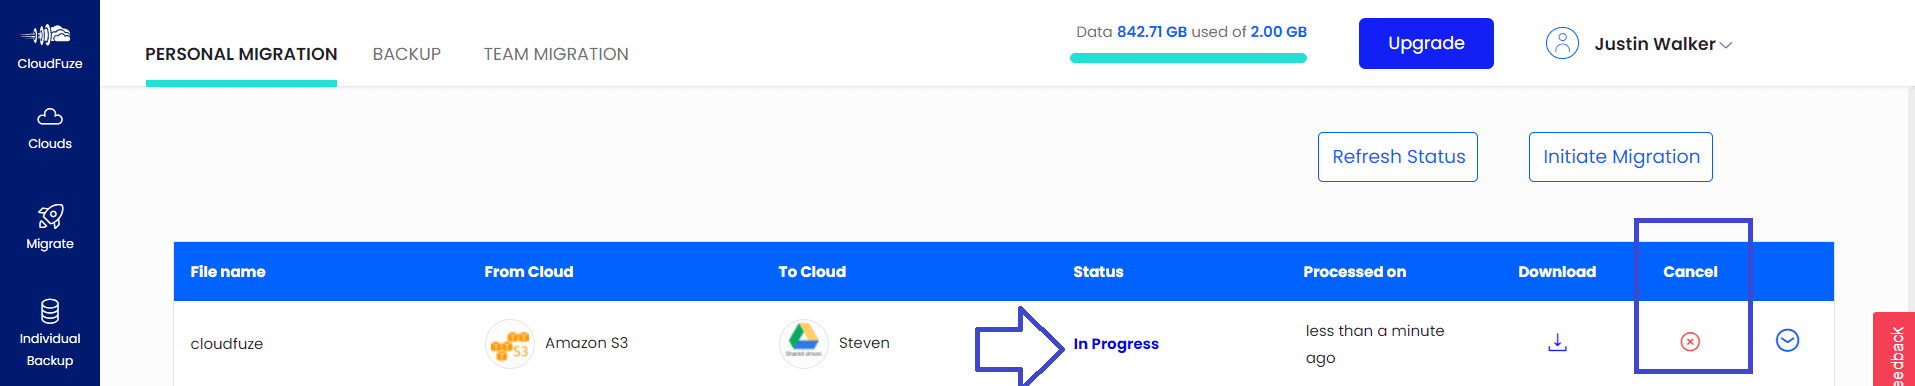
Step 11: Migration Is in Progress
During the file transfer process, the status will be displayed as in progress.
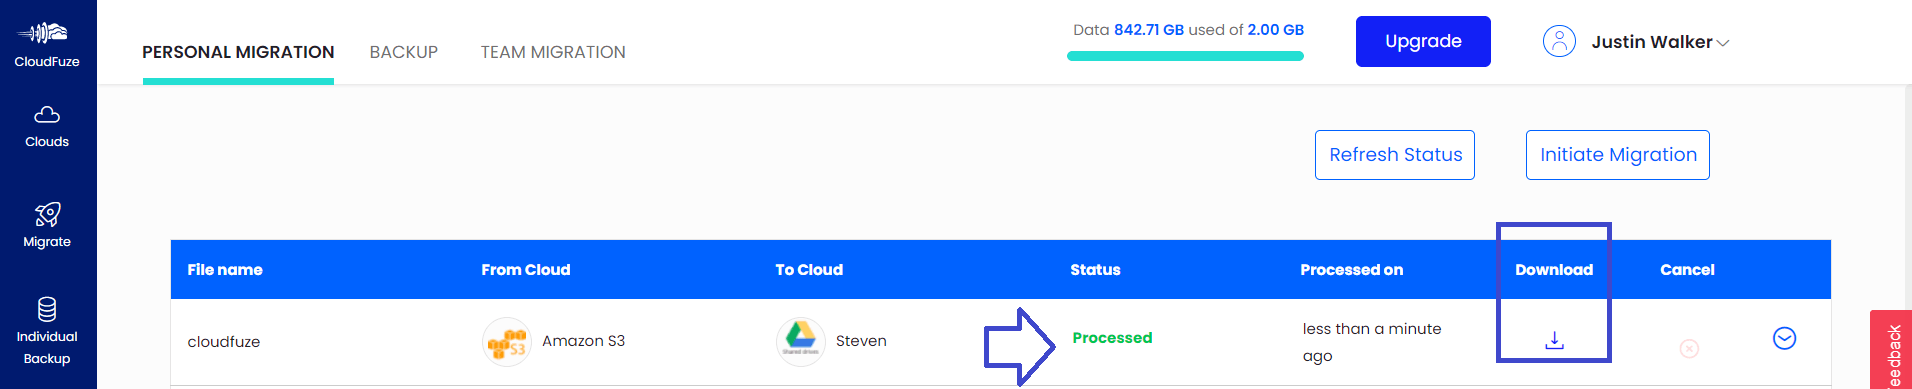
Step 12: Migration Has Been Completed
Once migration is completed, the status will be changed as Processed.
About the Author: Arun Jyothi



