How to Configure Outlook and Microsoft 365 Retention Policies
Outlook and Microsoft 365 retention policies let you control how long Microsoft 365 keeps your mail, files, and Teams messages. You can apply default policies to entire mailboxes, set up per-folder rules, or override at the message level.
Document each policy’s purpose, test on a small scope initially, avoid conflicting policies, use labels for item-level control, and review settings as regulations change. For governance beyond native settings, CloudFuze Manage gives visibility and control over data, permissions, and security across your cloud environment.
Key Takeaways:
How Outlook and Microsoft 365 Retention Policies Apply to Mailboxes, Folders, and Messages
Companies can create default retention policies for all mail items in an Exchange Server or Microsoft 365 mailbox. You can also create specific policies for default folders such as inbox, drafts, sent items, deleted items, and junk e-mail or create retention policies that users can apply to folders or individual items.
You can also assign a retention policy on a per-folder basis. However, even when a retention policy is assigned to a folder, you can select one or multiple messages and then assign a different policy to only those messages. A retention policy assigned to a message takes precedence over any inherited folder policy.
Where to Apply Retention Policies?
You can apply retention policies in following areas:
- Exchange mailboxes
- SharePoint classic and communication sites
- OneDrive accounts
- Microsoft 365 Group mailboxes & sites
- Exchange public folders
- Teams channel messages (standard channels, shared channels, and private channels post-migration)
- Teams chats
- Teams private channel messages (pre-migration only)
- Teams call logs
- Microsoft Copilot experiences
- Enterprise AI apps
- Other AI apps
- Viva Engage community messages
- Viva Engage user messages
How To Assign a Retention Policy to an Email Folder?
Steps to assign the retention policies to an email folder:
- In the Navigation Panel, right-click a mail folder to bring up the shortcut menu and select Properties.
- elect the Policy tab and choose your Folder Policy.
- By default, a folder will automatically use any policy that’s already been assigned to its parent folder.

How To Assign a Retention Policy to an Email Messages?
Steps to assign a retention policy to an email message:
- In the email message list, select a message.
- Now select Assign Policy.
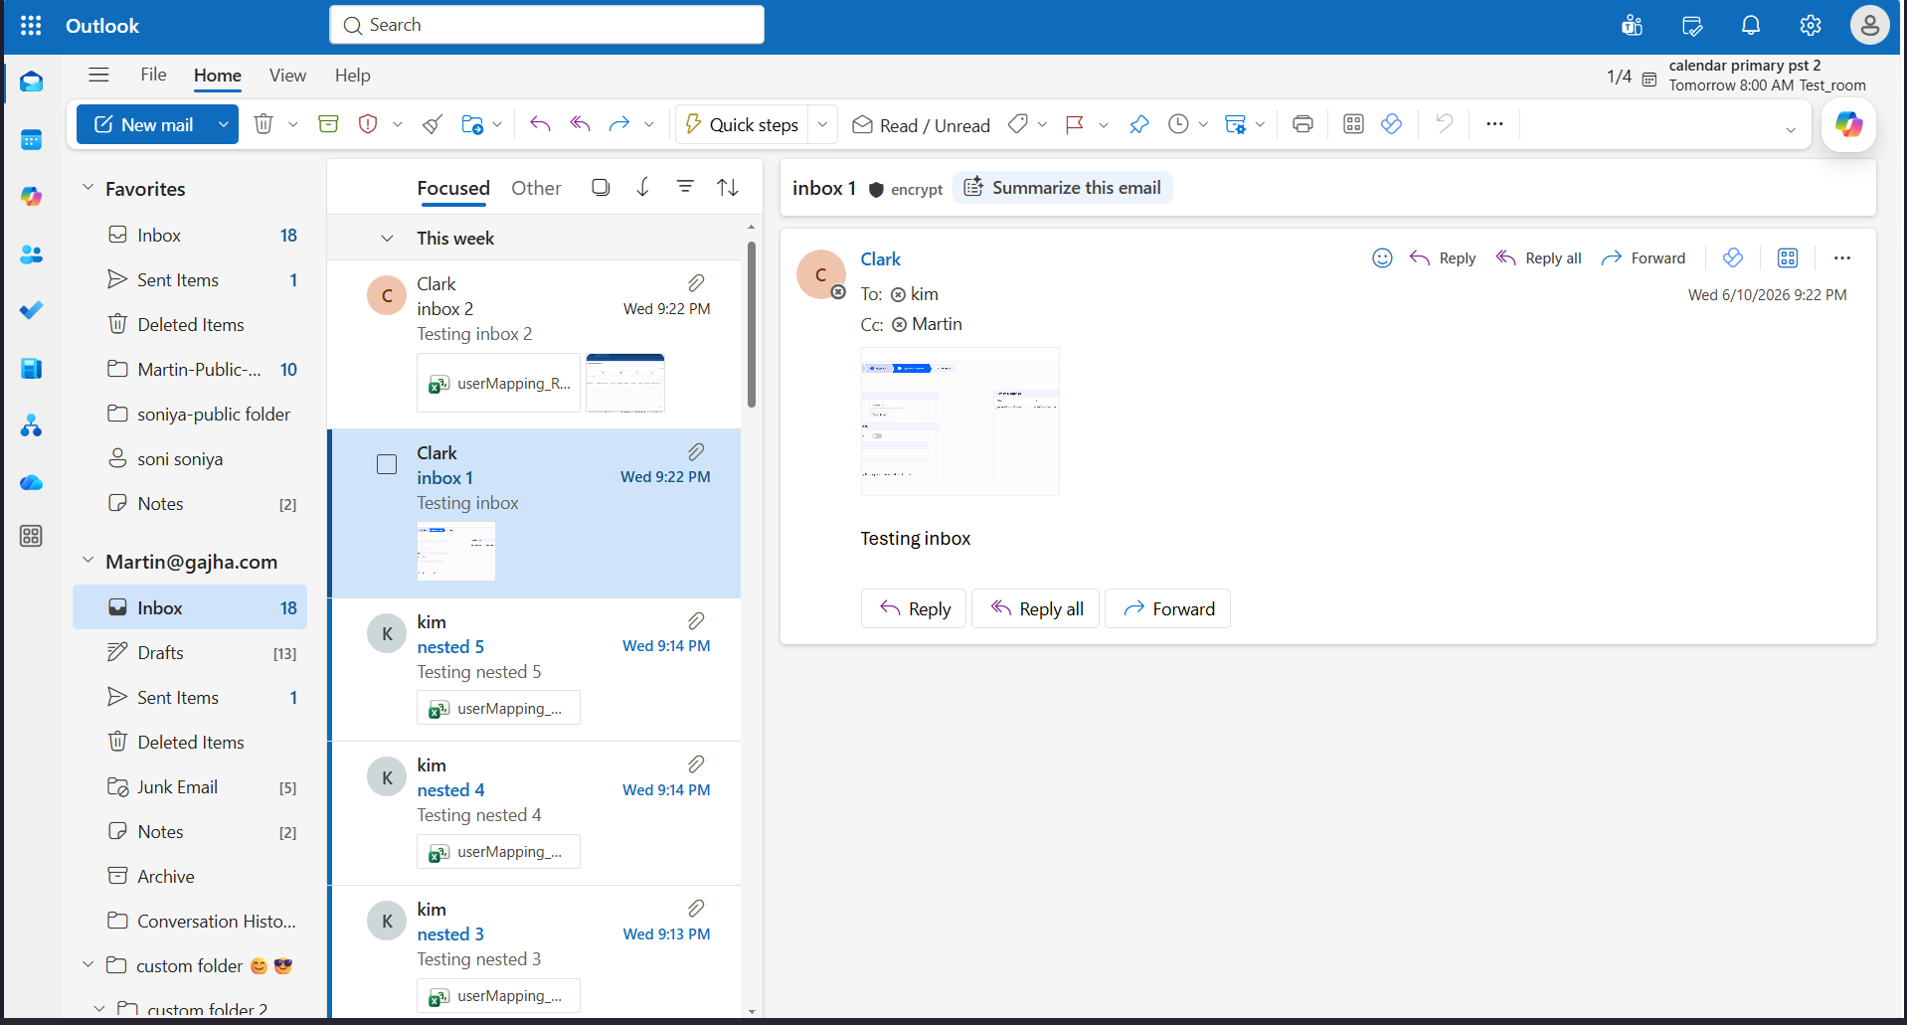
- Now the retention policy for the email message appears in the header in the Reading Pane under the recipient names along with the expiration date.

How to Remove a Retention Policy for Email Messages and Email Folders?
Steps to remove a retention policy:
- In the admin center, navigate to Mailbox policies.
- Now select the user and select the retention policy as [No policy].
![Selecting the retention policy as [No policy]](//www.cloudfuze.com/wp-content/uploads/2026/06/Selecting-the-retention-policy-as-No-policy.png)
- Then, right click on message and select assign policy. Now select “Use parent folder policy”. Now the policy will be removed.
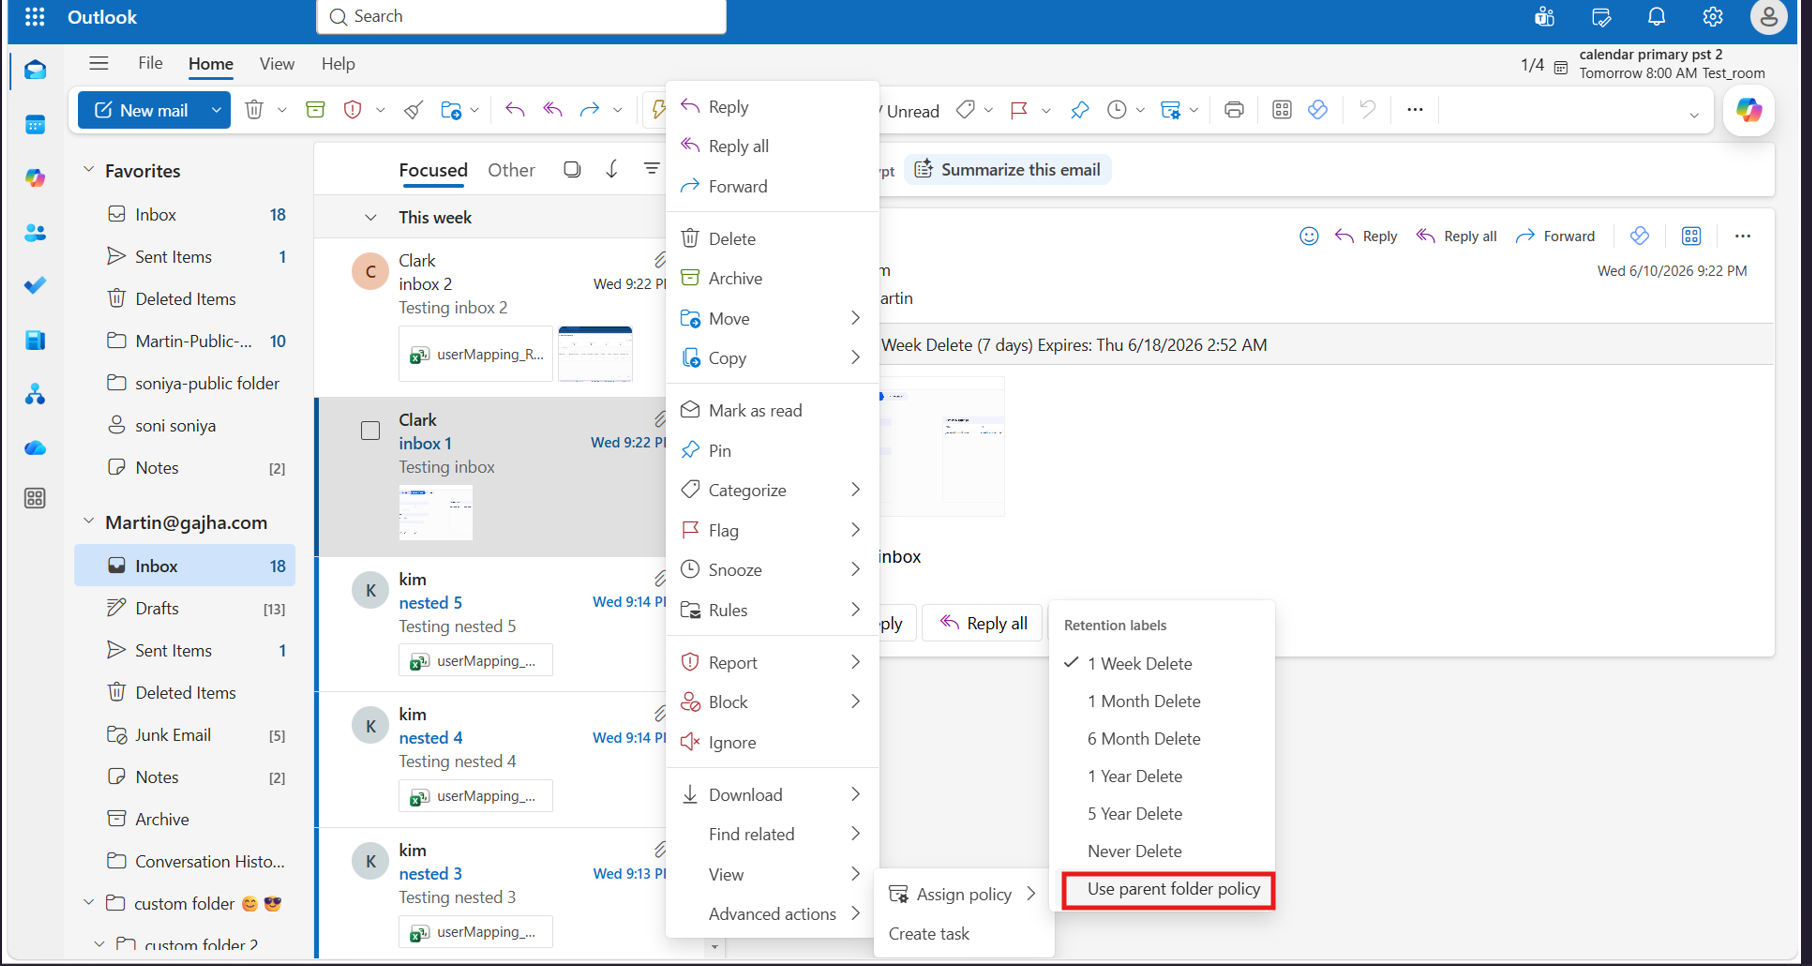
- Likewise, you can remove the retention policy for email folders.
![Selecting the retention policy as [No policy]](https://www.cloudfuze.com/wp-content/uploads/2026/06/Selecting-the-retention-policy-as-No-policy.png.webp)


Best Practices to Follow When Configuring Retention Policies
You can get the most from Outlook and Microsoft 365 retention policies when you follow best practices. Document why you created each retention policy and what it retains. Test a retention policy on a small scope before you roll it out broadly. Avoid overlapping retention policies that conflict.
Use a retention policy to assign the same retention settings for content at a site or mailbox level and use a retention label to assign retention settings at an item level (folder, document, email). Review your retention settings on a schedule as regulations change.
Final Thoughts
Setting clear Outlook and Microsoft 365 retention policies helps you secure your data. Ensure proper licensing rules and compliance for complete governance. As your governance needs grow beyond native settings, CloudFuze Manage can help you show a full overview of your cloud environment by helping you control data, permissions, and security settings.
If you’re interested in right-sizing your licenses, talk to our experts and get a free demo of our platform.
Frequently Asked Questions
1. What is the difference between a retention policy and a retention label in Microsoft 365?
A retention policy applies to all locations, like all Exchange mailboxes or SharePoint sites. A retention label applies to individual items, such as a single email or document.
2. Where do I create Outlook and Microsoft 365 retention policies?
You can create Outlook and Microsoft 365 retention policies in the Microsoft Purview portal under Data lifecycle management > Retention policies.
3. How long does it take for a retention policy to take effect?
When you create and submit a retention policy, it can take up to seven days for the retention policy to be applied. For more information, check out the official page here.
4. What happens when two retention policies apply to the same content?
Microsoft 365 follows a precedence order. Retention generally takes priority over deletion, and when periods differ, the longest retention period is given priority. This prevents content from being deleted earlier than any applicable rule allows.

