Microsoft Rolls Out Personal Vault Feature for Personal OneDrive Users
Microsoft has taken OneDrive’s security to a new level by introducing a “Personal Vault” feature to the personal users of OneDrive.
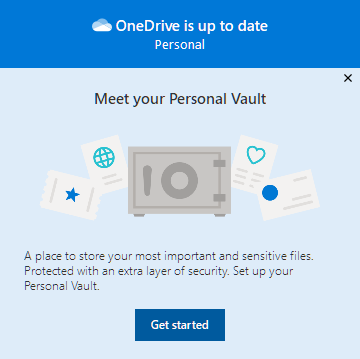
What is Personal Vault in OneDrive?
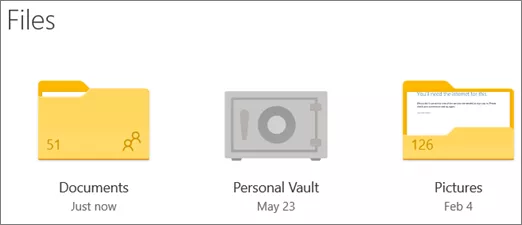
Personal Vault is a highly secure area within OneDrive that is primarily meant for storing sensitive documents or files. In simple words, it is just yet another folder within OneDrive root. Unlike other folders, the vault is protected by two-factor authentication. Even if a OneDrive account has multi-factor authentication enabled at the login level, one still needs an additional MFA to be able to access Personal Vault.
How to Enable Personal Vault in OneDrive?
Keep in mind that Microsoft hasn’t rolled out Personal Vault feature to users in some countries. If you are among those users who have received the Personal Vault feature, you would already be seeing it in your OneDrive dashboard. If you didn’t find it, you need to spend more time to explore the feature.
Here are steps to upload files or folders to Personal
- Enable Personal Vault
- Once you read about Personal Vault, click on Next button .
- You will get a verify your identity dialog box, where you can verify your account.
- Choose the verification method like a text message on your phone or email, code is sent to the particular option you choose.
Here are steps to upload files or folders to Personal
Those who have office 365 Home or Personal subscription are eligible to add several files. Whereas, others can only add up to three files in your Personal Vault.
- Go to your OneDrive cloud, start selecting a folder of Personal Vault.
- Sign in with a two-factor authentication
- Click on the Upload button
- Select the file you want to upload and click on open
Steps to Move Files to Personal Vault
You can easily transfer files from OneDrive to your Personal Vault.
- Select a Personal Vault folder in OneDrive
- Select the identity verification method for security purpose for example: if you select Text, code will be sent on your phone
- Select move option
- Click on Move items button where the files transfer into Personal Vault
How to Unlock your Personal vault
Personal Vault automatically locks, even when you are not active. When it comes to Web, personal Vault itself locks after 20 minutes when the time you stop using it. When it comes to the mobile app, it automatically locks after 3 minutes. Here are some steps on how it unlocks.
- Select Personal Vault folder on your OneDrive
- Verify your identity by choosing a two-factor authentication
- You can unlock your Personal Vault with the Microsoft Authenticator app. Internet access is not necessary to generate an access code
Steps to Lock Your Personal Vault
You are eligible to lock your Personal Vault at any time
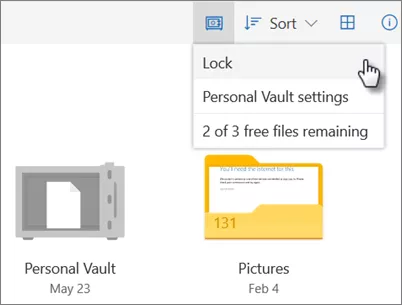
- Select Personal Vault folder in Your OneDrive
- Click on Lock option in the Personal vault options icon
Disable Personal Vault
Disabling Personal Vault option delete your files permanently in the Personal Vault. Once deleted files won’t be able to recover.
- Go to OneDrive, click on settings options and then select Personal Vault place on the left side of the navigation
- Select Disable Personal Vault slider to disable Personal Vault
- Select Disable option to delete all files and folders inside Personal Vault
- Warns before you Disable your Personal vault because once the files are deleted won’t be able to restore them again.

Leave A Comment