
Single-User Box to Google Drive Migration Tutorial
If you are a consumer user of Box cloud storage service and planning to migrate your content to Google Drive on a temporary or permanent basis, here the tutorial that helps you speed up the migration. Just to let you know, CloudFuze is a cloud data migration tool that helps individual users and businesses migrate their data from one cloud service to another.
Box to Google Drive Migration Prerequisites
- CloudFuze Account with a subscription (Free trial available to test the service)
- Box account login credentials
- Google Drive account login credentials
Step 1: Create a CloudFuze Account
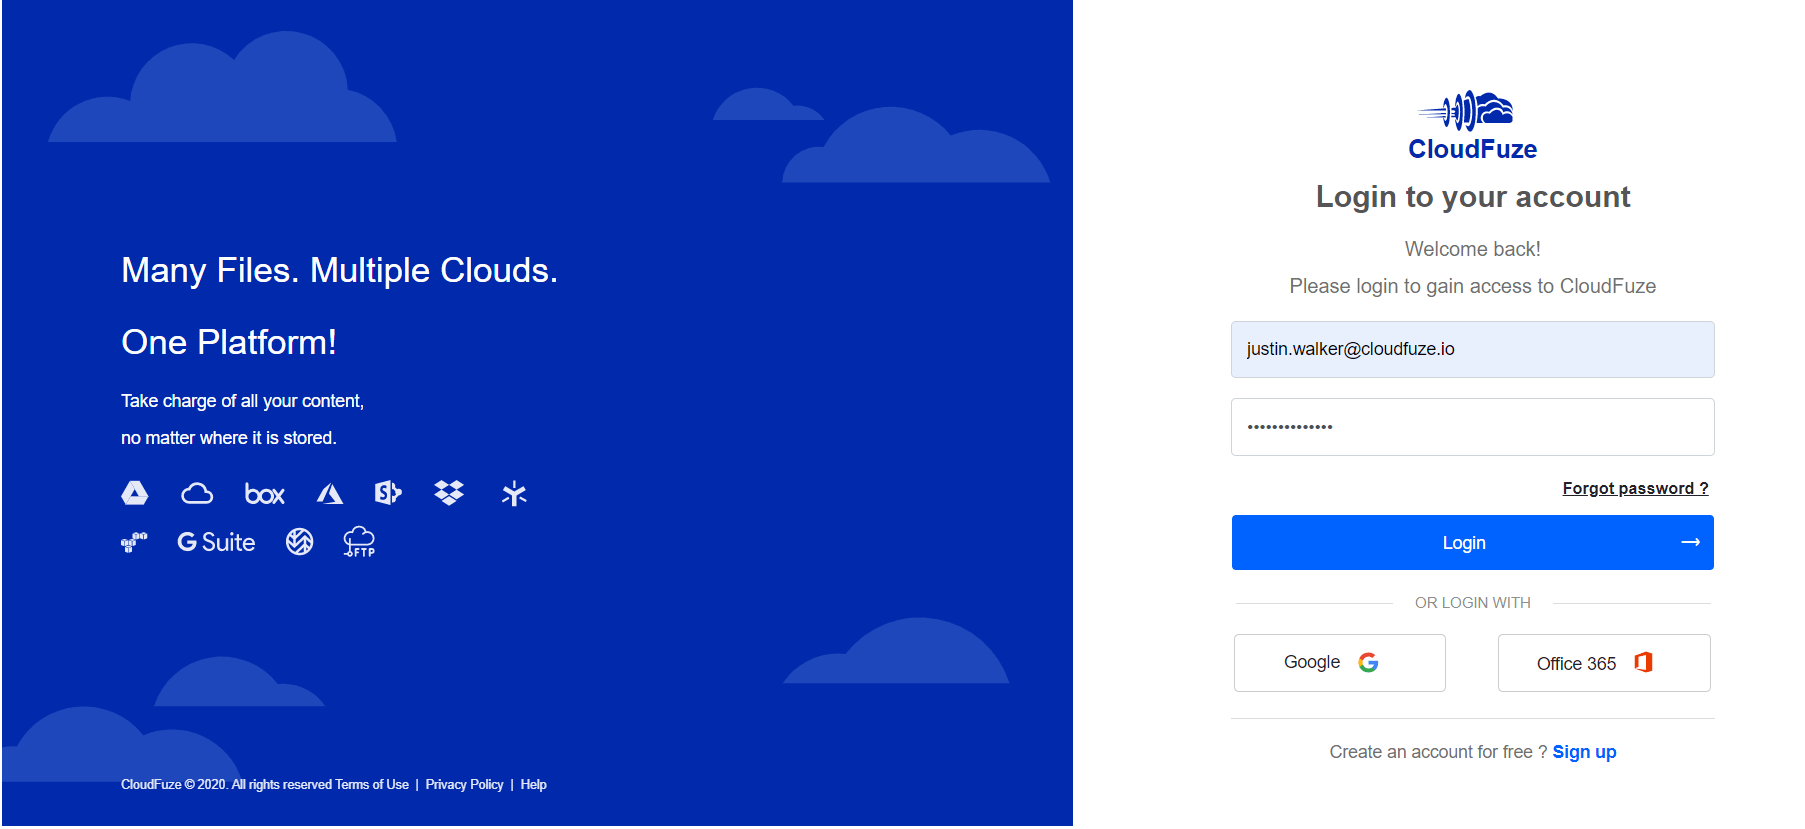
Go to webapp.cloudfuze.com and create a CloudFuze account. CloudFuze offers a free trial for users who wish to test the service before using it.
Step 2: Add Box Account to CloudFuze
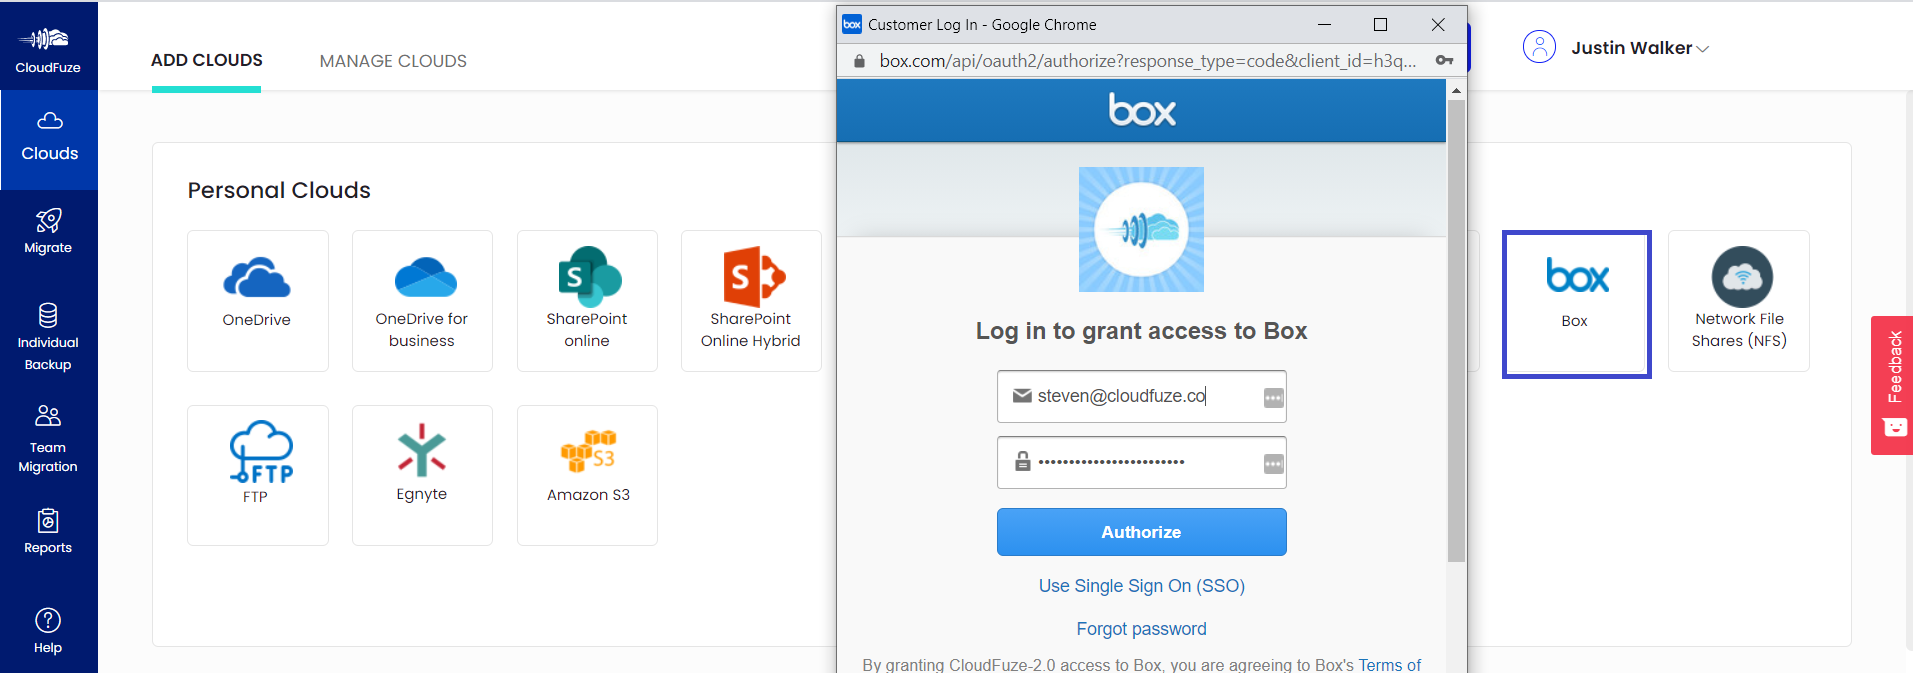
Locate and click on the Box logo listed under the personal clouds and enter your login credentials.
Step 3: Add Your Google Drive Account too
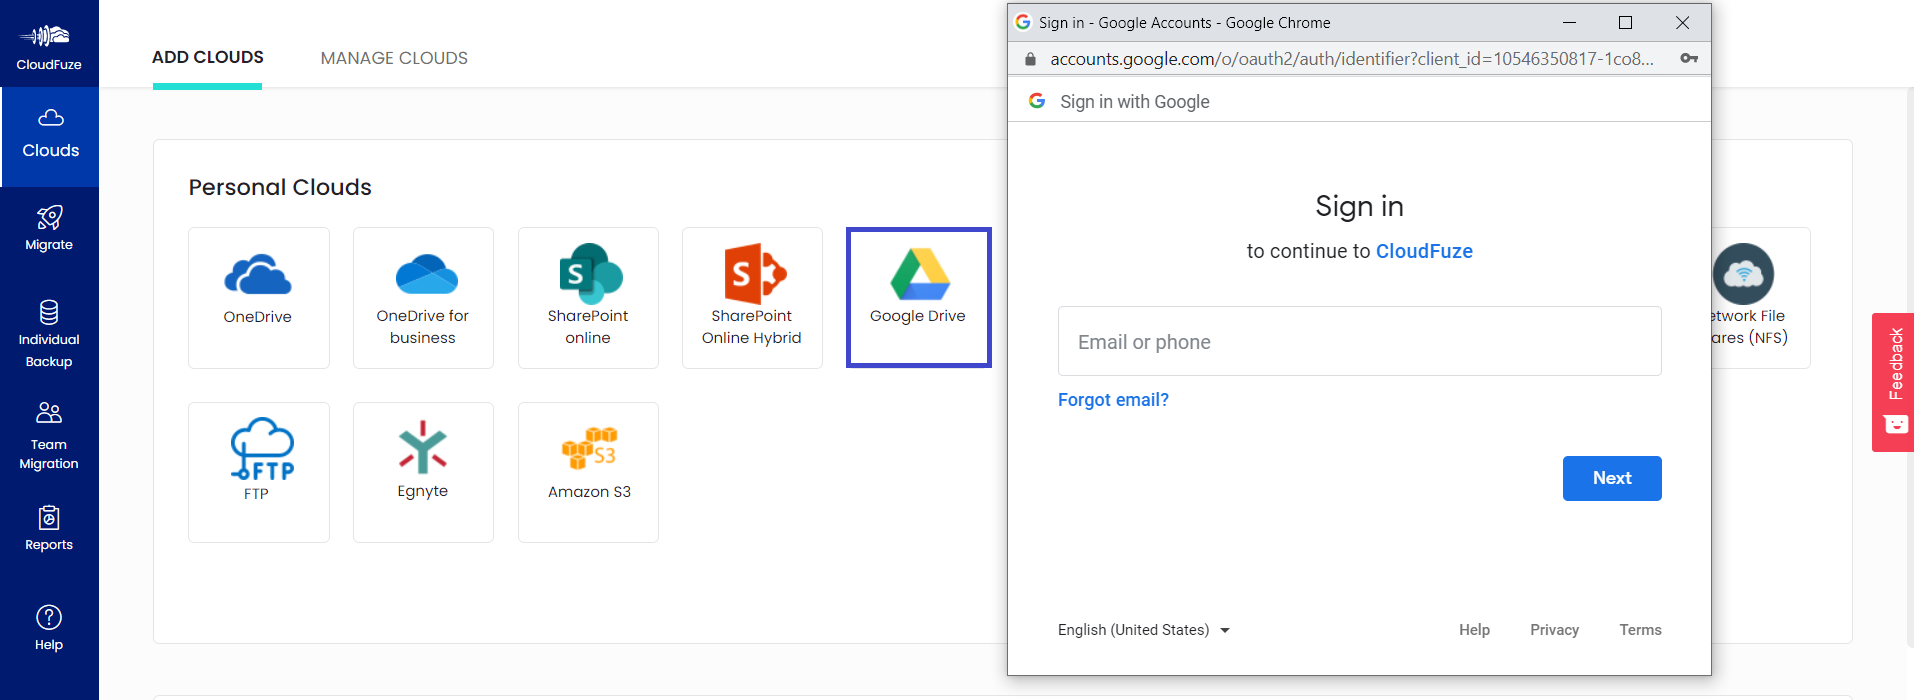
Now click on the Google Drive logo from the same personal clouds list and enter your Google account login details.
Step 4: Allow Google Drive Access to CloudFuze
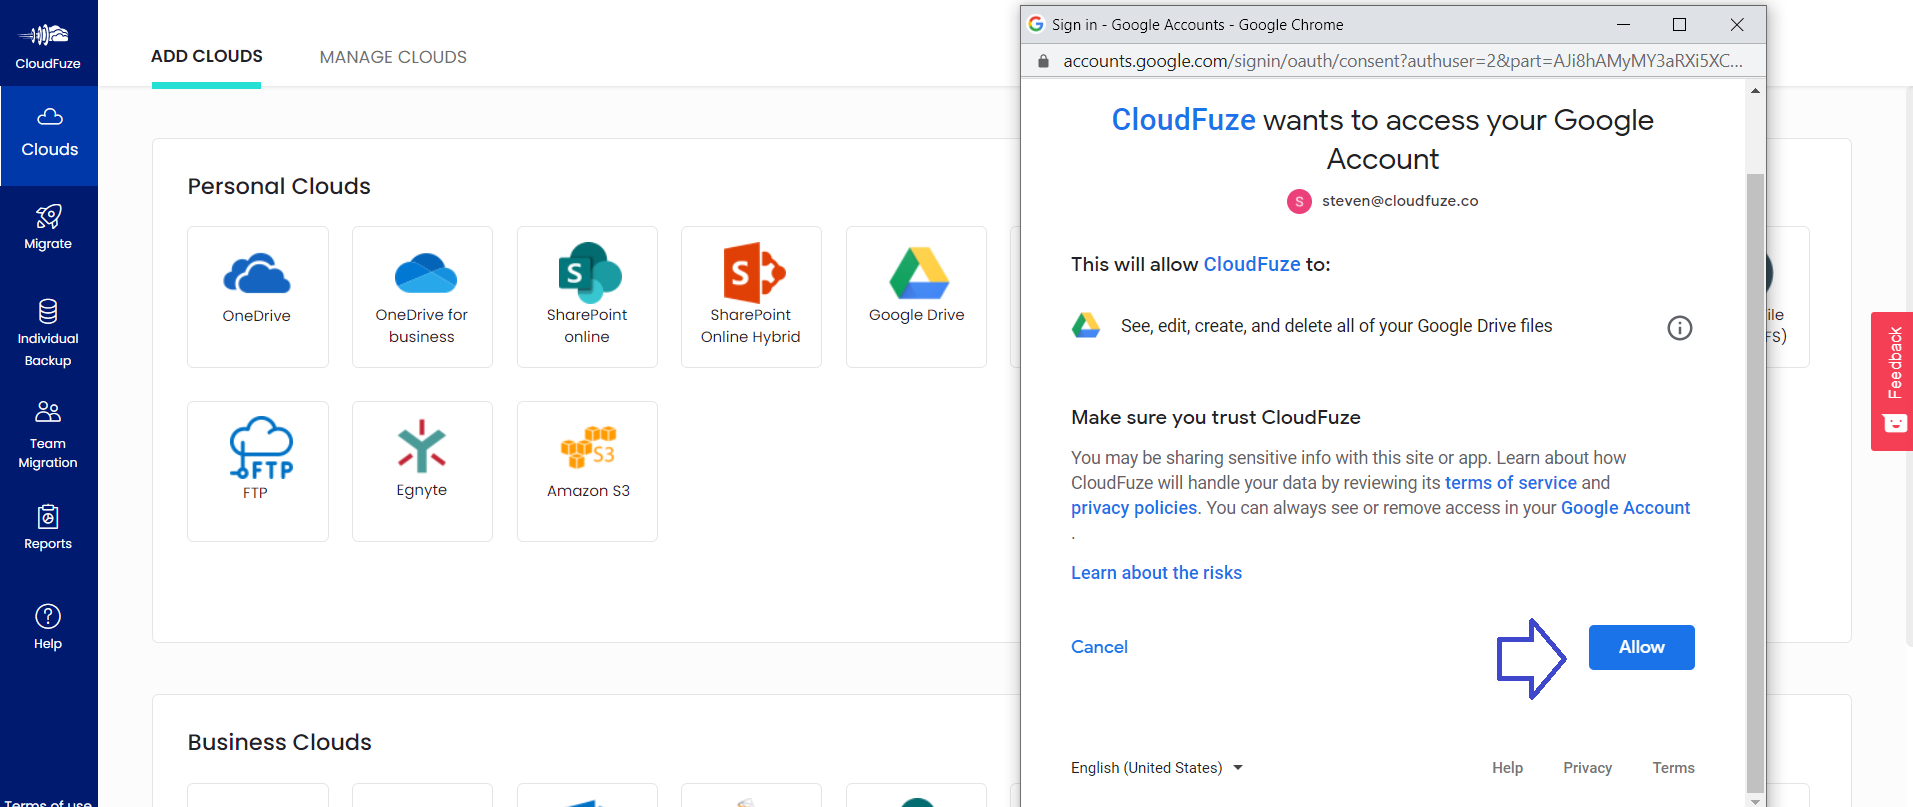
Click on the Allow button as seen in the image and that completes the cloud adding process.
Step 5: Verify the Cloud-Adding Process
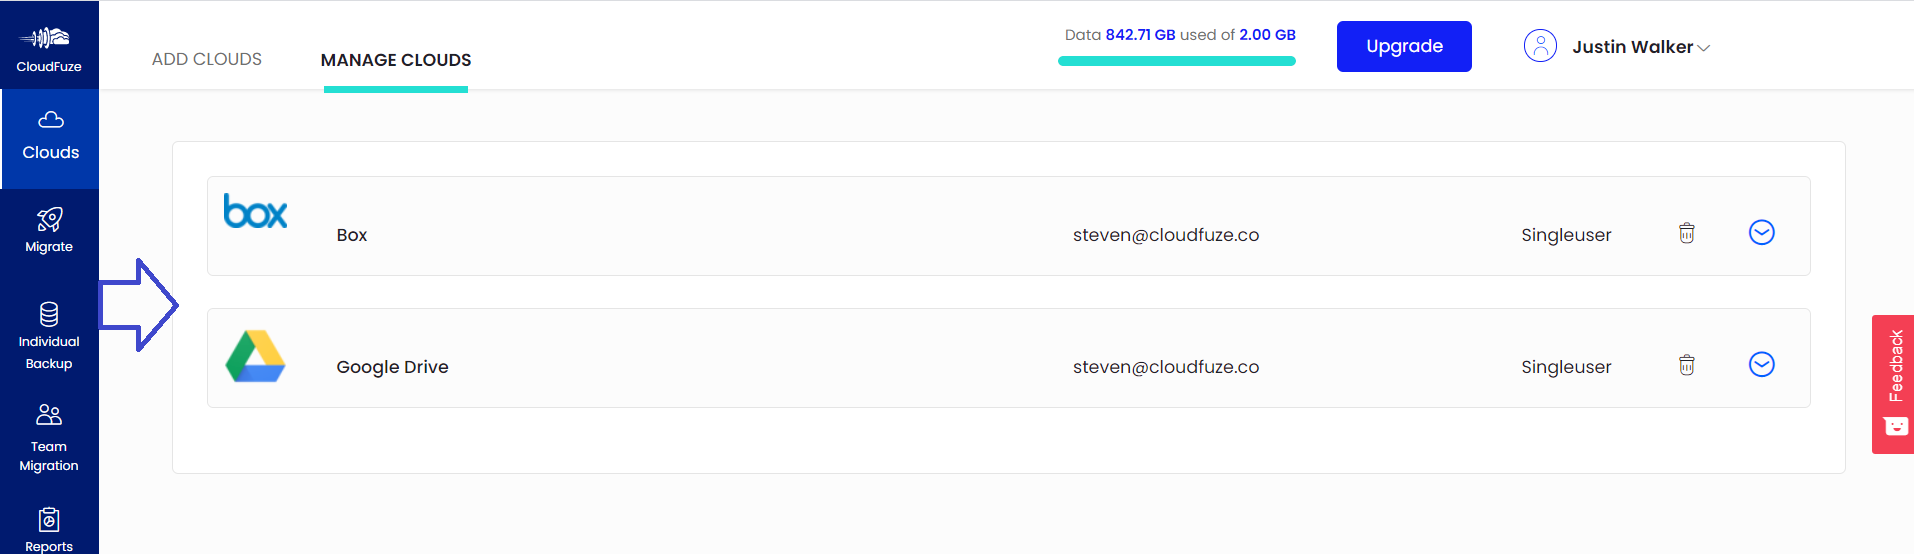
Head to the Clouds section by clicking on the cloud icon in the menu bar on the left. Go to the Manage Clouds tab from there. You should be able to see both Box to Google Drive accounts added there.
Step 6: Start the Migration
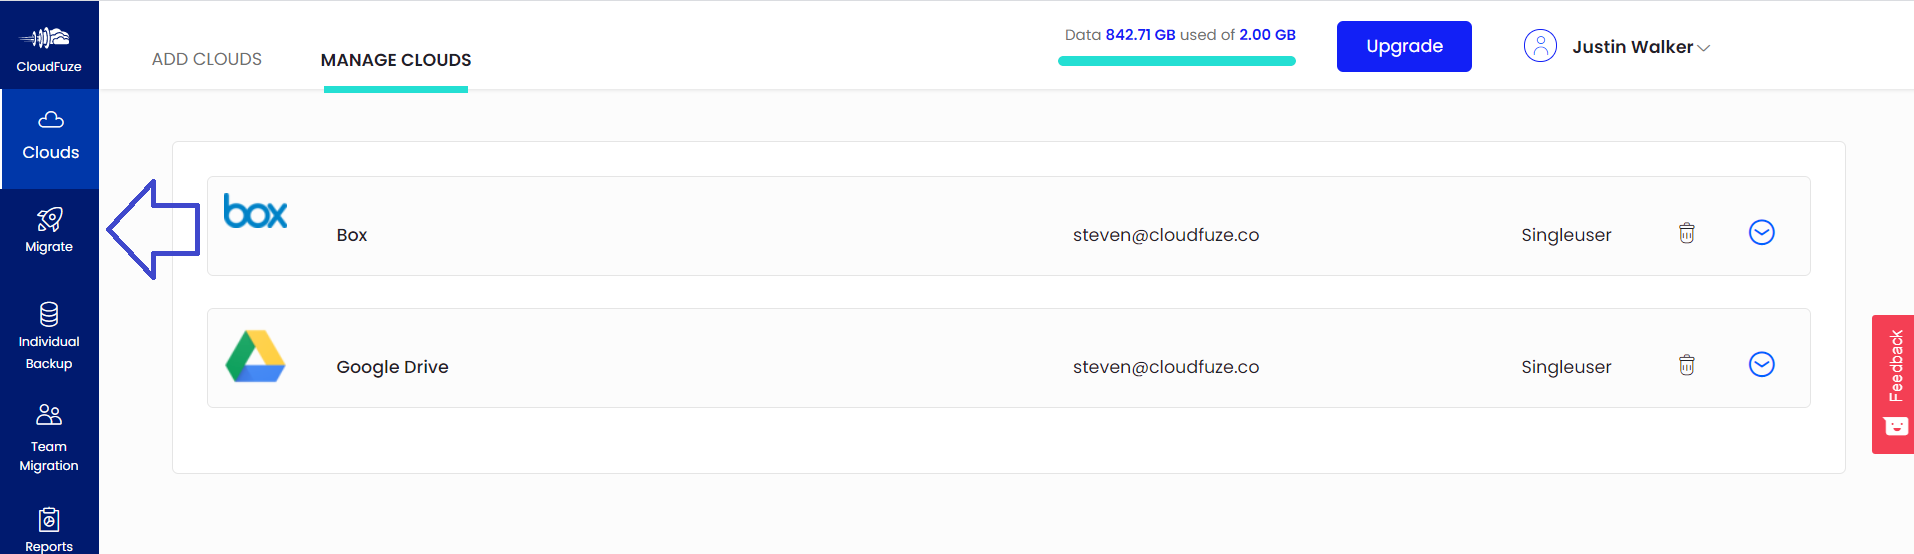
Click on the Migrate button. This will not start migration right away but will initiate the migration process. You need to configure a few options before the actual file transfer begins.
Step 7: Select Source and Destination Accounts
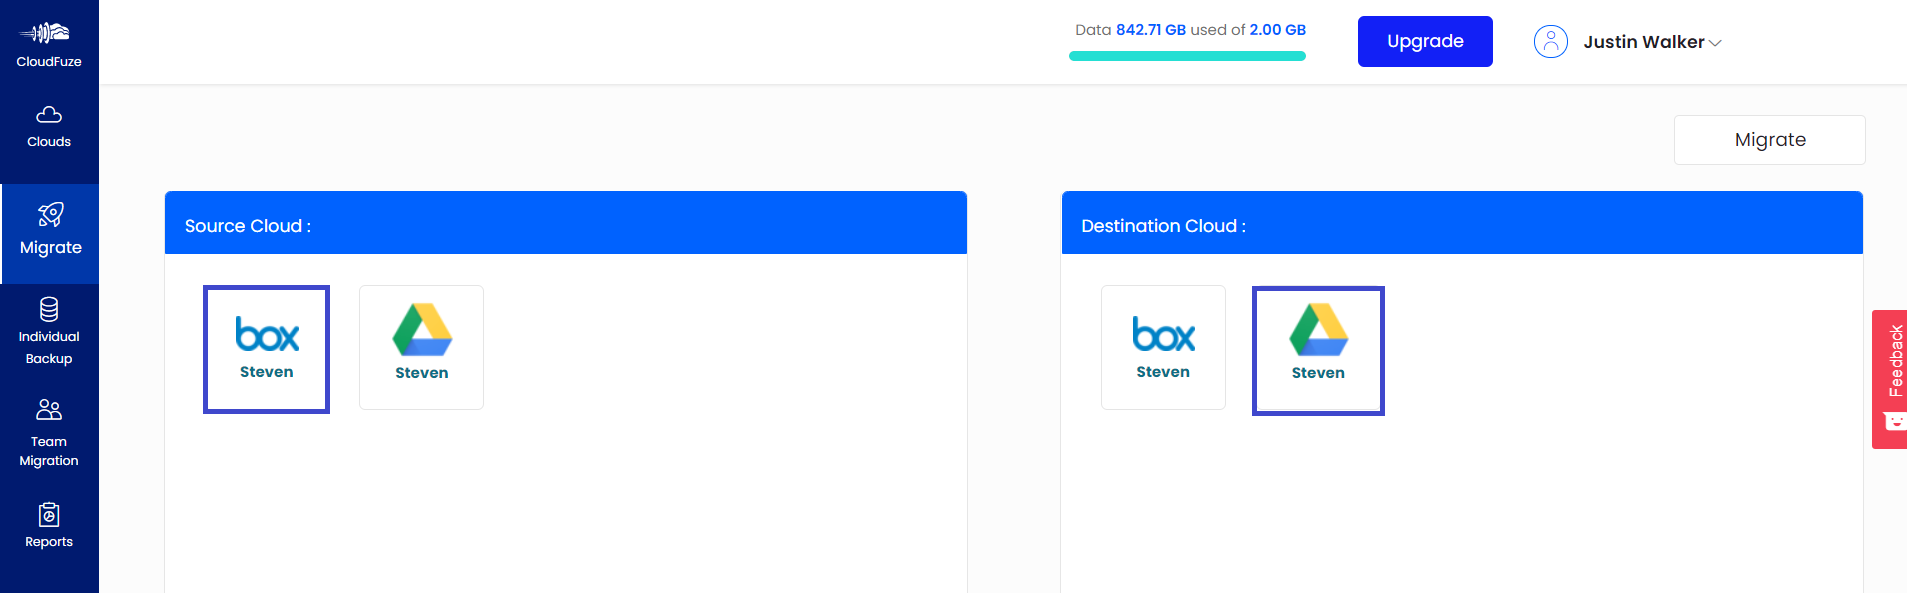
Since you are trying to migrate from Box to Google Drive, Box should be your source account and Google Drive should be the destination.
Step 8: Select Files that You Want to Migrate
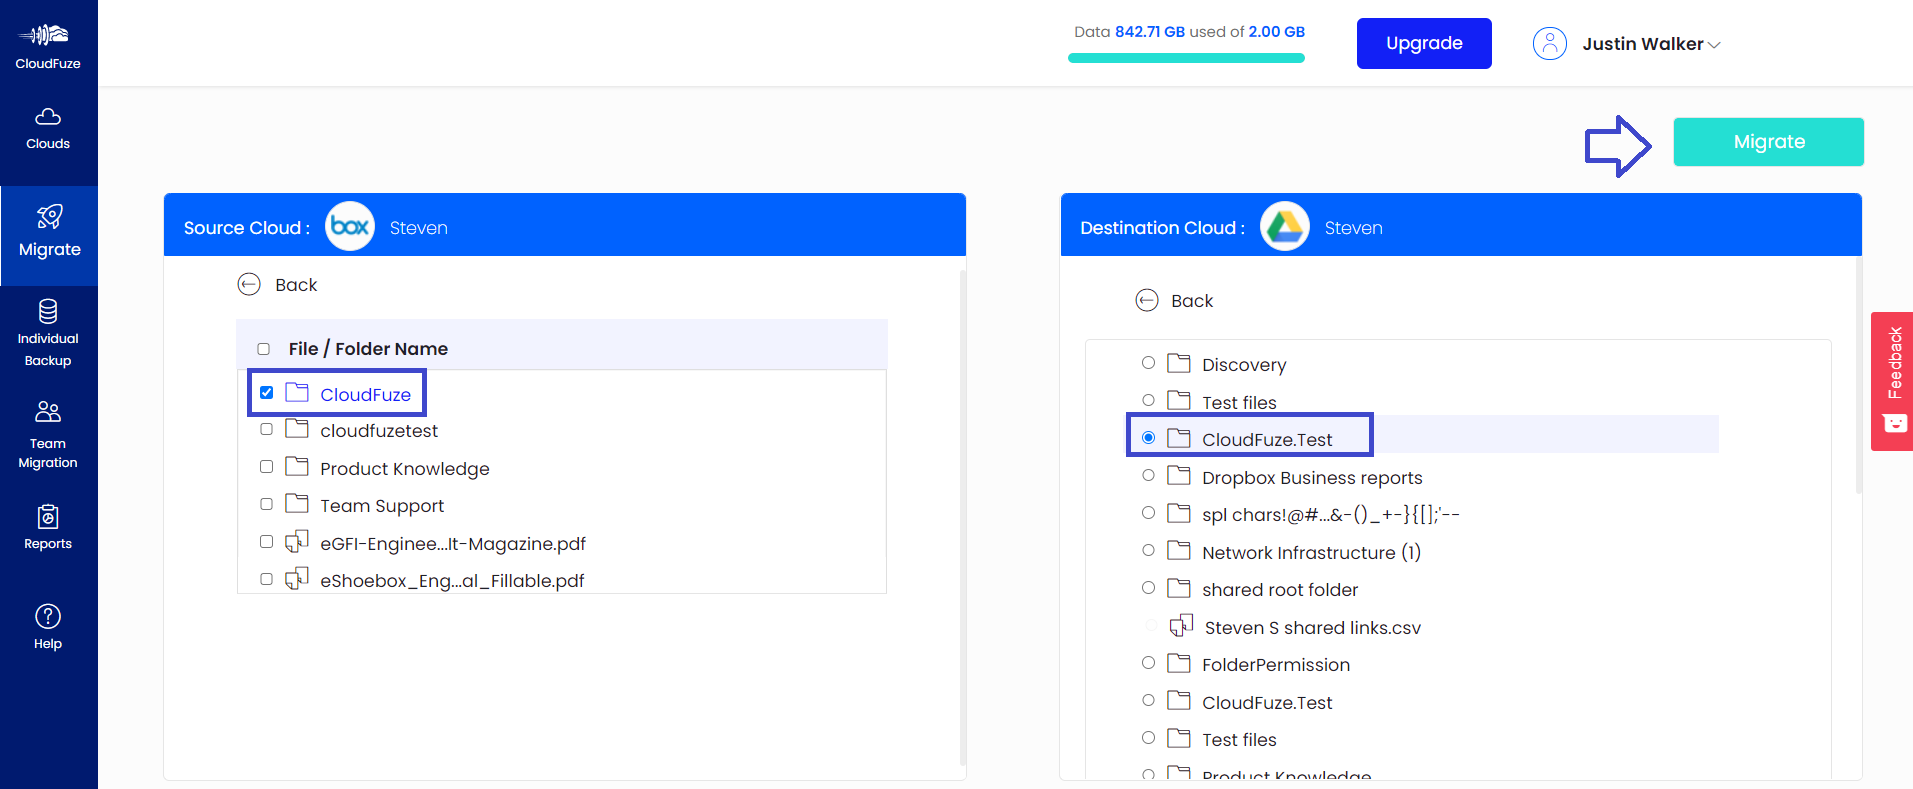
Choose all the files in the Box account that you want to migrate to Google Drive. You can select a few files or migrate all the content within your Box account.
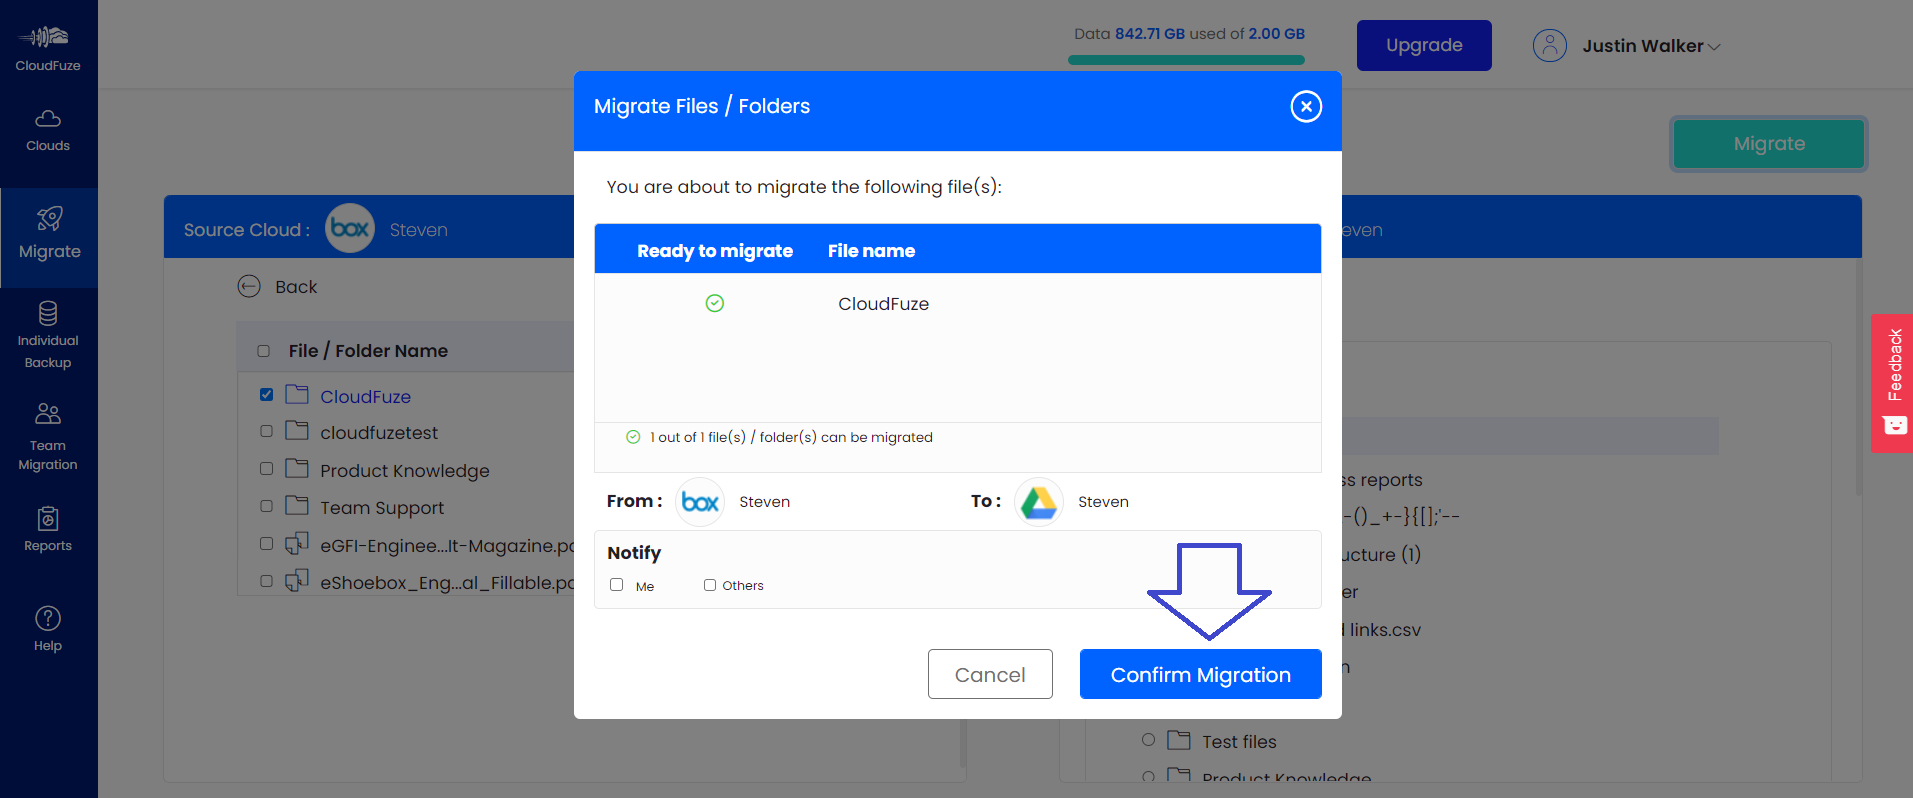
Step 9: Preview and Confirm Migration
Check everything in the preview dialog box. If it looks good, go ahead and click on the Start Migration button.
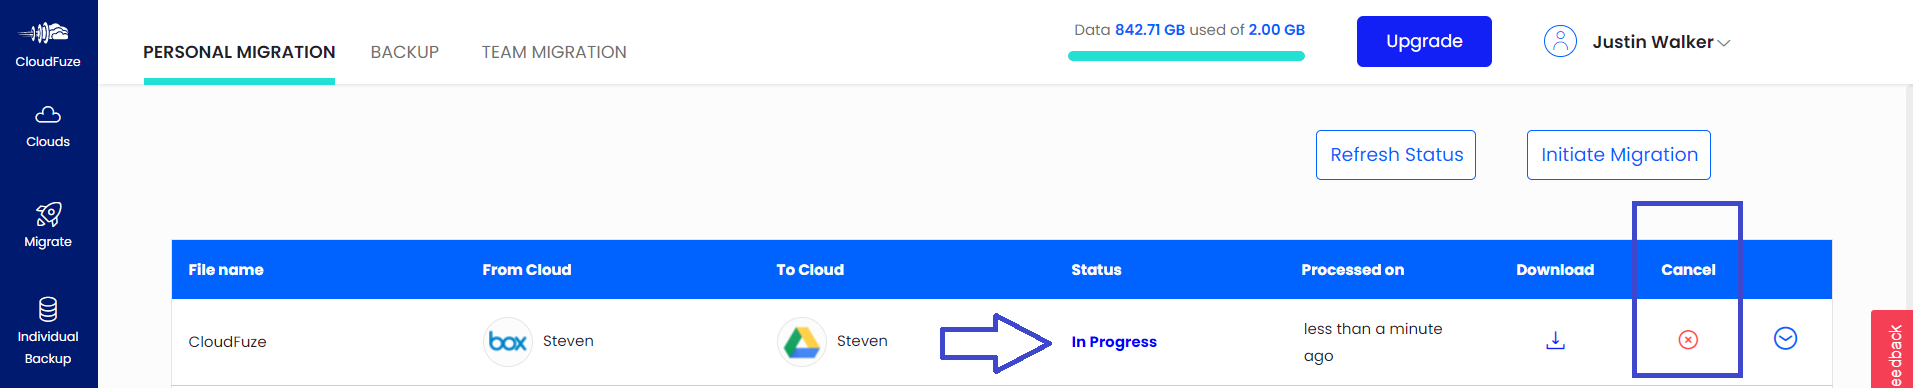
Step 10: Migration Is in Progress
During the file transfer process, CloudFuze displays the status as In-Progress. At this point, you can cancel the migration if you wish to. Remember, CloudFuze will not reverse migration happened until that point.
Step 11: Migration is Completed
Once all the files are migrated, CloudFuze changes the status of the migration to Processed. You can download the migration report to cross-verify the accuracy of migration.

About the Author: Arun Jyothi



