How to Create a Group in Yammer
Yammer is a Microsoft communication and collaboration service that comes as a part of the Office 365 business bundle. Microsoft acquired Yammer in 2012 for a whopping $1.2 billion. Yammer is like a social networking website for people belonging to an organization. One can post updates, create or join groups, follow your coworkers, and do much more. Learn how to get started with Yammer by creating a group.
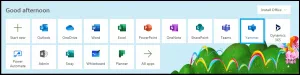
Step 1: Click on the Yammer Icon in Microsoft 365
Yammer is available to Office 365 subscribers. You will be able to locate and access Yammer from your Office 365 home page. After logging into your Office 365 account, click on the Yammer icon. This will open the Yammer portal in a new page.
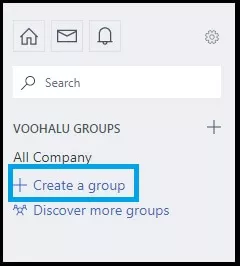
Step 2: Create a New group
Click on the + Create a Group link on the left navigation menu.
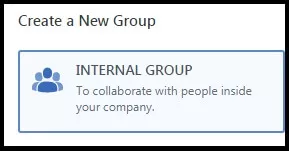
Step 3: Choose from Internal or External Groups
An internal group is meant for communicating with your coworkers. Whereas, an external group can have people from outside of the organization.
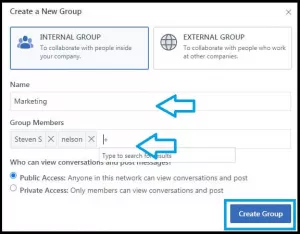
The below screenshot shows creating an internal group.
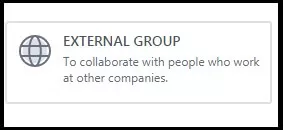
Step 4: Now, An External Group
As said earlier, an external group is used to collaborate with people who don’t work in your company. Check with your IT admin if you are planning to create an external group just to ensure data security.
Step 5: Enter Group Details
Enter the name of the group. Under group members, enter the email address of your coworkers.
Step 6: Explore Group Settings
A classification section can be seen if your group is Office 365 connected. You can change the classification by editing it and selecting a classification from the dropdown list.

Step 7: Share Something With Your Group
Share news or update with your group members.

We hope you found this article on Yammer helpful.

Leave A Comment