How to Transfer Files from Single-User Wasabi to SharePoint Online
Need to transfer your files from Wasabi to SharePoint Online? Try CloudFuze! CloudFuze migrates all your data in Wasabi to SharePoint Online effortlessly while saving you a lot of time and money. Please keep in mind that this guide talks about personal migration. If you are a business and need to migrate business data between Wasabi and SharePoint Online, please reach out to our support team.
Step 1: Create a CloudFuze Account
Go to webapp.cloudfuze.com and create an account with your email ID, Google ID, or an Office 365 account. If you already have a CloudFuze account, log in to the webapp using your account credentials.

Step 2: Add Your Wasabi Account
Locate the Wasabi icon under personal clouds and click on it. A popup appears where you need to enter your Wasabi login details.

Step 3: Authorize Wasabi Account
Enter admin credentials of your Wasabi account and click the Add button to complete the process.

Step 4: Add SharePoint Online
Locate the SharePoint Online icon in the personal clouds list and click on it.

Step 5: Authorize Your SharePoint Online Account
Authorize your Sharepoint Online account by entering admin credentials.

Step 6: Verify Cloud Adding Procedure
You can check whether clouds added or not by clicking on the Clouds icon and opening the Manage Clouds section.

Step 7: Start the Migration
To initiate migration, click on the Migrate icon in the menu bar on the left.

Step 8: Choose Source and Destination Clouds
Select Wasabi as the source cloud and Destination as SharePoint Online

Step 9: Select Data to Migrate
CloudFuze offers full root or selected content migrations. Choose the files or folders you wish to migrate.

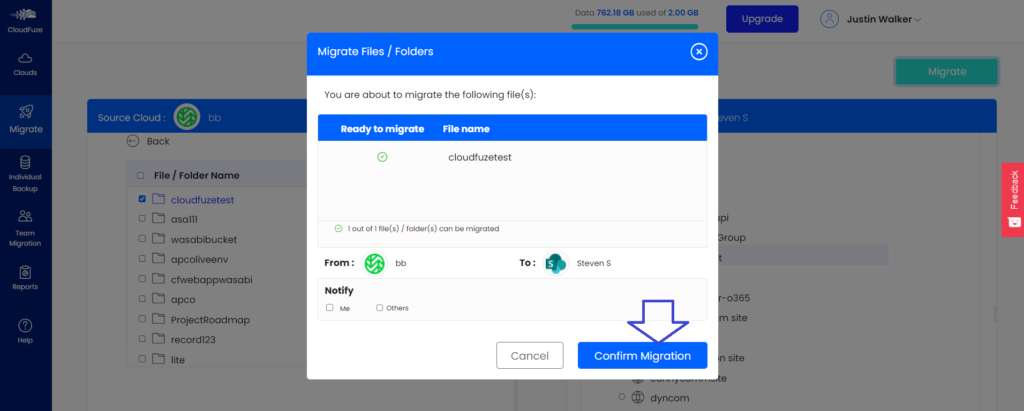
Steps 10: Preview and Confirm Migration
Preview your migration preferences and click on the Confirm Migration button.

Step 11: Migration Is in Progress
When the file transfer is in progress, CloudFuze displays that status as In Progress. At this time, you can cancel the migration if you wish to.

Step 12: Migration Has Been Completed
Once migration is completed, CloudFuze displays the status as Processed. You can download the migration report by clicking on the download icon.


Leave A Comment