How to Initiate Cloud File Migration with CloudFuze
Once the source and destination clouds are added, the next step is starting the migration. Follow the steps below to initiate the migration between your source and destination account.
Note: We took Dropbox and Google Drive as the source and destination clouds. The procedure remains the same for any cloud combination.
Migration Prerequisites:
- A CloudFuze Account
- Cloud File Migration
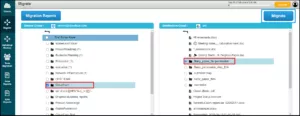
Step 1: Click on the Migrate Icon
Locate the Migrate icon in the menu on the left and click on it. This will take you to the page where you can select your clouds and start the migration.

Step 2: Select Source and Destination Clouds
Select your source clouds from the list of added clouds in the box on the left. Similarly, select the destination cloud.
Note: Be watchful on what you are selecting as the source and destination clouds. If you choose it wrongly, the data in your destination cloud will be moved to the source cloud.

Step 3: Select Content to be Migrated
If you would like to transfer specific folders, you can select them from the list.
If you, however, would like to transfer the entire data, click on the uppermost checkbox as shown in the below image.
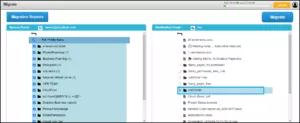
Now, click on the Migrate button that you can see on the upper right corner of the page.
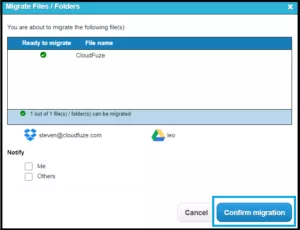
Step 4: Preview and Confirm Migration
Preview this migration confirmation and check if everything is right.
You can also get notified of the migration by clicking on the checkboxes listed under Notify.
- Me: You will receive migration reports in your email.
- Others: You can add more email addresses separated by comma to receive migration reports.
Click on the Confirm Migration button to start the migration.

Leave A Comment