CloudFuze User Guide:
Tutorial for Getting Started
Migrating across cloud platforms and governing SaaS and AI apps and agents should not be complicated. This simple user guide helps you get started with both of our solutions, including CloudFuze Migrate (for cloud migration) and CloudFuze Manage (SaaS and AI governance)
CLOUDFUZE MIGRATE
AI-Ready, Enterprise-Grade Cloud Migration
CloudFuze Migrate is an enterprise-grade cloud migration solution built for large enterprises, SMBs, and MSPs to migrate users, files, folders, chat messages, emails, and tenants across 40+ clouds. It positions organizations for secure AI adoption and transformation with AI-ready data migration.
- 1
Start a Trial
Click on the Free Trial button on the CloudFuze website.
- 2
Create a CloudFuze Account and Log In
Create a CloudFuze account or login if you already have one.
- 3
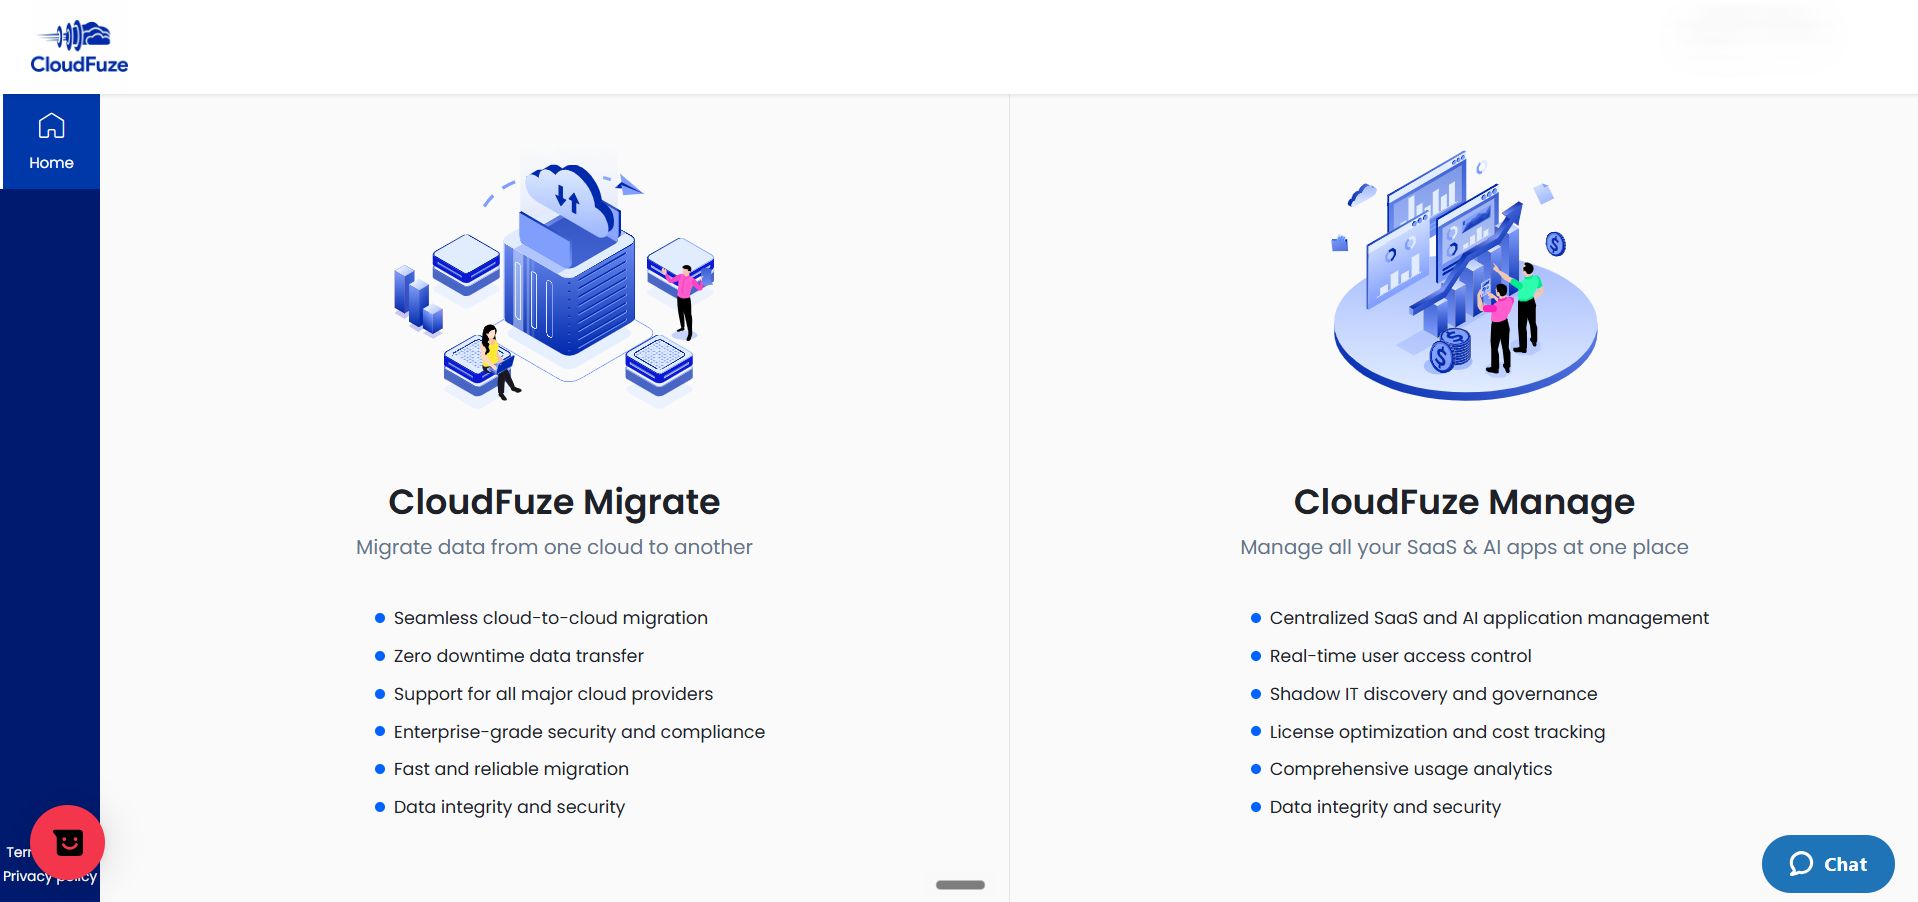
Choose the CloudFuze Migrate Tool Option
Choose the CloudFuze Migration option.
- 4
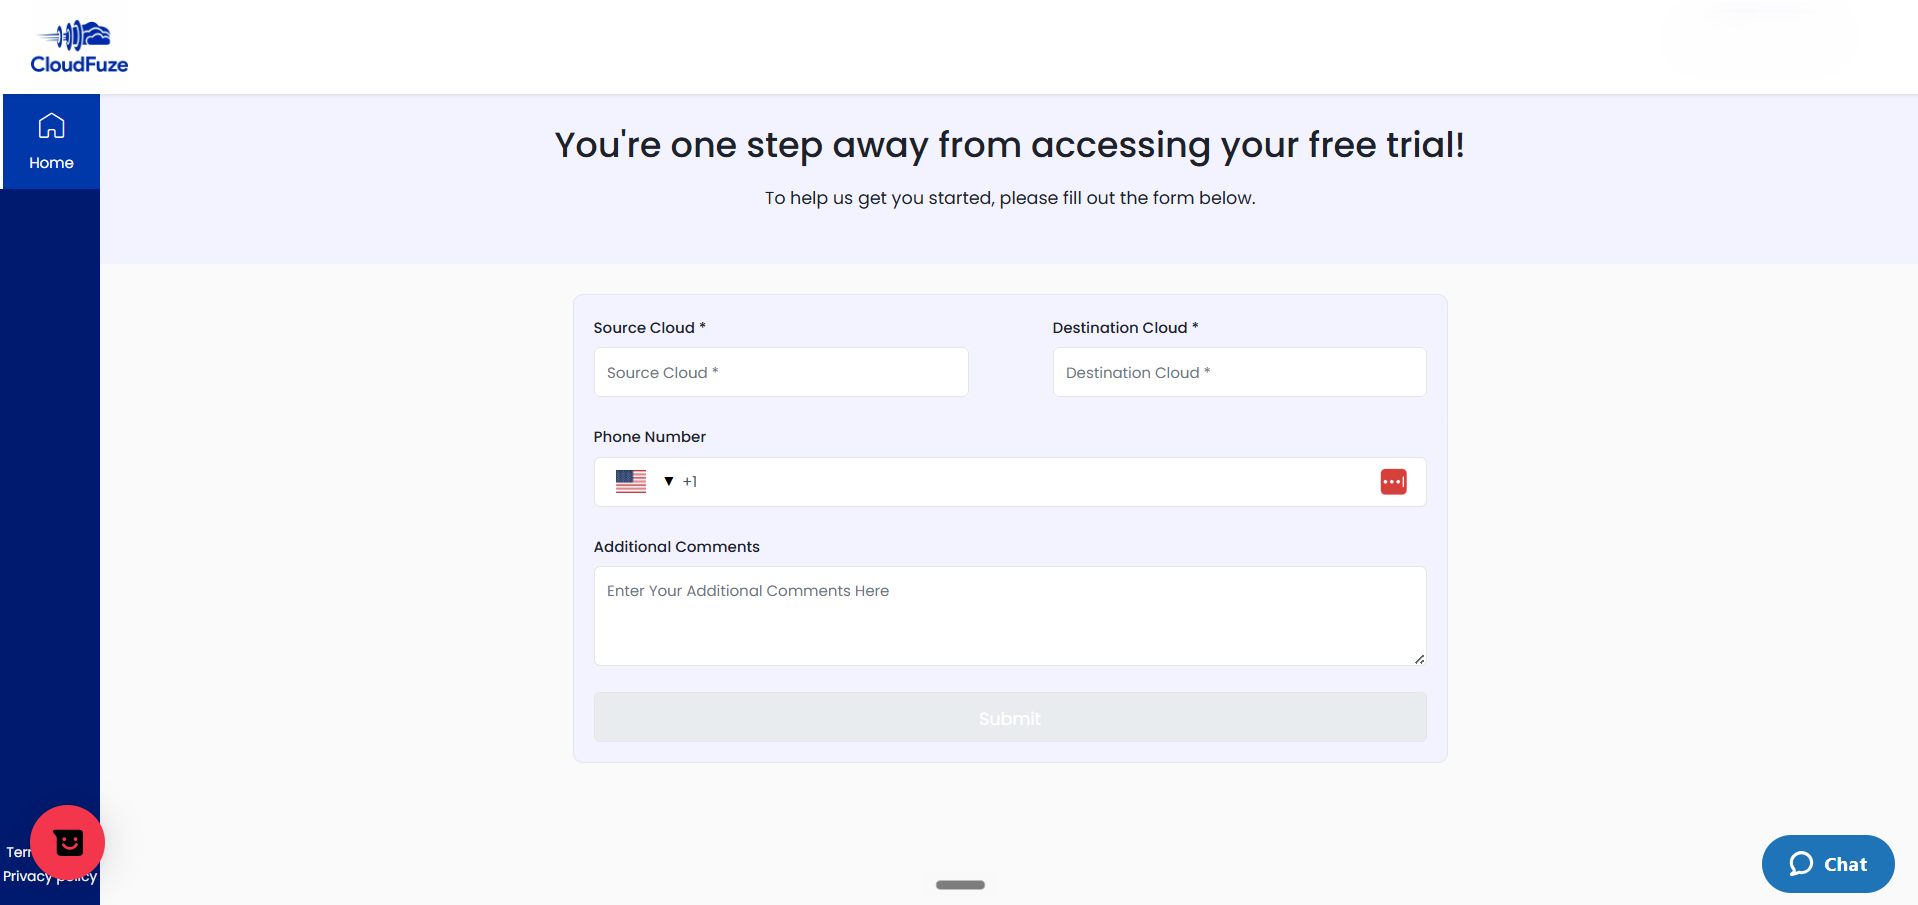
Share Your Requirements for A Trial
Fill in your migration requirements to request a trial or a demo.
- 5
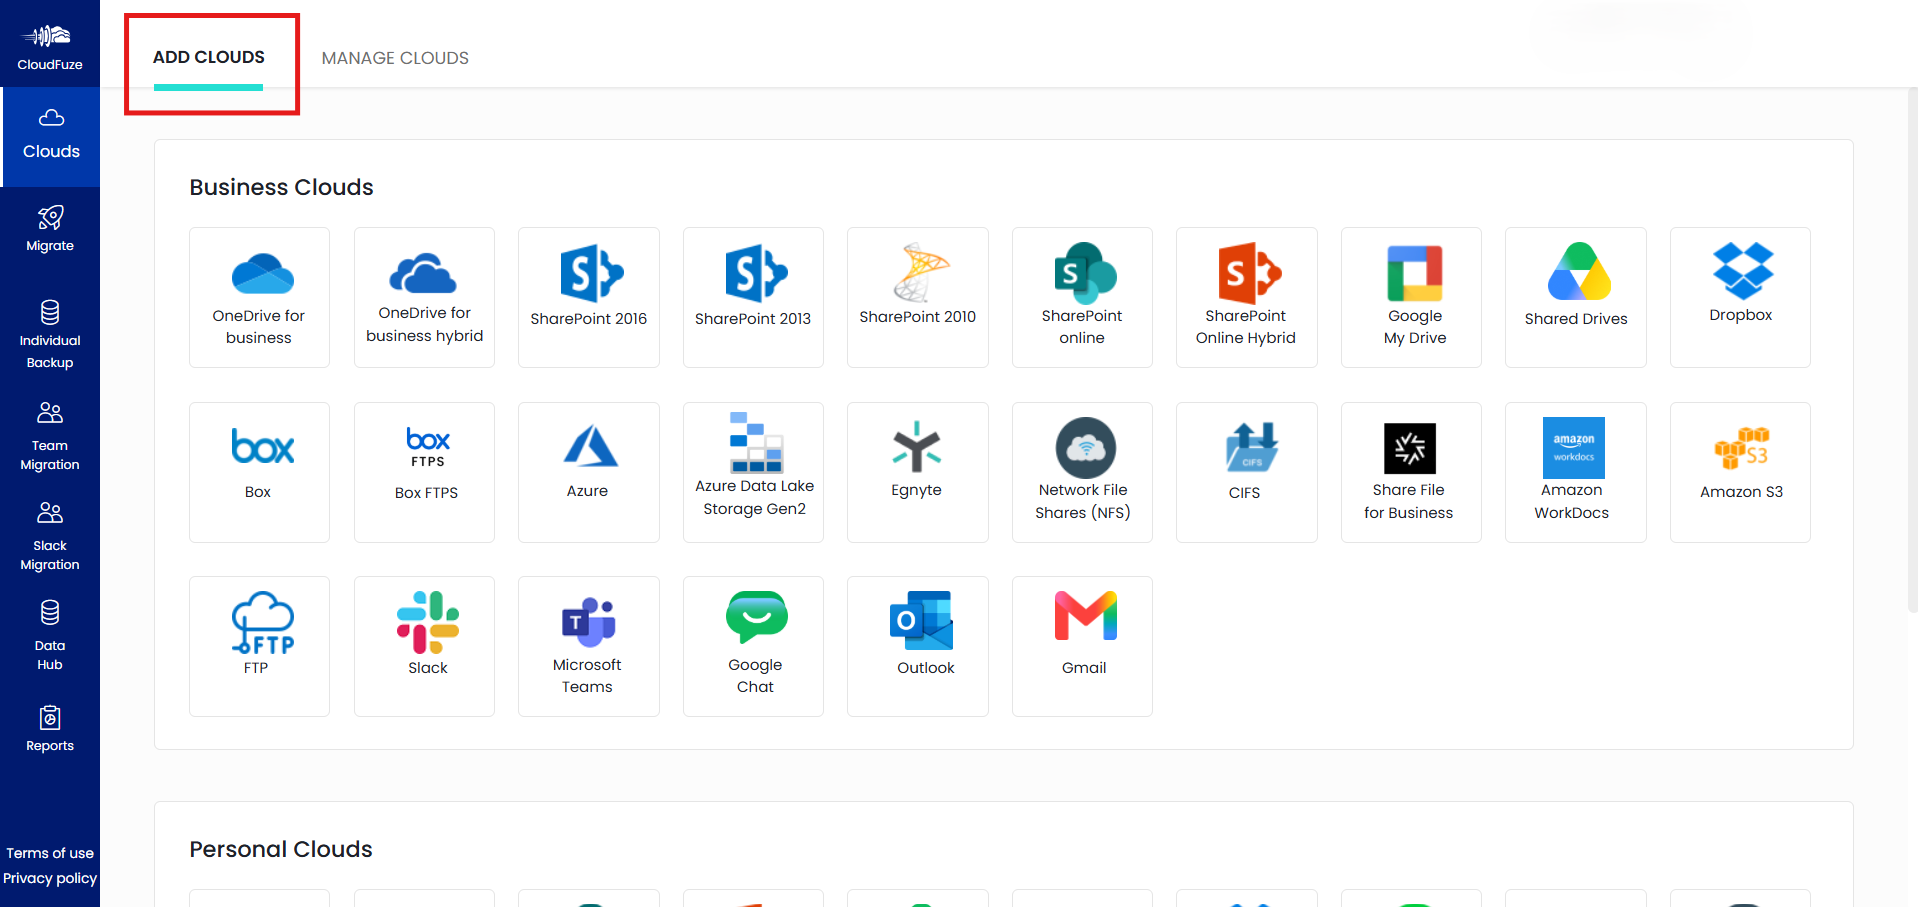
Add the Clouds to Migrate
In the demo or trial, you can view or access the CloudFuze Migrate dashboard. To get started, visit the Clouds panel and under the Add Clouds section, add the clouds that you want to migrate.
- 6
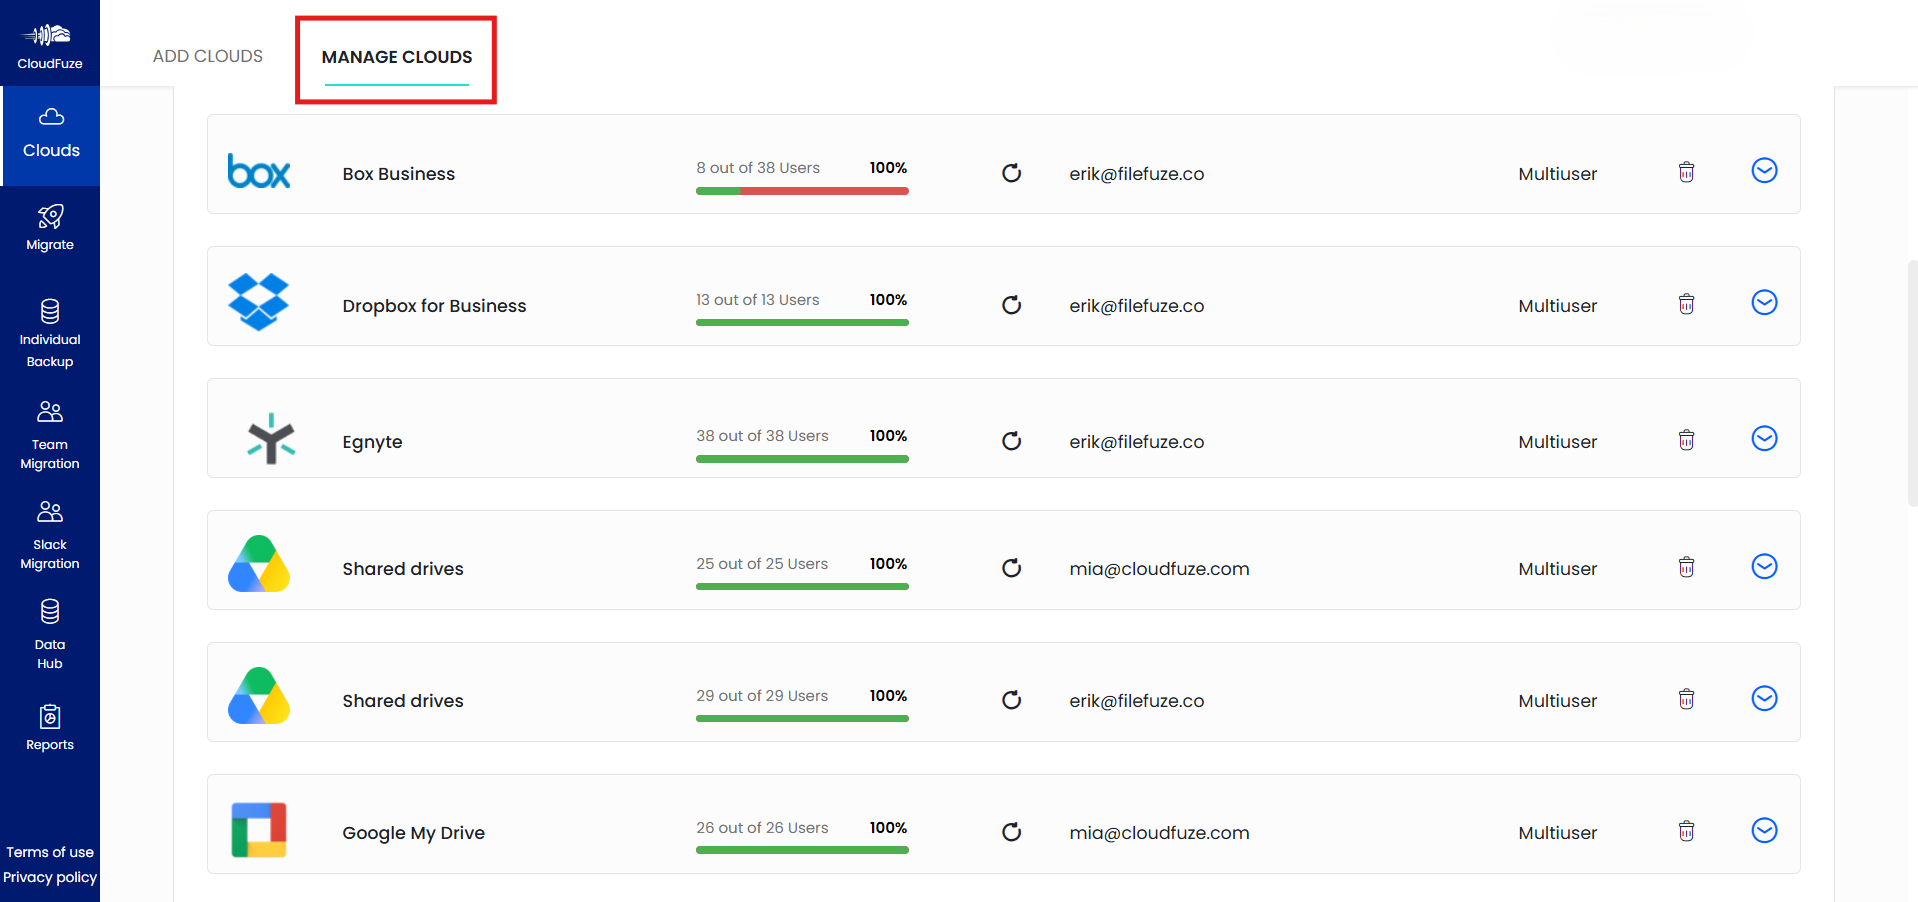
Validate the Added Clouds
Once done, switch to the Manage Clouds tab to check the clouds that you have recently added.
- 7
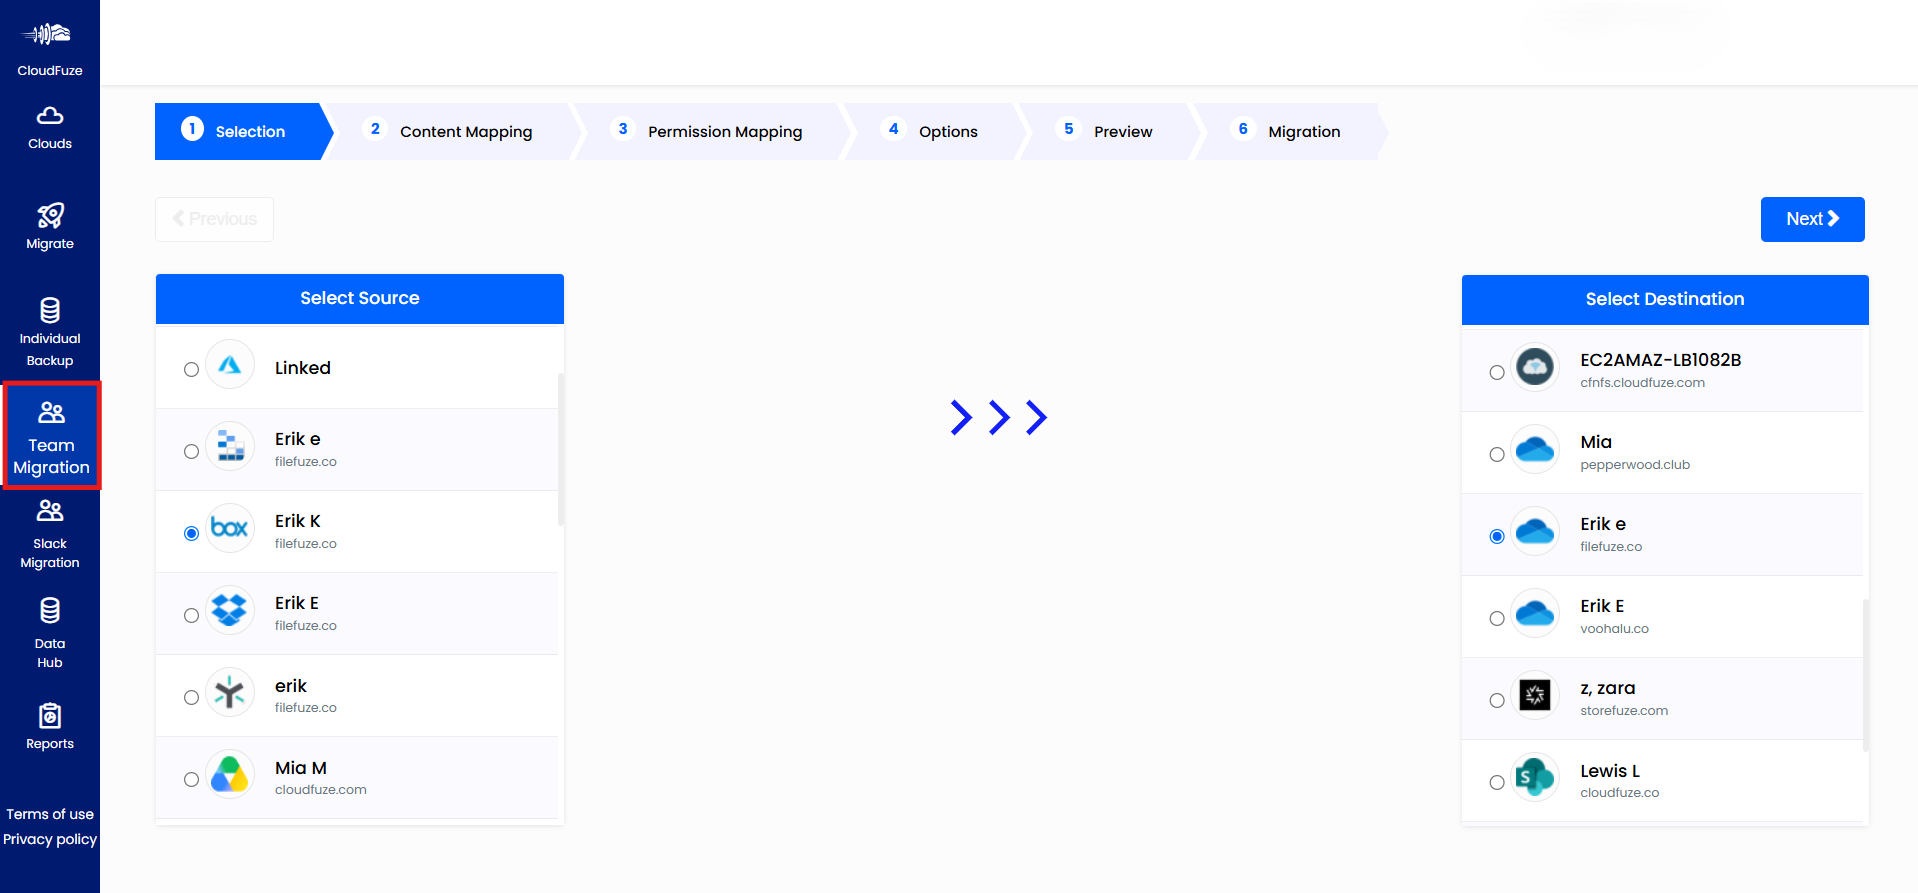
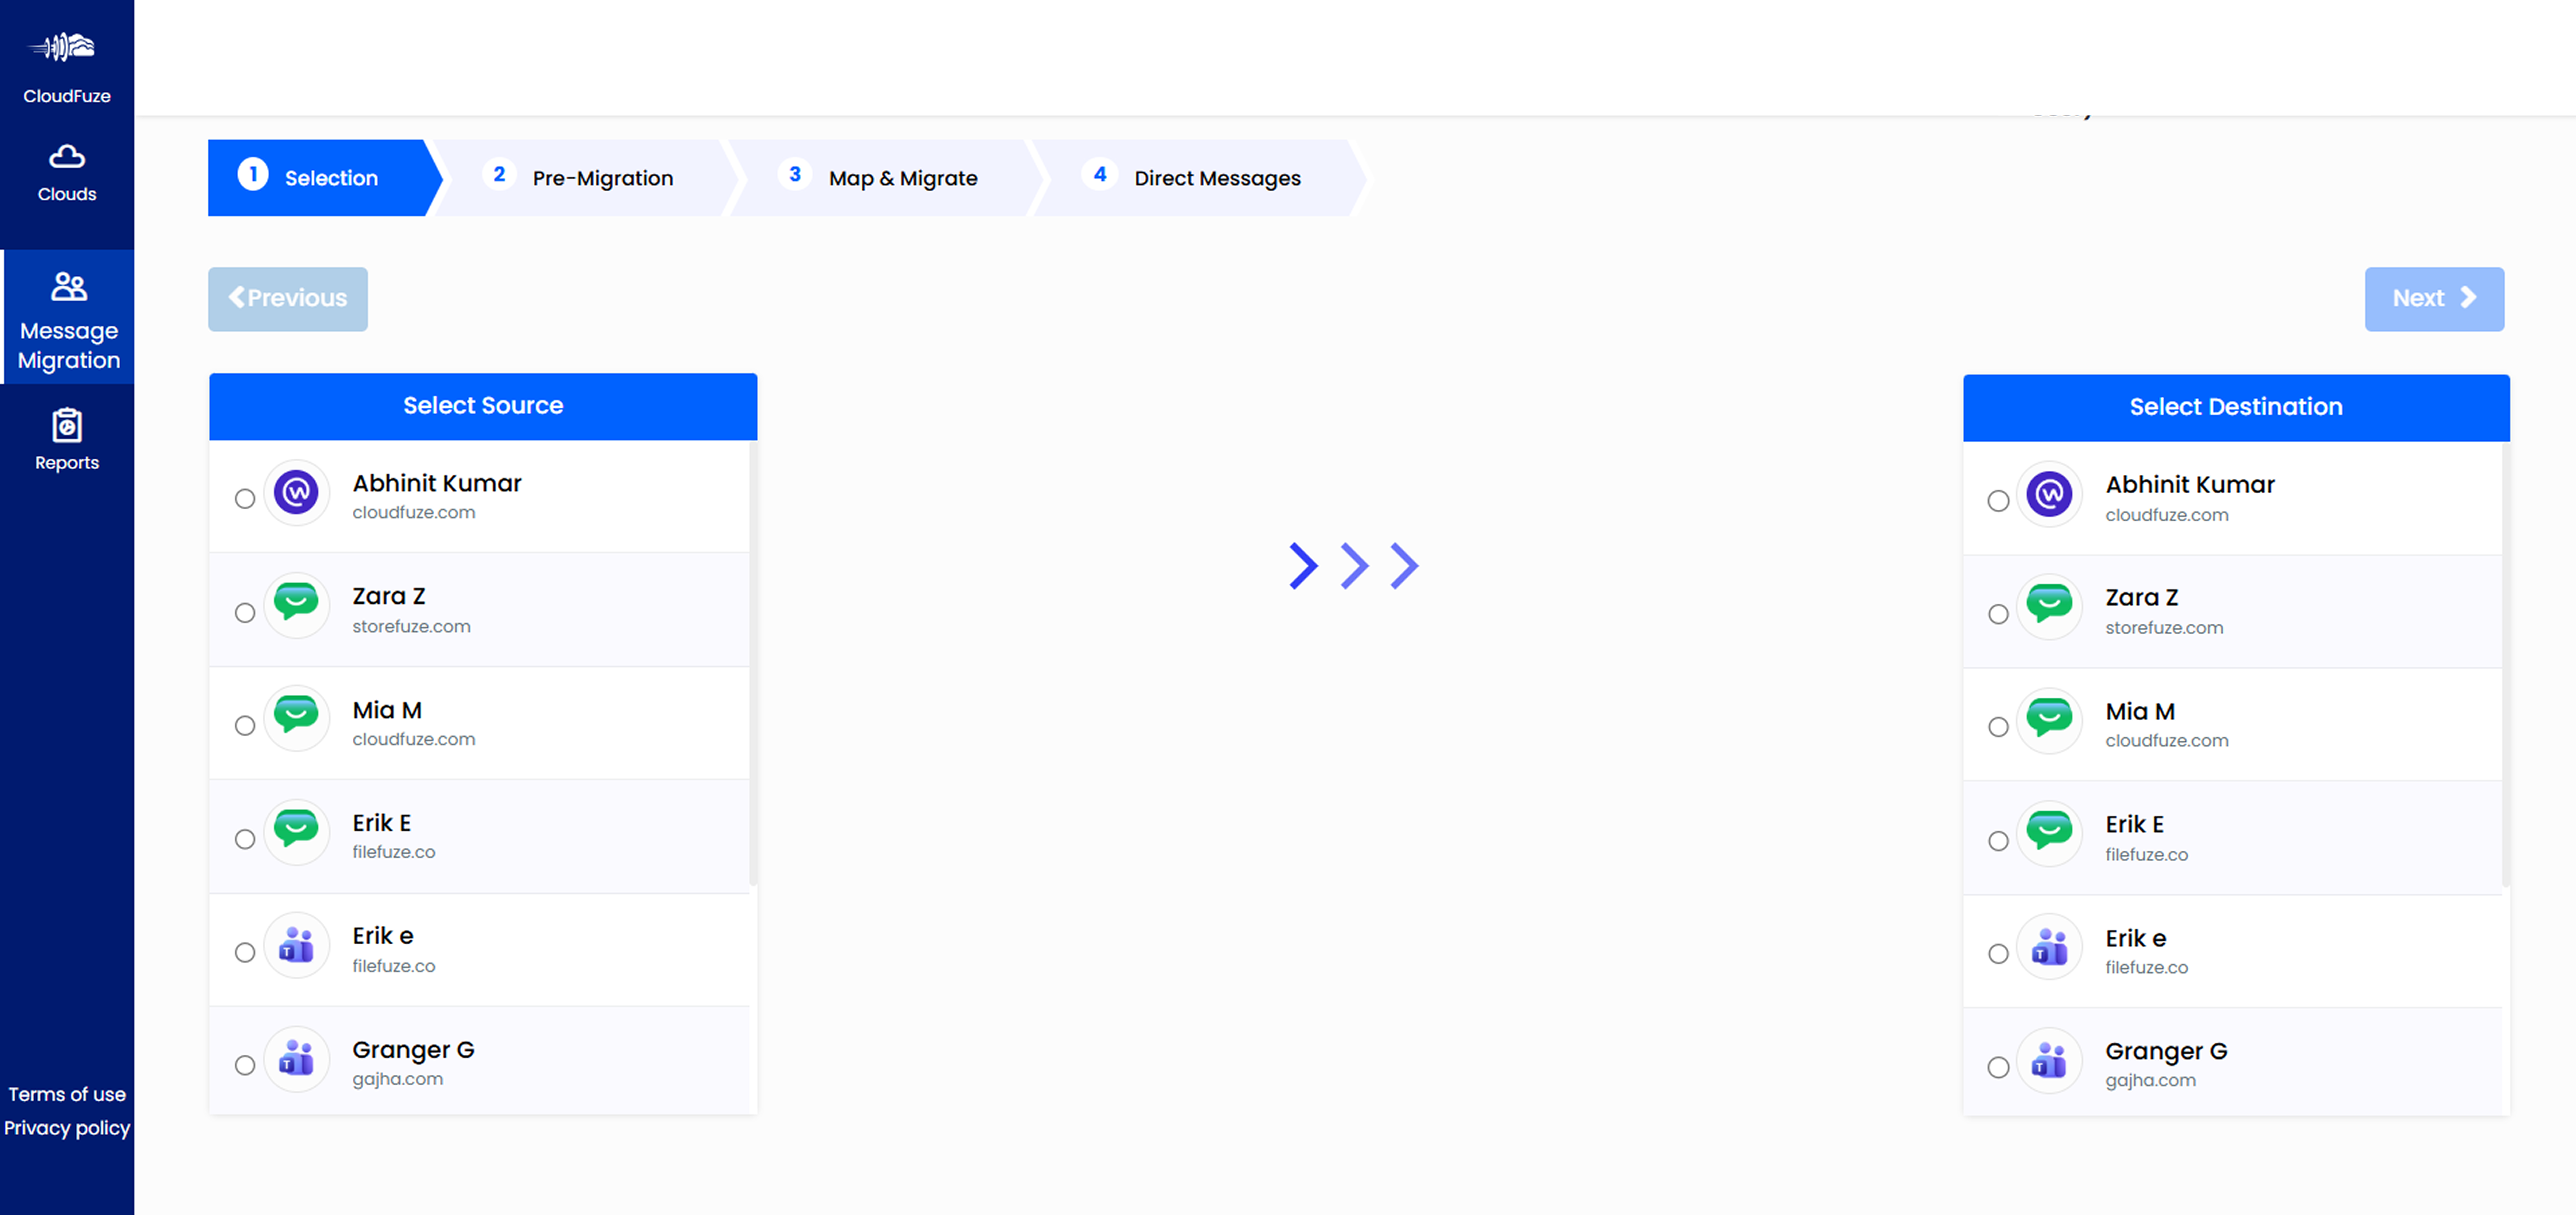
Select the Source and Destination Clouds
Click on the Team Migration panel to select the source and destination cloud. For the rest of the migration steps, check our migration guides.
- 8
Check Chat Migration Options
If you want to migrate chat messaging platforms like Slack, Microsoft Teams, Google Chat, etc., visit the Slack Migration panel. Once there, add the chat platforms and configure them as source and destination clouds.
- 9
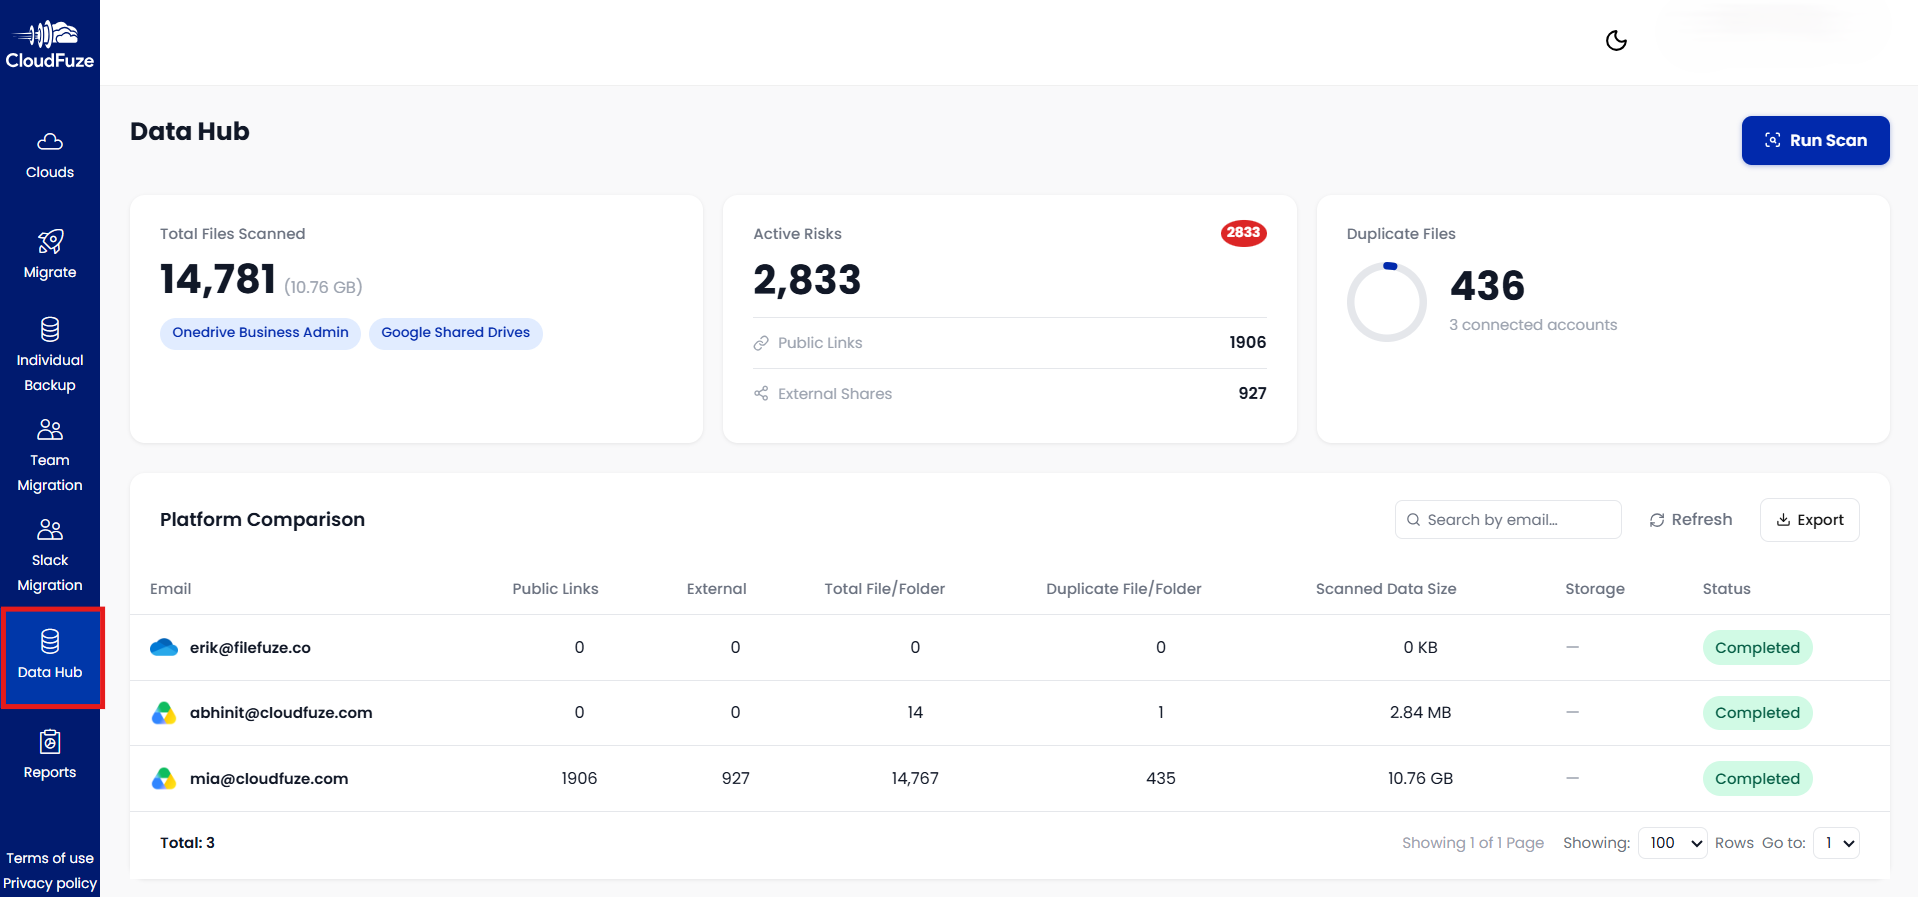
Check Data Sprawl in Your Clouds
Visit the Data Hub dashboard to check data and access sprawl in your connected clouds, such as duplicate files, public links, risky external shares, and more.
- 10
Check Migration Statuses in the Reports Dashboard
The Reports panel provides detailed information on completed and ongoing migrations with specific parameters, such as migration status, migration name and job type, completed migrations, processed files and folders, processed data size, and more.
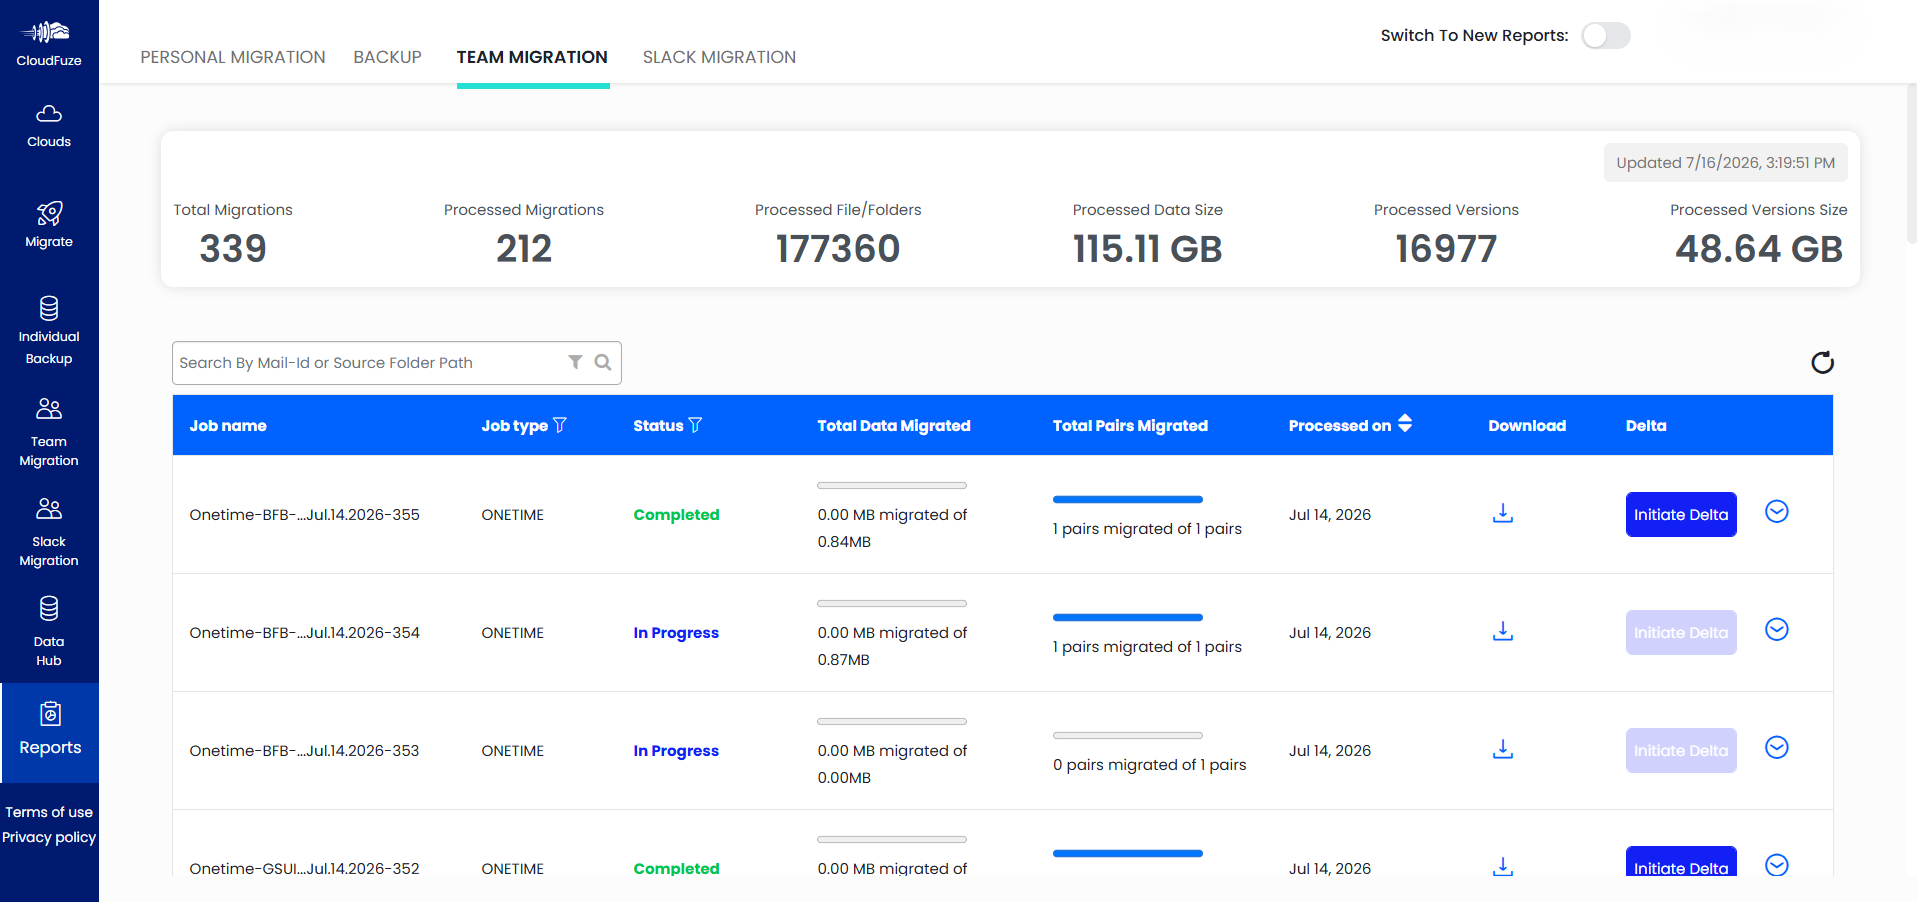
You can click on the “Switch to New Reports” button to access the new report dashboard that offers visual analysis of all migration projects.


CLOUDFUZE MANAGE
End-to-End SaaS and AI Governance
CloudFuze Manage enables continuous governance of SaaS apps and AI tools and agents. Built for organizations of all sizes and industries, it gives IT teams complete visibility into AI agents, data exposure, user lifecycle, and more, across the entire software stack.
- 1
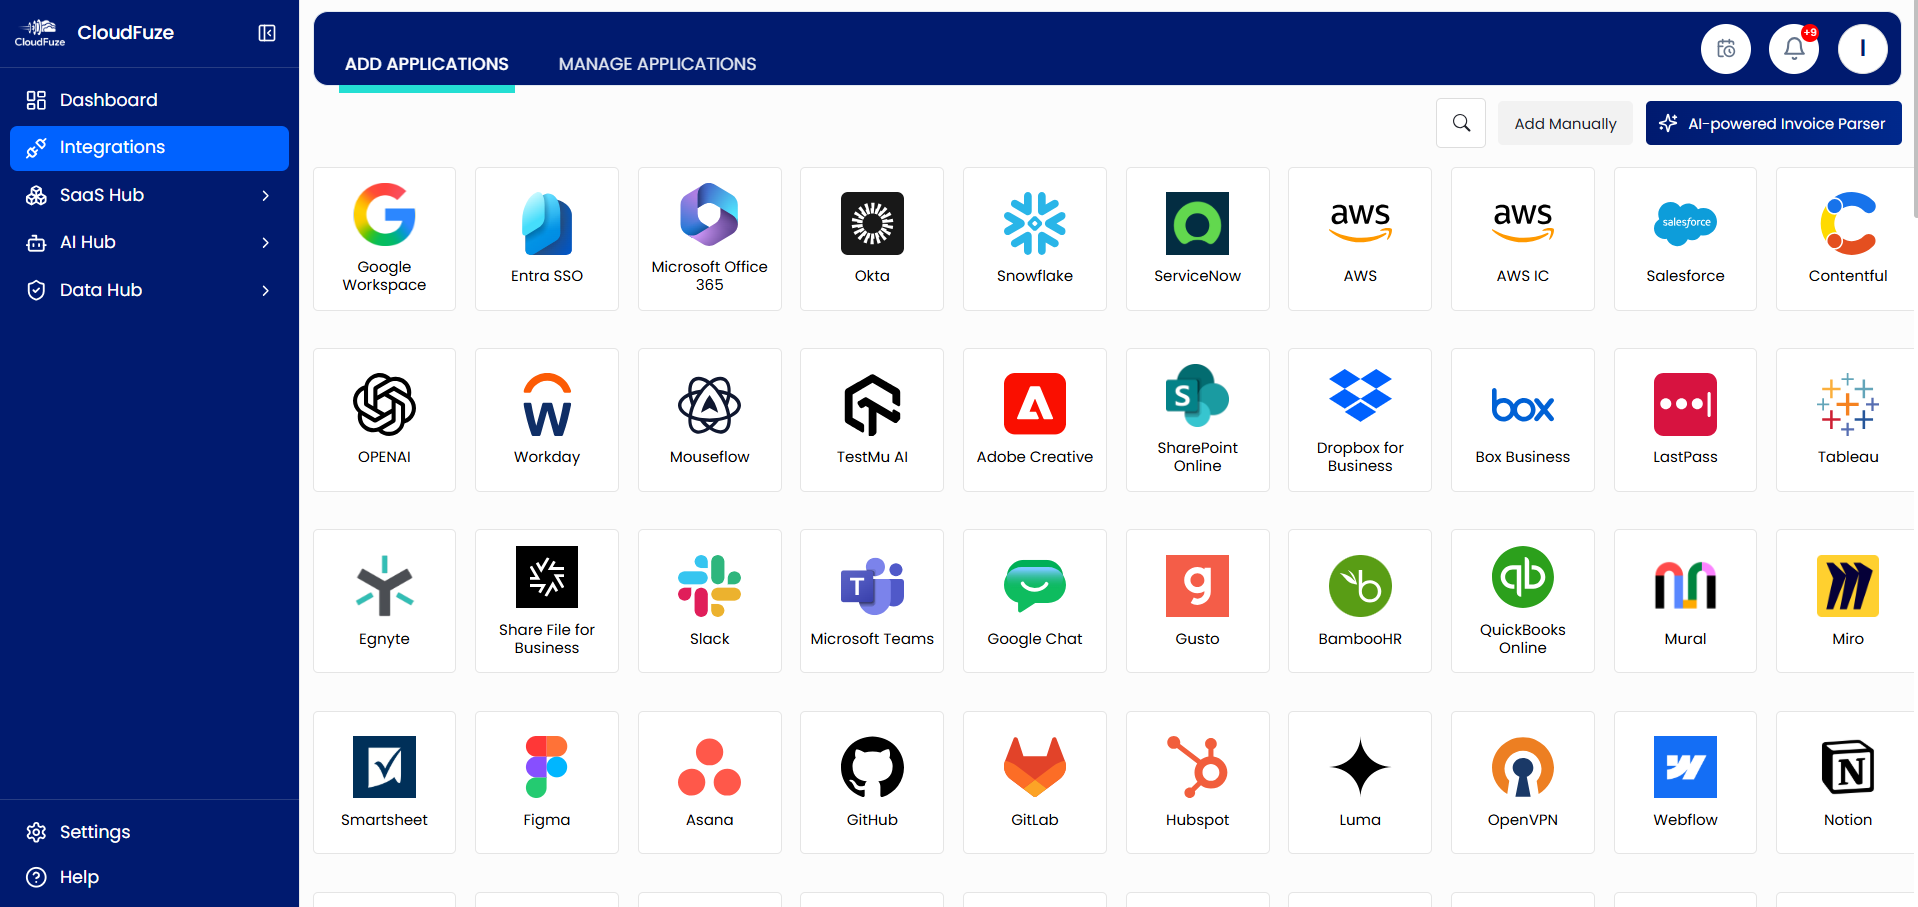
Connect Your SaaS and AI Apps
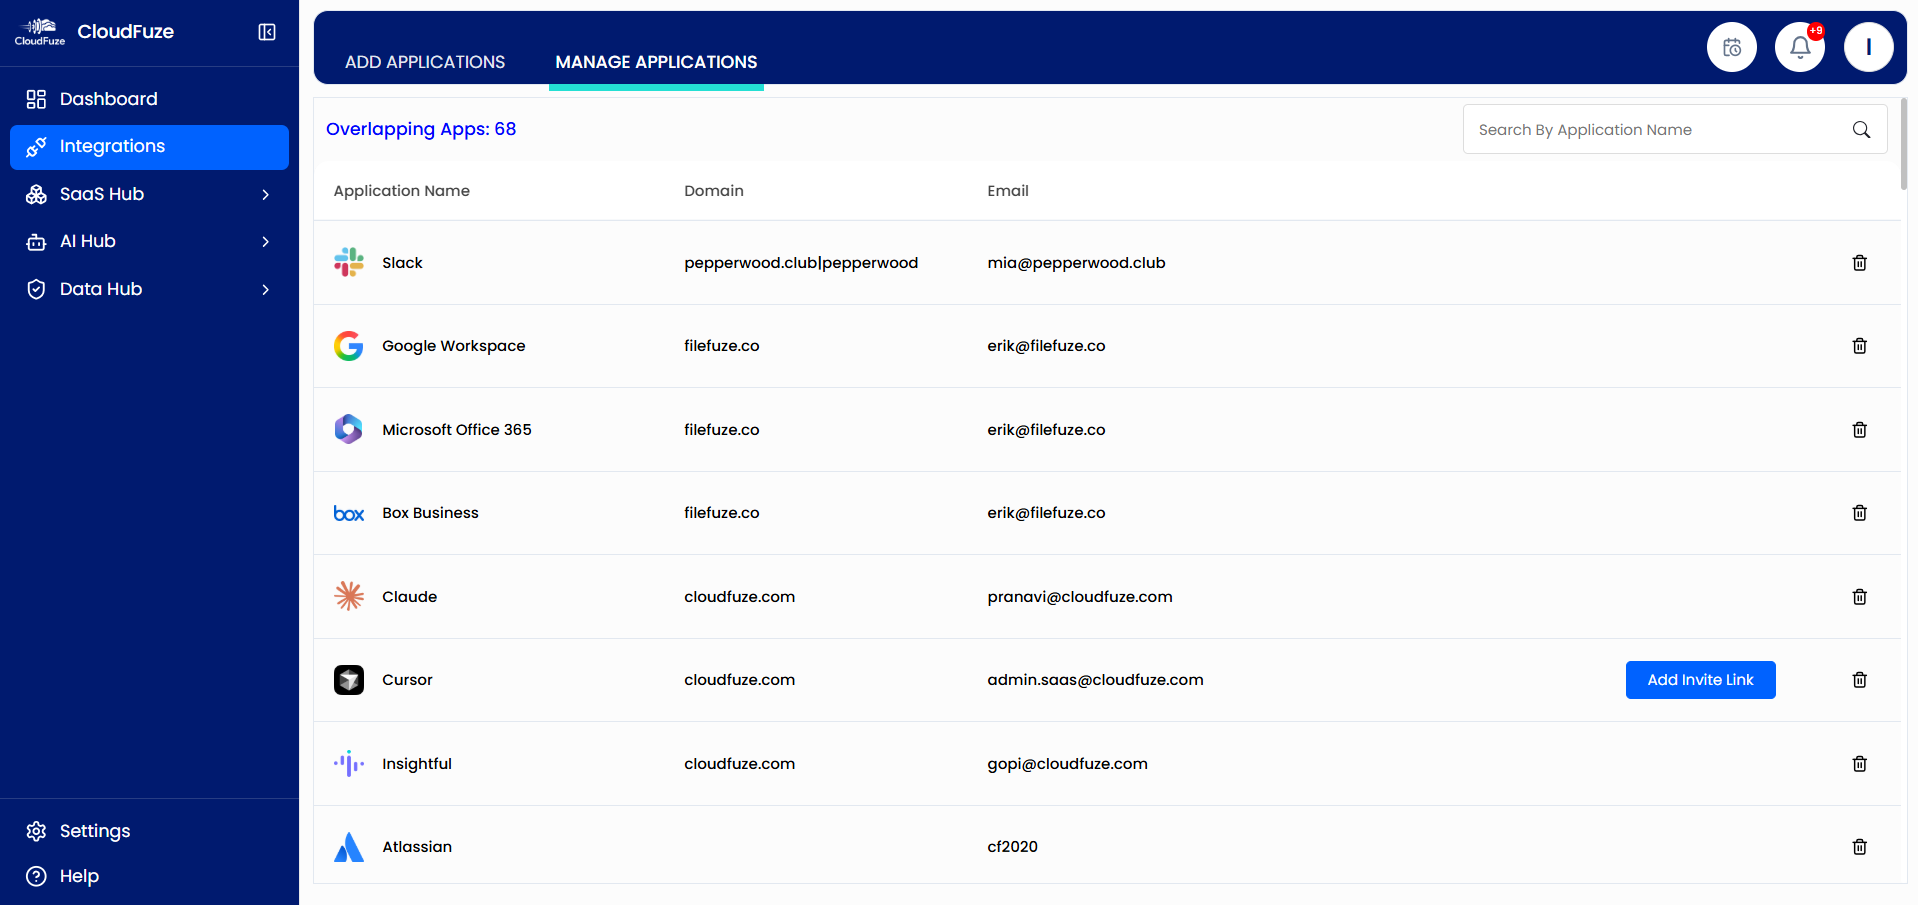
Visit the Integrations panel and add the clouds and SaaS and AI apps that you want to manage and govern.
- 2
Validate the Added Apps
Once added, view the added apps under the Manage Applications tab.
- 3
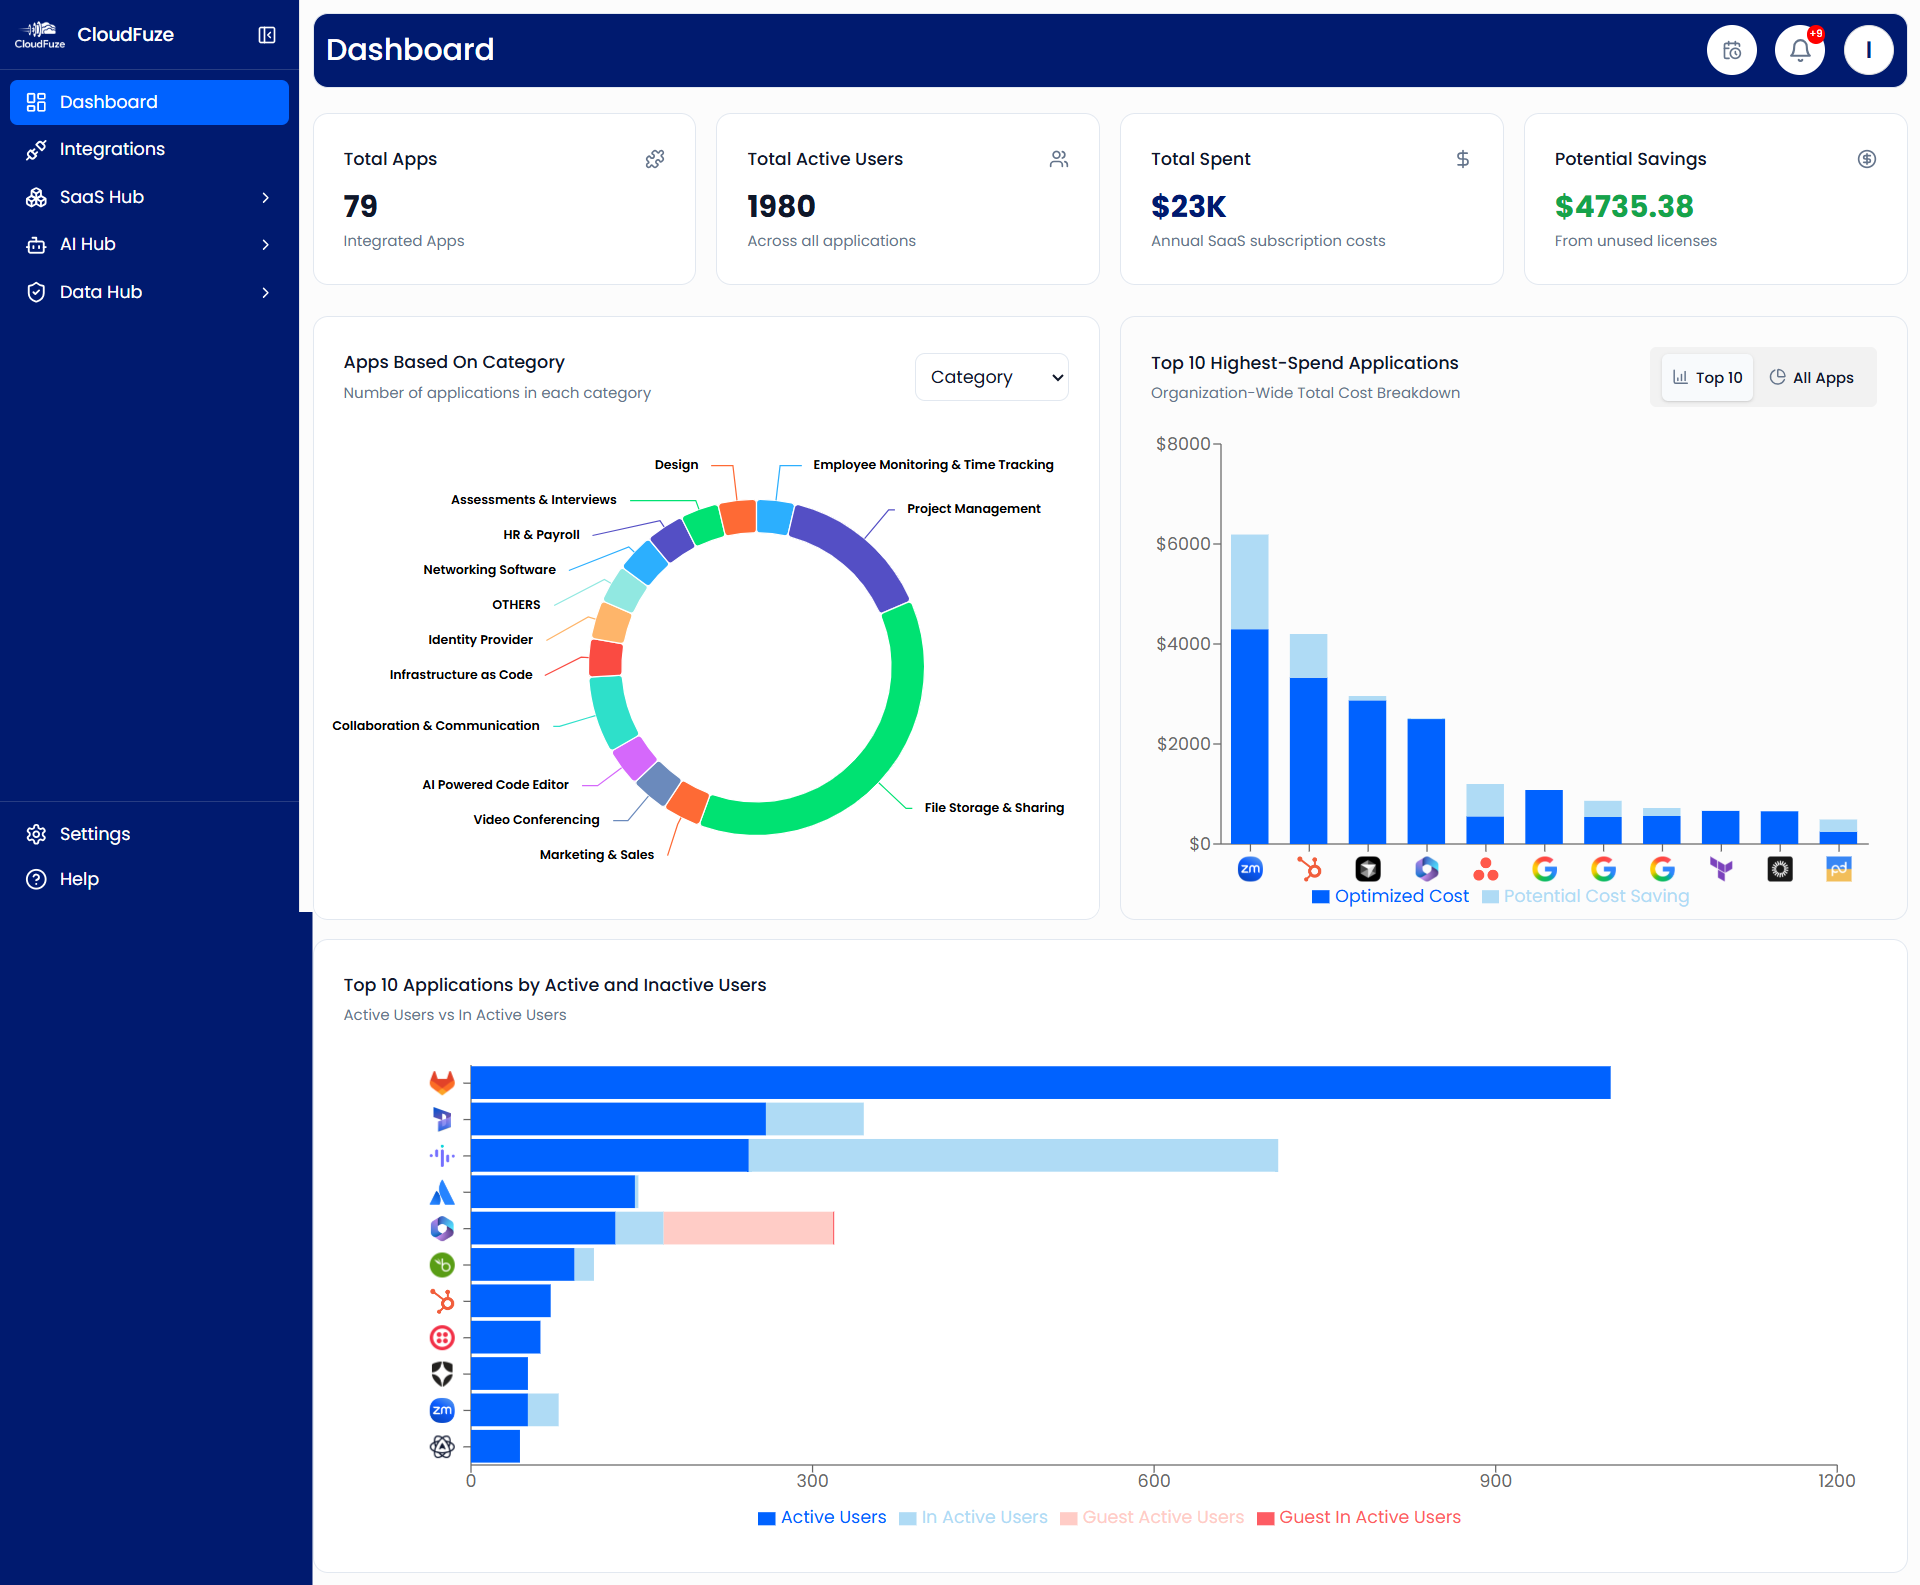
Get a Snapshot of Your SaaS Environment
Visit the Dashboard panel to get a high-level overview of your SaaS environment.
- 4
Check the IT Approved Apps
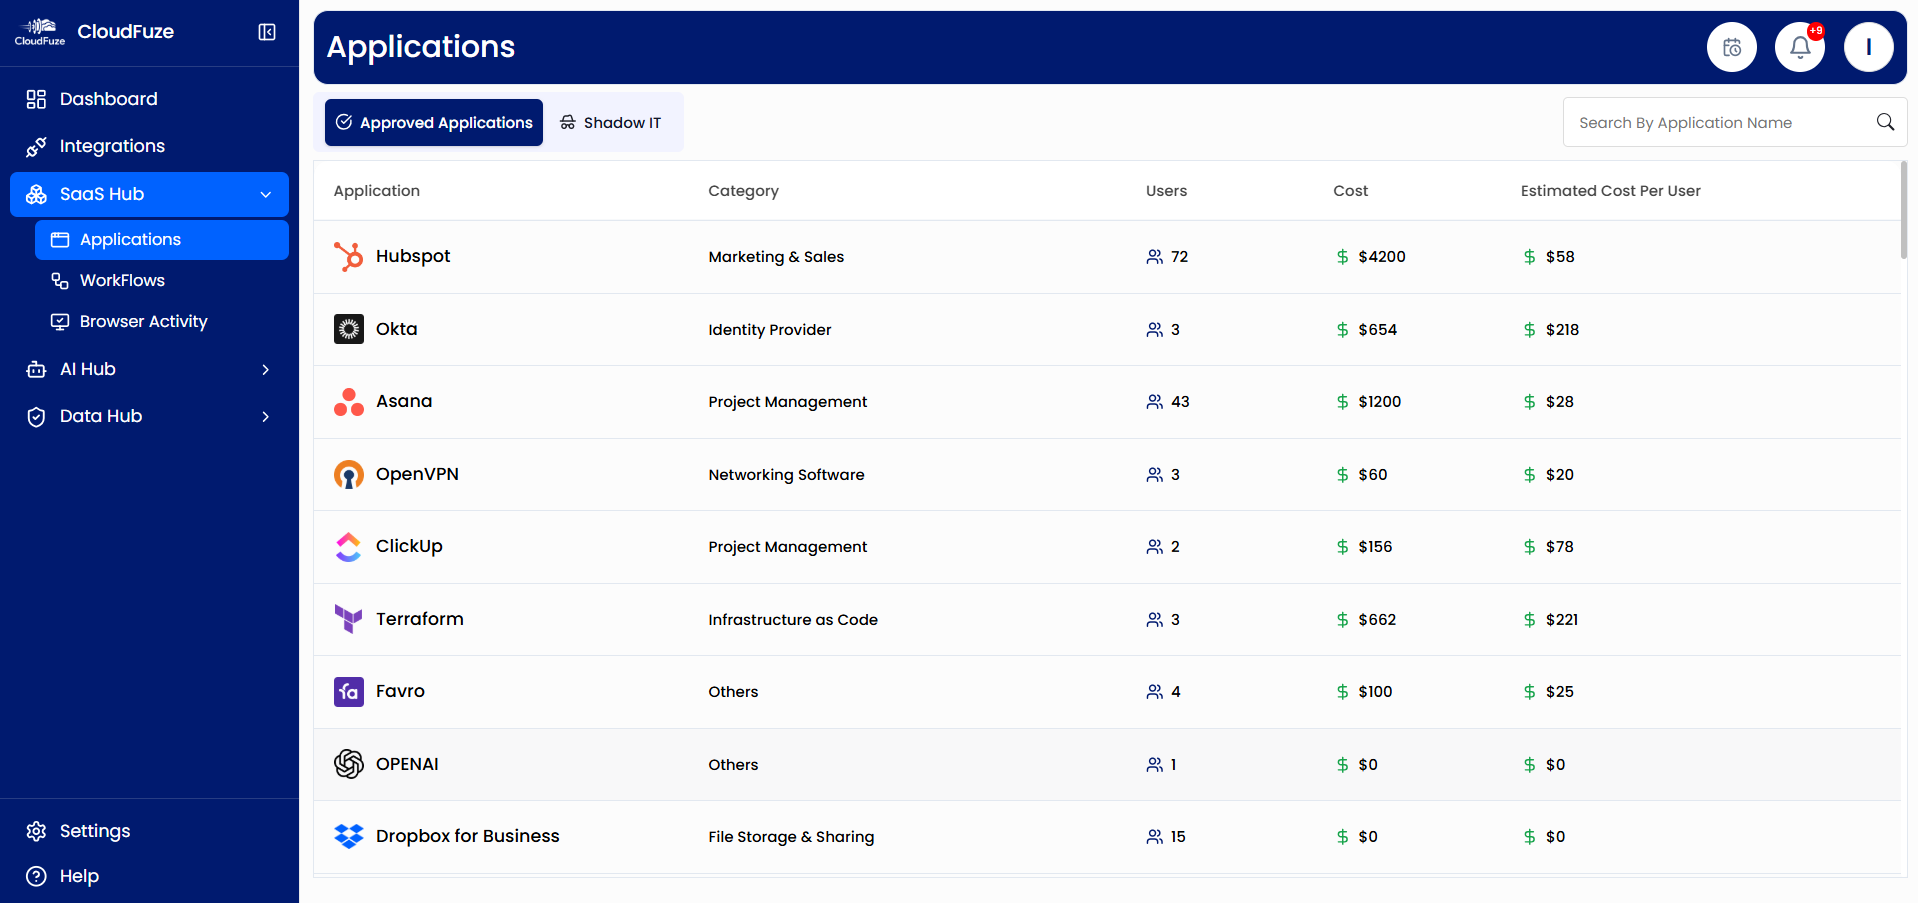
Visit the SaaS Hub panel and the Applications tabs below it. It lists all the apps that the IT team has approved/has gone through standard IT procurement processes.
- 5
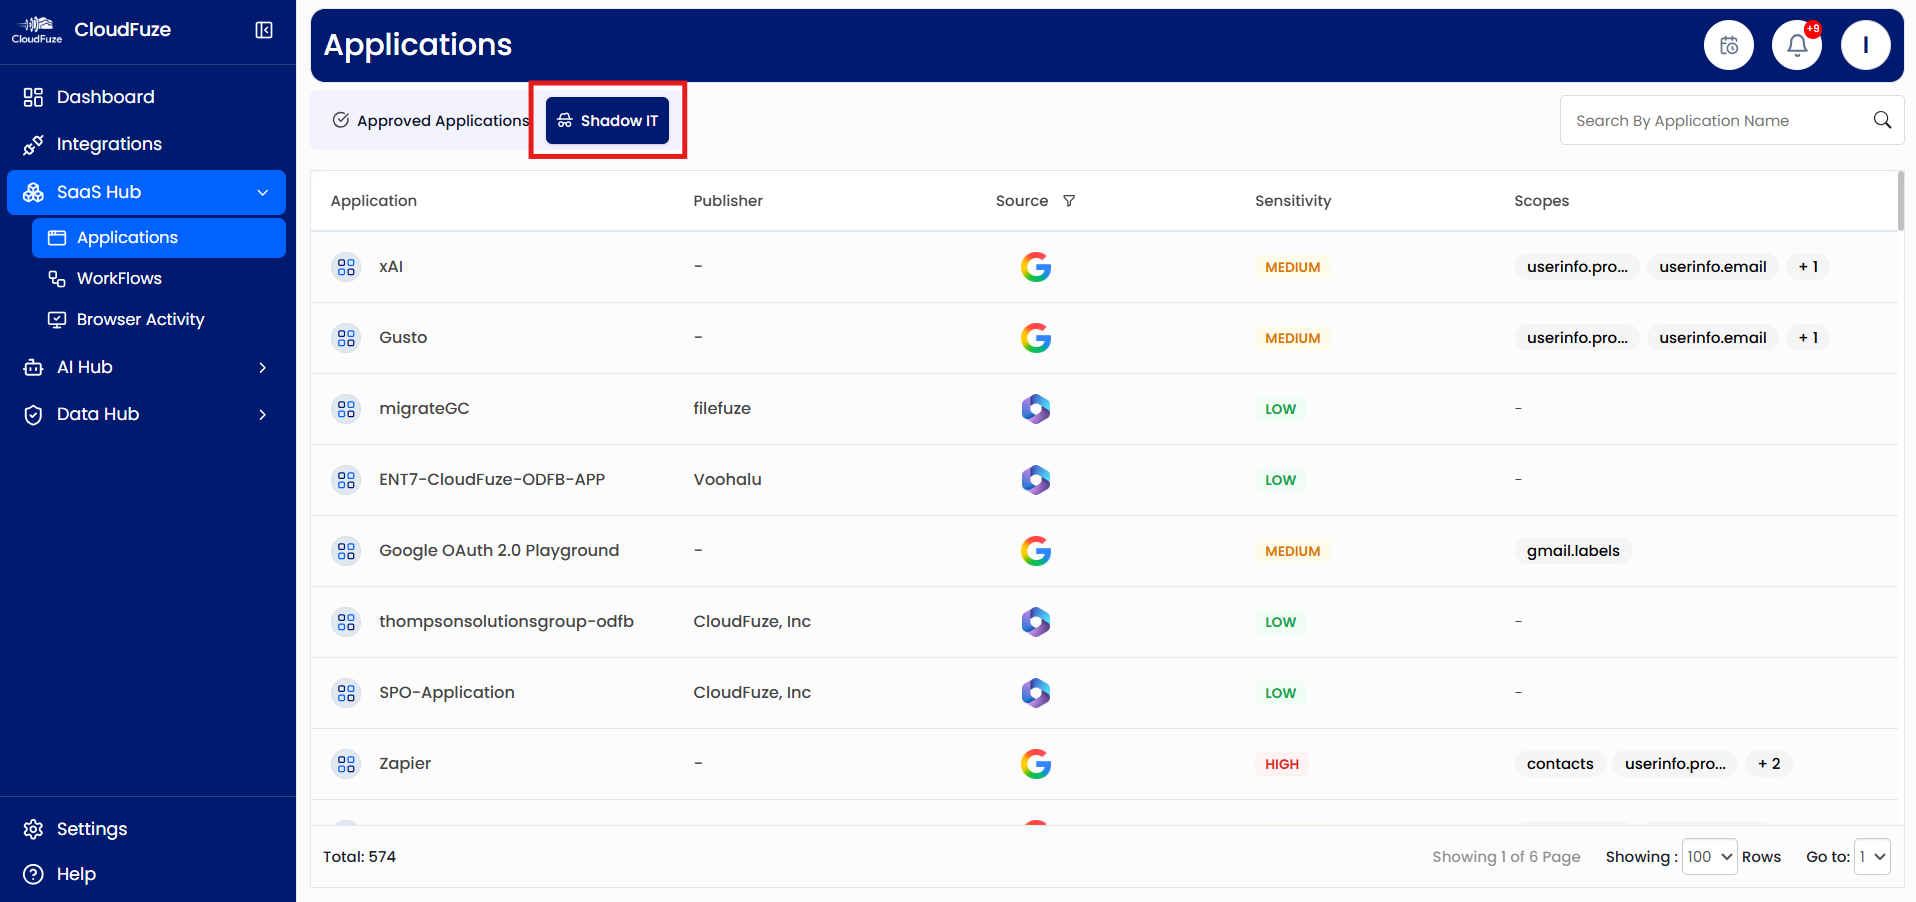
Check Shadow IT Apps
Switch to the Shadow IT tab to view the list of apps that have been connected to your clouds without IT approval or standard procurement process. These Shadow IT apps create data security risks, and therefore it is important to act on them.
- 6
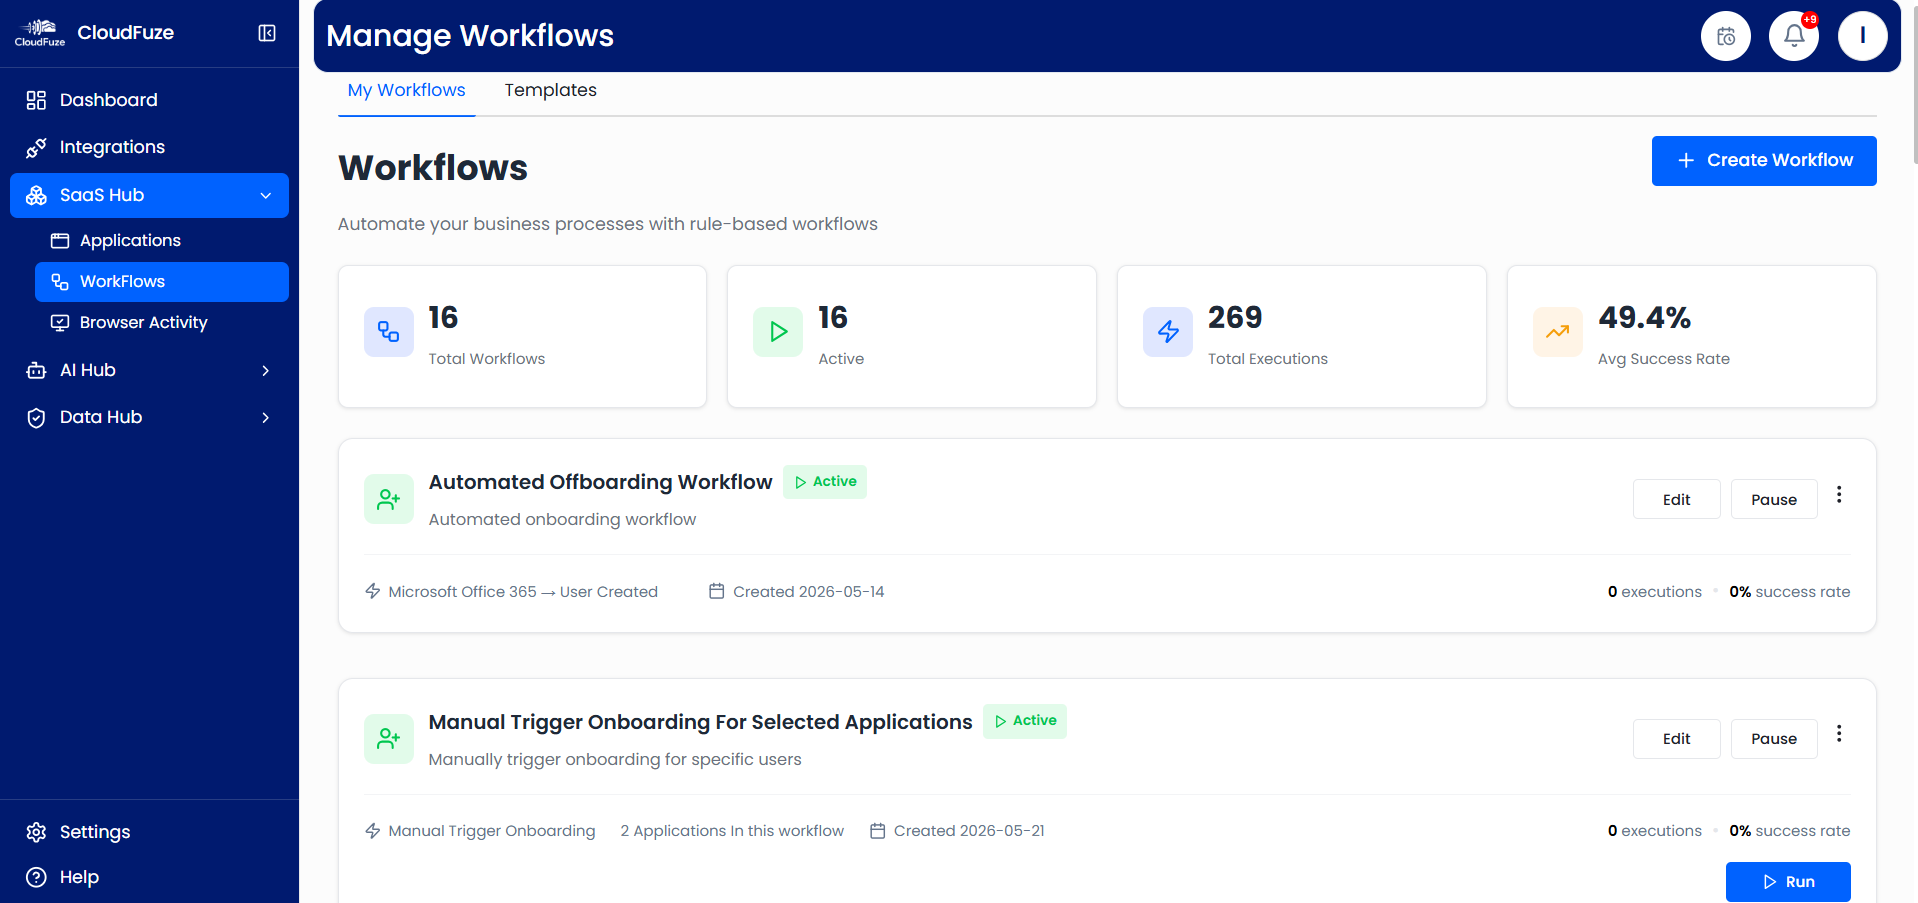
Create User Lifecycle Workflows
Visit the Workflows panel to access and create user onboarding and offboarding workflows. You can choose from existing templates or create your own workflows from scratch.
- 7
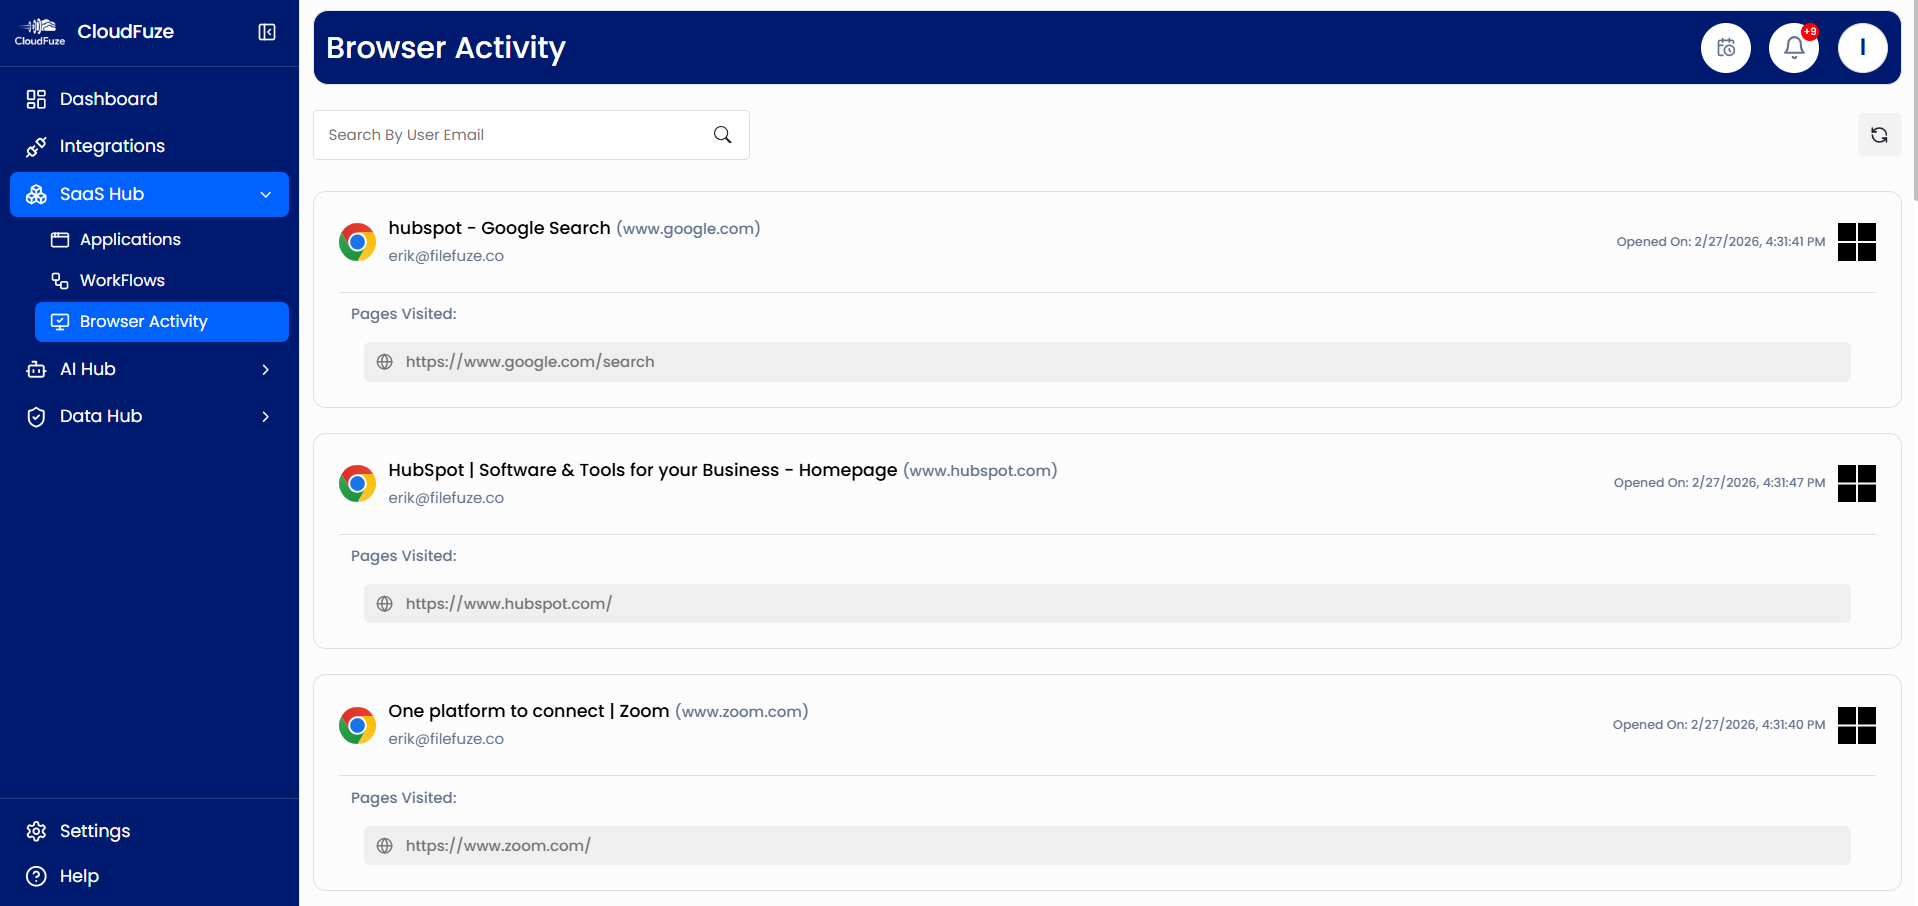
Check Browser-based SaaS and AI App Usage
Visit the Browser Activity panel to get visibility and reports on how users are using SaaS and AI apps through browsers like Google Chrome.
- 8
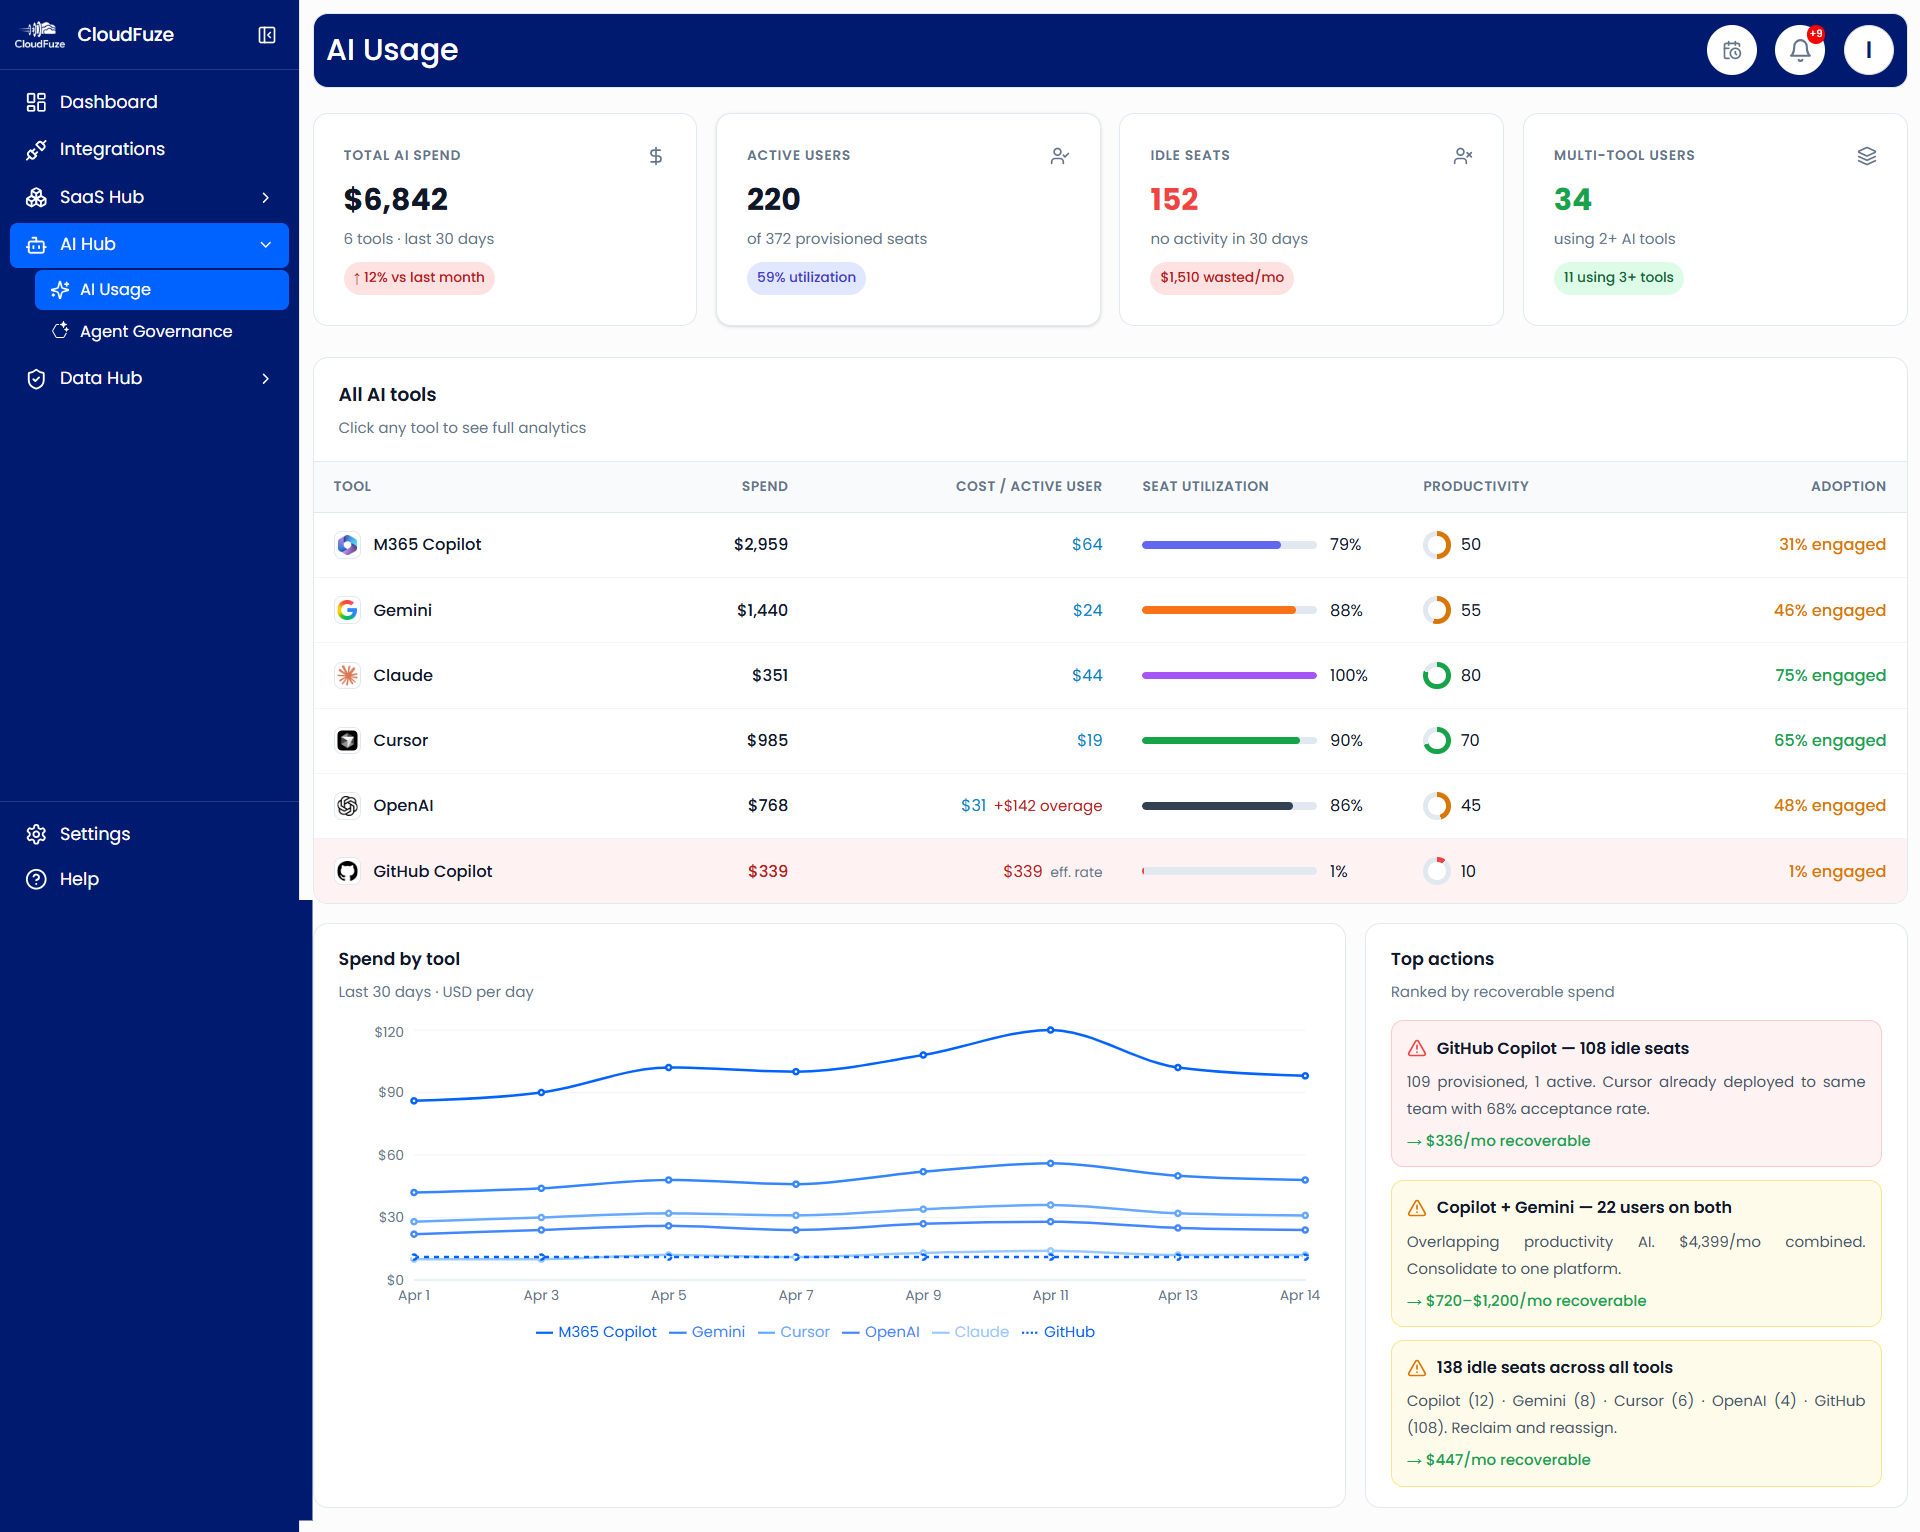
Check AI Usage Across Your Organization
Under AI Hub, the AI Usage dashboard gives detailed visibility and insights into total AI spend, active and inactive users, token spend of each AI tool, and suggestions on recoverable spend.
- 9
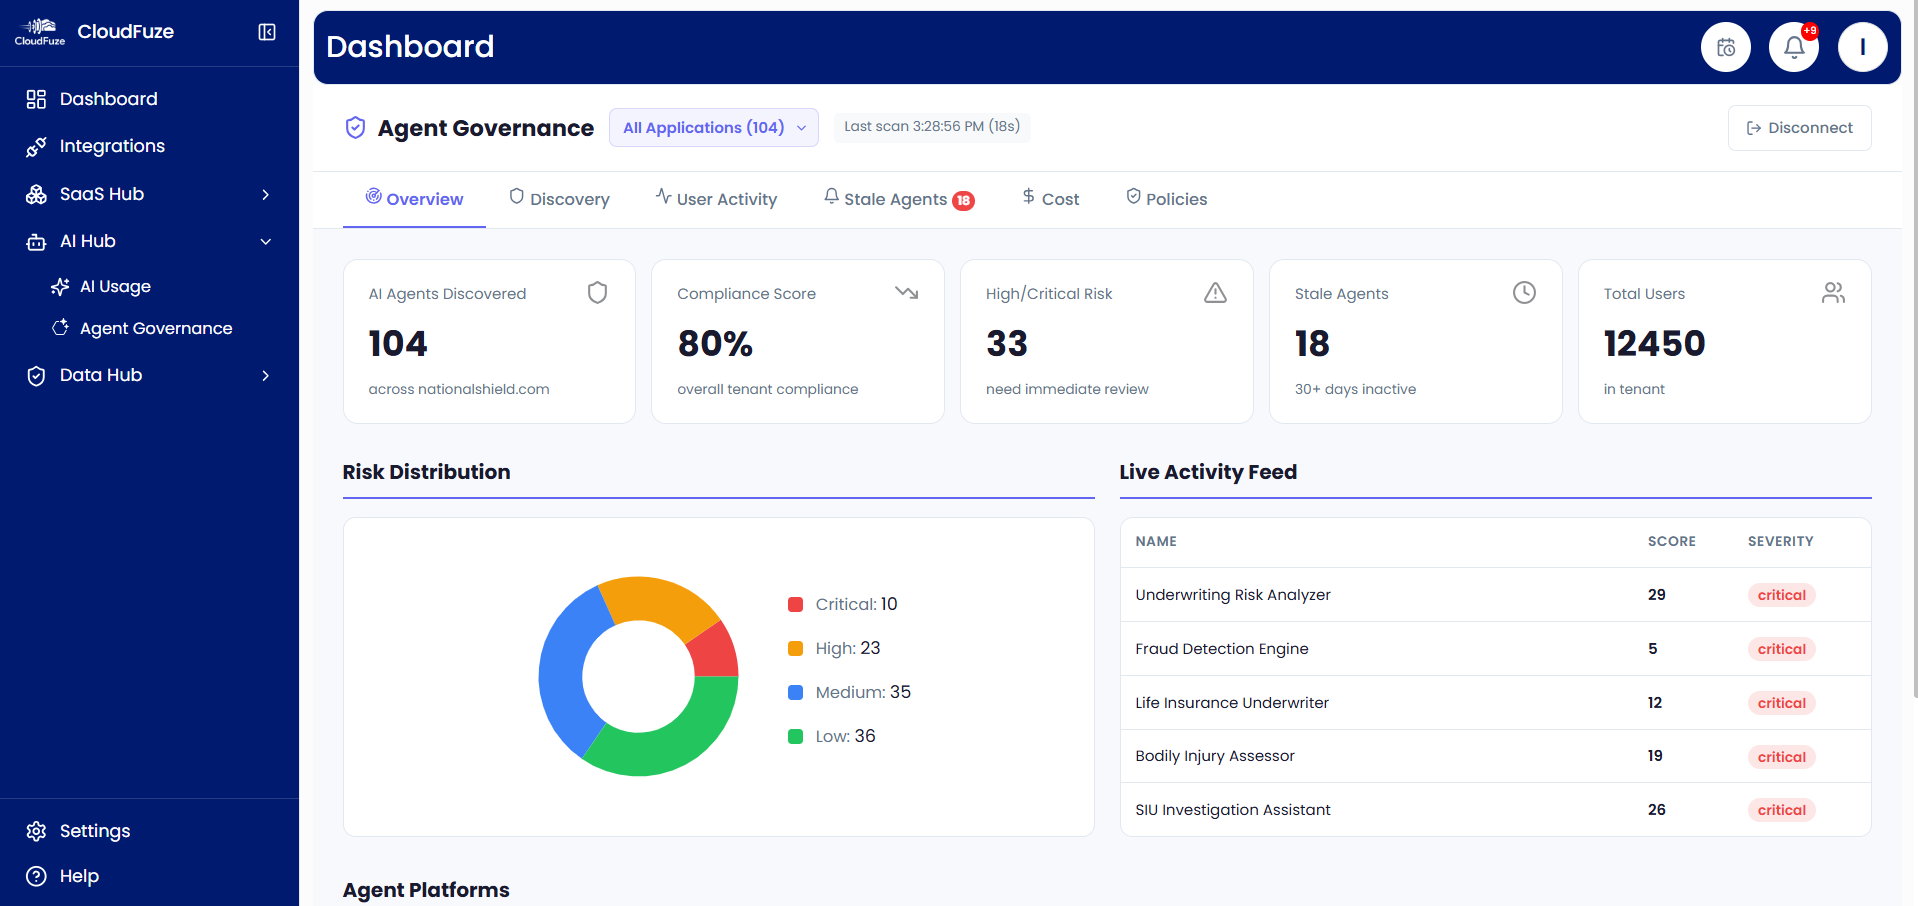
Govern AI Agents
Next, visit the Agent Governance dashboard to govern all AI agents deployed in your organization’s AI agent platforms like Copilot Studio, Azure AI Foundry, and more.
- 10
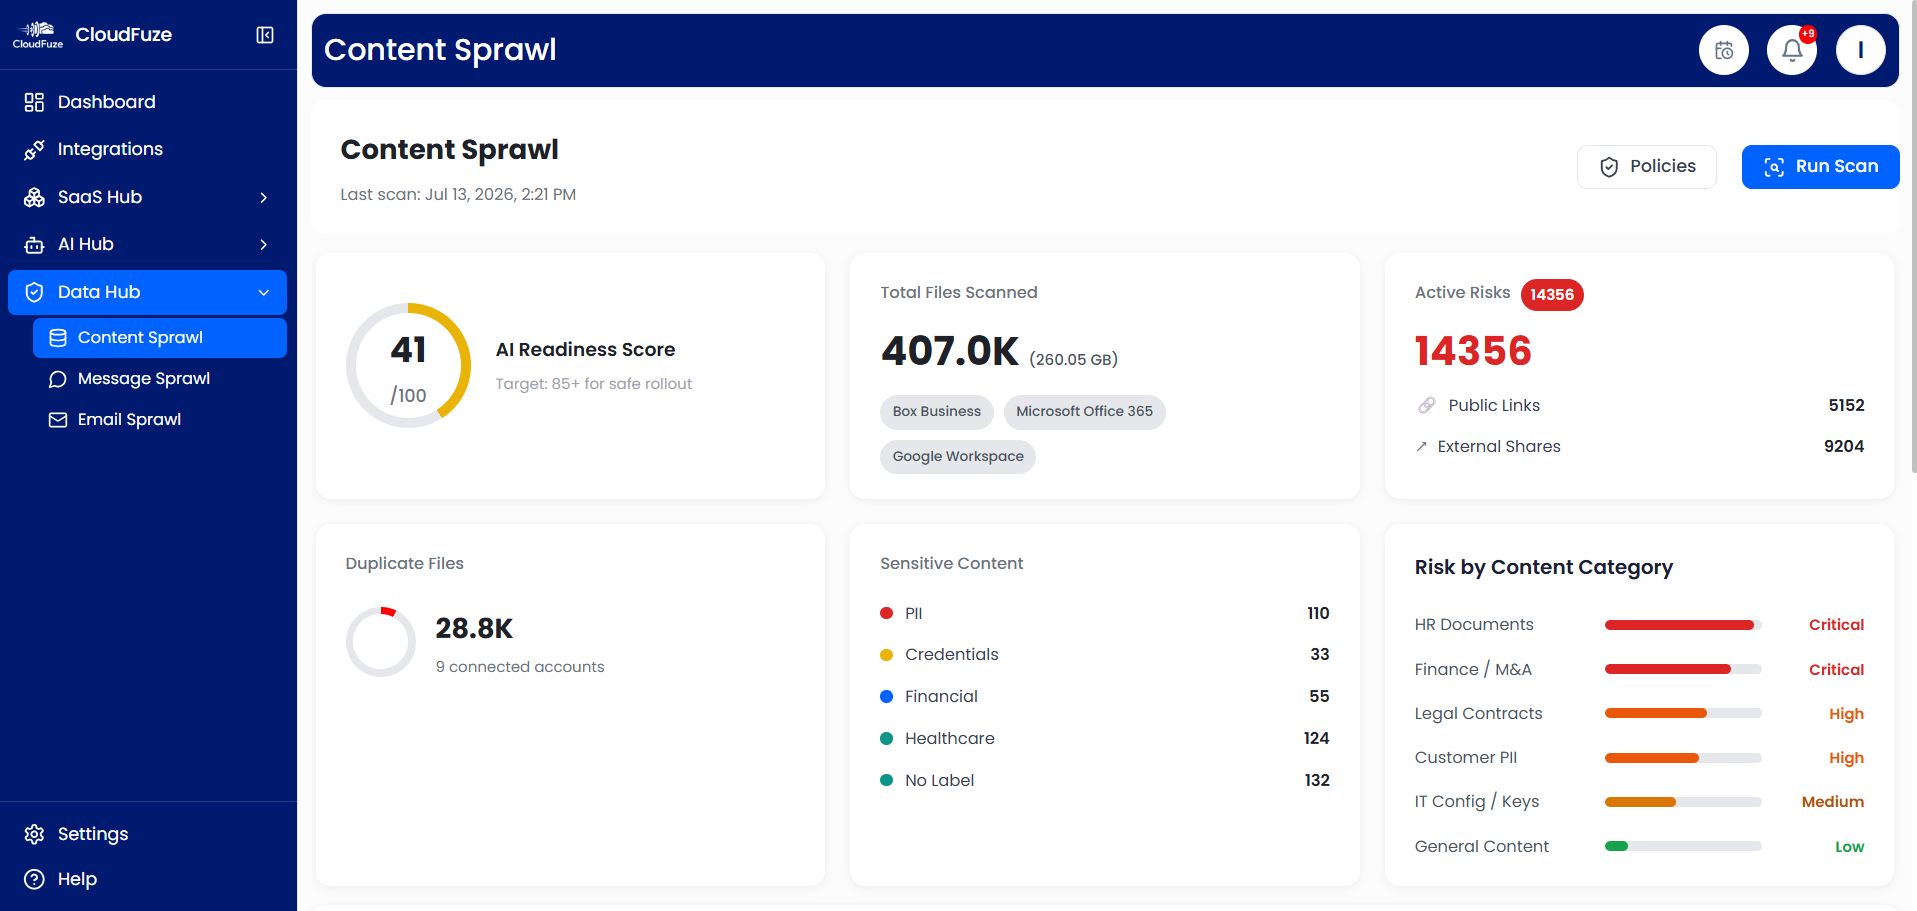
Check and Act on Content Sprawl
Next, under Data Hub, visit the Content Sprawl dashboard. There, you can check the status of content sprawl present across your clouds connected to CloudFuze Manage. Apart from identifying sprawl and risks, you can also take actions, such as creating data duplication remediation policies, etc.
- 11
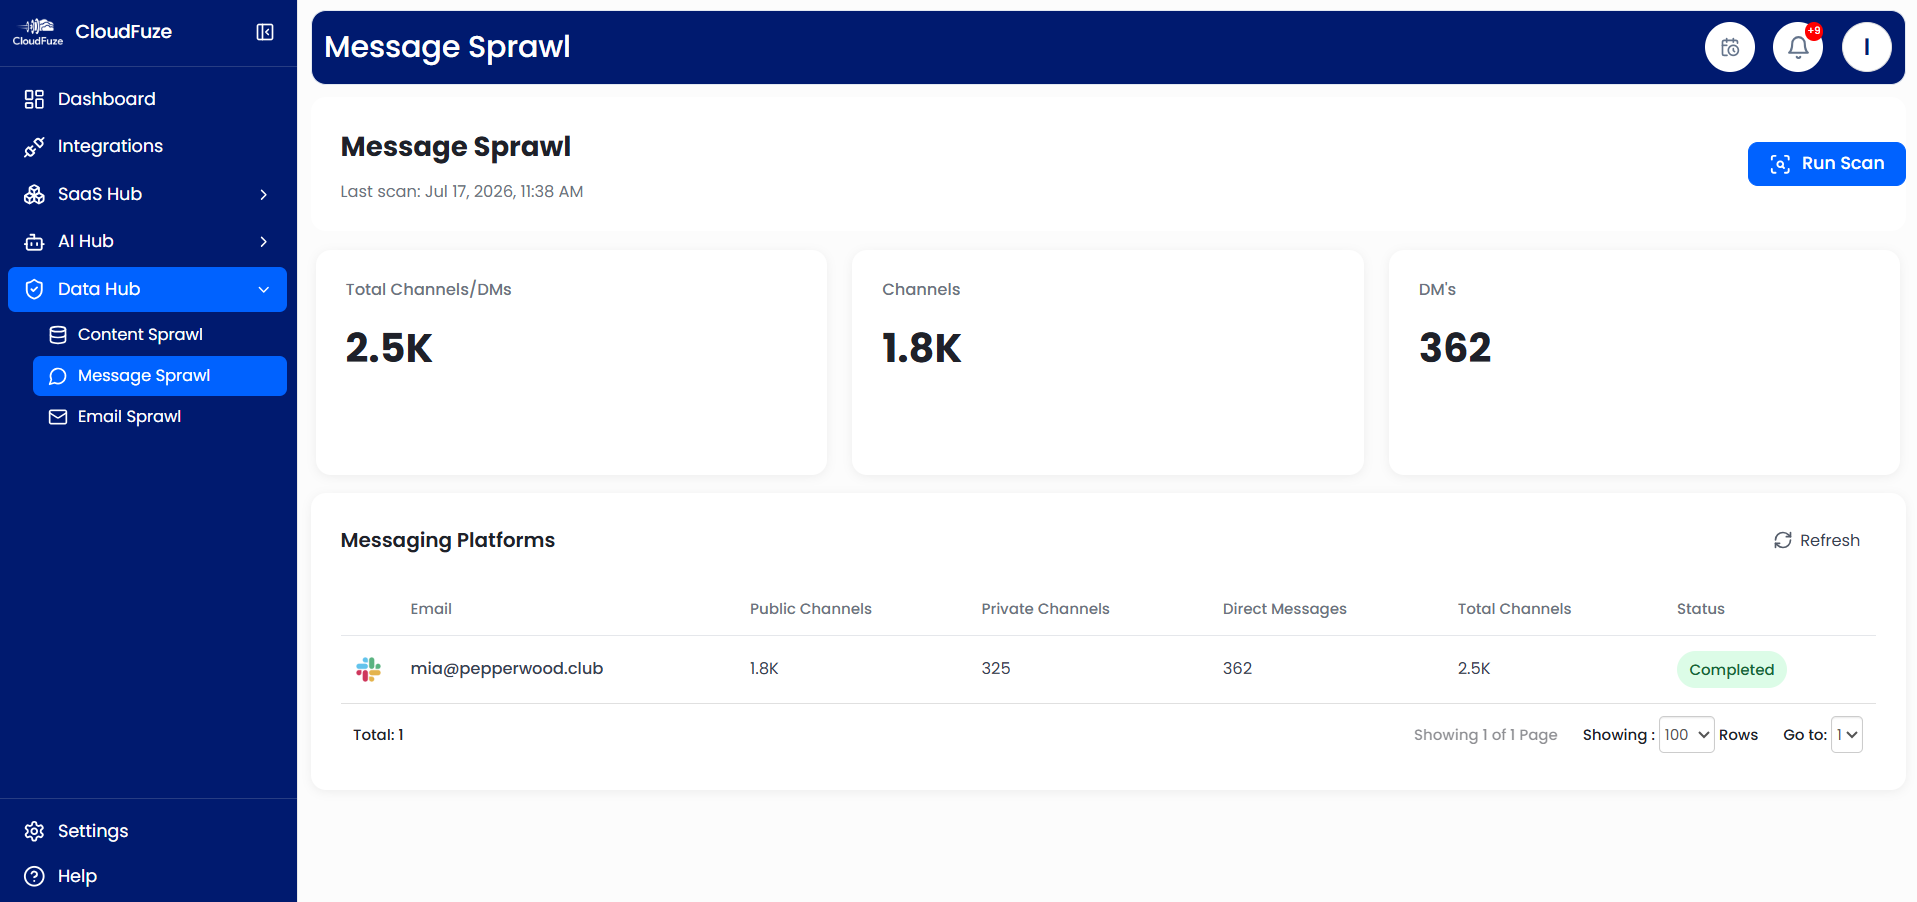
Check Message Sprawl
Next, when you move to the Message Sprawl dashboard, it allows you to have complete message sprawl visibility in channels, teams, and direct messages.
- 12
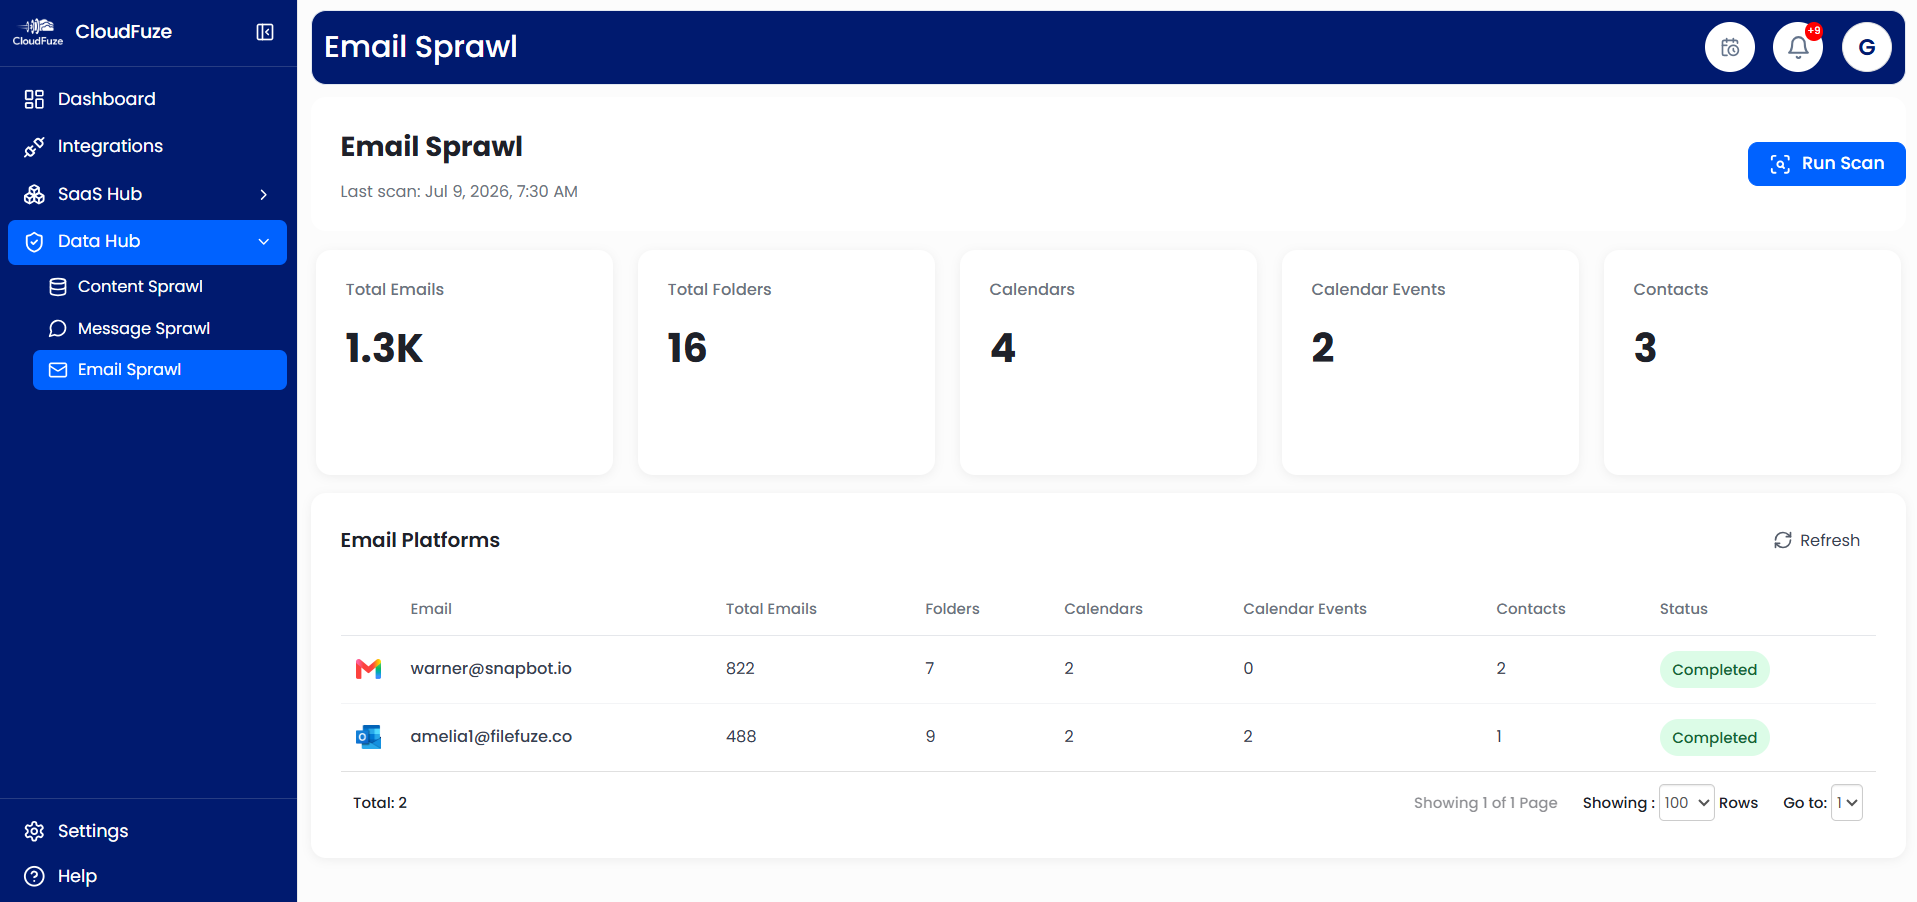
Check Email Sprawl
Lastly, the Email Sprawl dashboard provides visibility into total emails, total folders, calendars and events, and contacts. It also provides visibility into individual mailbox folders.